
Subscribe to Our Youtube Channel
Related Manuals for Siemens HM876G0 6 Series


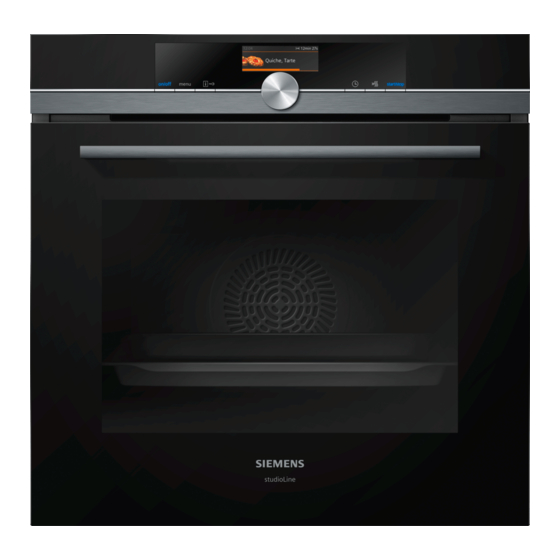
Summary of Contents for Siemens HM876G0 6 Series
- Page 1 Oven HM876G0.6 User manual and installation instructions Register your product on My Siemens and discover exclusive ser- vices and offers. siemens-home.bsh-group.com/welcome The future moving in. Siemens Home Appliances...
-
Page 2: Table Of Contents
en Safety Table of contents 1 Safety Observe the following safety instructions. 1.1 General information INFORMATION FOR USE ¡ Read this instruction manual carefully. Safety .............. 2 ¡ Keep the instruction manual and the Preventing material damage ....... 7 product information safe for future refer- Environmental protection and saving en- ence or for the next owner. -
Page 3: Safety
Safety en 1.4 Safe use The telescopic shelves become hot when the appliance is in use. Always place accessories in the cooking com- ▶ Allow hot telescopic shelves to cool down partment the right way round. before touching them. → "Accessories", Page 12 ▶ Only touch hot telescopic shelves with WARNING ‒ Risk of fire! oven gloves. - Page 4 en Safety Children may breathe in or swallow small WARNING ‒ Risk of electric shock! parts, causing them to suffocate. Incorrect repairs are dangerous. ▶ Keep small parts away from children. ▶ Repairs to the appliance should only be ▶ Do not let children play with small parts. carried out by trained specialist staff.
- Page 5 Safety en Using the appliance for anything other than its WARNING ‒ Risk of burns! intended purpose is dangerous. This is be- Foods with peel or skin may burst or explode cause, for instance, overheated slippers, pil- during heating, or even afterwards. lows filled with grain or cereal, sponges and ▶...
- Page 6 en Safety The outside of the appliance gets very hot WARNING ‒ Risk of electric shock! when the cleaning function is in progress. The appliance uses a high voltage. ▶ Never hang combustible objects, e.g. tea ▶ Never remove the casing. towels, on the door handle. ▶...
- Page 7 Preventing material damage en 2 Preventing material damage If the seal is very dirty, the appliance door will no 2.1 General longer close properly during operation. This may dam- ATTENTION! age the front of adjacent kitchen units. ▶ Alcoholic vapours may catch fire in the hot cooking Keep the seal clean at all times.
-
Page 8: Environmental Protection And Saving En- Ergy
en Environmental protection and saving energy 3 Environmental protection and saving energy 3.1 Disposing of packaging When baking multiple dishes, do so in succession or in parallel. The packaging materials are environmentally compat- ¡ The cooking compartment is heated after baking ible and can be recycled. the first dish. -
Page 9: Familiarising Yourself With Your Appliance
Familiarising yourself with your appliance en 4.2 Buttons Use the buttons on the left- and right-hand side of the control panel to switch your device or the operating mode on and off. Button Function On/off Switch the appliance on or off. Menu Open the operating mode menu Information Display notifications Activate and deactivate the childproof lock... - Page 10 en Operating modes Symbol Name Home Connect server Home Connect server not connected → "Home Connect ", Page 21 Remote start Remote start activated → "Home Connect ", Page 21 Remote diagnostics Remote diagnostics activated → "Home Connect ", Page 21 Lighting 4.5 Cooking compartment One or more oven lights illuminate the cooking com- The functions in the cooking compartment make your partment.
-
Page 11: Operating Modes
Operating modes en For temperature settings above 275 °C and grill set- ting 3, the appliance reduces the temperature to ap- prox. 275 °C or grill setting 1 after approx. 40 minutes. Symbol Types of heating Temperature What it's used for and how it works range Possible additional options 4D hot air 30–275 °C... -
Page 12: Accessories
en Accessories Microwave power in Maximum cooking watts time in hours 90 W 1:30 Defrost delicate foods. 180 W 1:30 Defrost food and continue cooking. 360 W 1:30 Cook fish and meat. Heat up delicate foods. 600 W 1:30 Heat and cook food. Max. 0:30 Heat liquids. - Page 13 You will find a comprehensive range of products for baking tray your appliance in our brochures and online: siemens-home.bsh-group.com Accessories vary from one appliance to another. When purchasing accessories, always quote the exact product number (E no.) of your appliance.
-
Page 14: Basic Operation
The selection can be changed using the rotary se- button lights up blue. ‒ lector. a The Siemens logo appears in the display. A type of Change any further settings depending on the selec- heating and a temperature are then displayed. tion. -
Page 15: Rapid Heating
Rapid heating en ▶ 8.7 Displaying information Press . a When available, information is displayed for a few In most cases, you can call up information about the seconds. function that you have just started. The appliance auto- matically displays certain information, e.g. to ask you to do/confirm something or to issue a warning. -
Page 16: Microwave
en Microwave The cooking time can be set in one-minute incre- Requirements ments up to one hour, and then in five-minute incre- ¡ The type of heating and a temperature or setting ments. The end time is calculated automatically. have been set. Press ... - Page 17 Microwave en ATTENTION! Cookware and ac- Information cessories Operating the appliance without food in the cooking compartment may lead to overloading. Serving dishes You do not need to transfer ▶ Do not switch on the microwave unless there is food your food. inside.
- Page 18 en Microwave Setting the microwave combination Use the rotary selector to set the cooking time. Press to start the operation. Note: a The microwave starts and the cooking time counts Note the correct way to operate the microwave: down. ¡...
-
Page 19: Dishes
Dishes en 12 Dishes The "Dishes" operating mode helps you to use your ap- Take note of the information for the microwave. pliance to prepare different meals by selecting the op- → "Microwave", Page 16 timum settings automatically. 12.3 Overview of the dishes 12.1 Cookware You can find out which individual dishes are available The cooking result depends on the composition of the to you on the appliance when you call up the operating... -
Page 20: Childproof Lock
en Childproof lock Adding extra cooking time Press "Continue". Use the rotary selector to select the required food. For some dishes, the appliance allows you to extend Press "Continue". the cooking time once the set cooking time has Use the rotary selector to set the required dish. elapsed. - Page 21 Home Connect en 15 Home Connect 15.1 Setting up Home Connect This appliance is network-capable. Connecting your ap- pliance to a mobile device lets you control its functions Requirements via the Home Connect app, adjust its basic settings ¡ The appliance is connected to the power supply and and monitor its operating status.
- Page 22 en Basic settings 15.3 Operating the appliance with the stalling it via the Home Connect app if you are in your WLAN home network (Wi-Fi). The Home Connect app Home Connect app will inform you once installation is successful. When the Remote start function is activated, you can Notes use the Home Connect app to remotely configure the ¡...
-
Page 23: Sabbath Mode
Cleaning and servicing en Basic setting Selection Basic setting Selection Clock display Telescopic rails Retrofitted Digital + date Not retrofitted Analogue Sabbath mode Switched on Lighting Off during operation Switched off On during operation Home Connect Home Connect Settings Auto resume Do not resume microwave → "Home Connect ", (only applicable for the automatically... -
Page 24: Self-Cleaning
en Cleaning and servicing Appliance front Surface Suitable cleaning agents Information Stainless steel ¡ Hot soapy water To prevent corrosion, remove any limescale, grease, starch or albu- min (e.g. egg white) stains on stainless steel fronts immediately. ¡ Special stainless steel Apply a thin layer of the stainless steel cleaning product with a soft cleaning products cloth. - Page 25 Self-cleaning en 17.2 Cleaning the appliance WARNING ‒ Risk of fire! Loose food remnants, fat and meat juices may catch In order to avoid damaging the appliance, you must fire. clean your appliance only as specified, and with suit- ▶ Before using the appliance, remove the worst of the able cleaning products.
- Page 26 en Cleaning assistance → "Preparing the appliance for use following the Cleaning set- Cleaning Duration in hours cleaning function", Page 26. ting level Light Approx. 1:15 18.3 Preparing the appliance for use Medium Approx. 1:30 following the cleaning function High Approx. 2:00 Allow the appliance to cool down. Select a higher cleaning setting for heavier or older Wipe off any ash that has been left behind in the soiling.
- Page 27 Drying en 20 Drying To prevent residual moisture, dry the cooking compart- In order to use the drying function, set the drying ‒ ment following operation. function. → "Setting the drying process", Page 27 ATTENTION! If there is water on the cooking compartment floor Setting the drying process when operating the appliance at temperatures above Allow the appliance to cool down.
- Page 28 en Appliance door Press the intermediate pane against the appliance Insert the intermediate pane into the retainer at with one hand while pushing the left- and right-hand the bottom and push it in firmly at the top. retainers ...
- Page 29 Rails en 22 Rails To thoroughly clean the rails and the cooking compart- Hook the front retainers in at the bottom and ment, or to replace the rails, you can remove the rails. straighten them . 22.1 Detaching the rails WARNING ‒ Risk of burns! The shelf supports get very hot ▶...
-
Page 30: Troubleshooting
en Troubleshooting 23 Troubleshooting You can rectify minor faults on your appliance yourself. WARNING ‒ Risk of electric shock! Read the troubleshooting information before contacting Incorrect repairs are dangerous. after-sales service. This will avoid unnecessary costs. ▶ Repairs to the appliance should only be carried out WARNING ‒ Risk of injury! by trained specialist staff. -
Page 31: Disposal
▶ Next time, set lower or higher values. Tip: A lot of information about the food preparation and corresponding setting values can be found on our website siemens-home.bsh-group.com . 24 Disposal 24.1 Disposing of old appliance This appliance is labelled in accord- ance with European Directive Valuable raw materials can be reused by recycling. -
Page 32: Declaration Of Conformity
A detailed Declaration of Conformity can be found on- A detailed RED Declaration of Conformity can be found line at siemens-home.bsh-group.com/uk/ among the online at siemens-home.bsh-group.com among the ad- additional documents on the product page for your ditional documents on the product page for your appli- appliance. -
Page 33: How It Works
How it works en General information about roasting in cookware Baking on one level Shelf position ¡ Use heat-resistant, ovenproof cookware. Tall baked items and tins/dishes on ¡ Place the cookware on the wire rack. the wire rack ¡ Glass cookware is best. Shallow baked items/baking trays ¡... - Page 34 en How it works ¡ In the main part of the instruction manual, you will ¡ Use salt and seasoning sparingly. When cooking find information on how to configure the microwave food using the microwave mode, most of the food's and microwave combination oven settings. natural flavour will be retained.
- Page 35 How it works en Food Accessory/cook- Shelf pos- Heating Temperature in Microwave Cooking ware ition function °C power setting time in → Page 10 in W mins Biscuits, 2 levels Universal pan 140–160 15–30 Baking tray Biscuits, 3 levels 1 pcs 5+3+1 ...
- Page 36 en How it works Food Accessory/cook- Shelf pos- Heating Temperature in Microwave Cooking ware ition function °C power setting time in → Page 10 in W mins Fillet of beef, medium, Wire rack 210 - 220 40 - 50 1 kg Fillet of beef, medium, Covered cookware ...
- Page 37 How it works en Recommended settings for desserts and compote Food Accessory/cook- Shelf pos- Heating Temperature in Microwave Cooking ware ition function °C power setting time in → Page 10 in W mins Blancmange made from Covered cookware 5 - 8 blancmange powder Yoghurt Individual moulds...
- Page 38 en How it works ¡ Stir or turn the food 1-2 times during defrosting. ¡ Once the food has defrosted, switch off the appli- ance and leave the food in the appliance for another Turn large items several times. Split the food into smaller pieces as it defrosts.
- Page 39 How it works en Recommended settings for warming up food using the microwave mode Food Accessory/cook- Shelf pos- Heating Temperature in Microwave Cooking ware ition function °C power setting time in → Page 10 in W mins Drinks, warming up, Uncovered cook- 1 - 3 200 ml ware...
- Page 40 en How it works Recommended settings for baking Food Accessory/cookware Shelf posi- Heating Temperature in °C Cooking time tion function in mins → Page 10 Viennese whirls Baking tray 140–150 25–40 Viennese whirls Baking tray 140–150 25–40 Viennese whirls, 2 levels Universal pan ...
-
Page 41: Installation Instructions
Installation instructions en Recommended settings for microwave cooking Food Accessories/cook- Shelf posi- Heating Microwave power Cooking time ware tion function setting in W in mins → Page 10 Egg wash Uncovered cookware 2 1. 360 1. 20 2. 180 2. 20–25 Sponge Uncovered cookware 2 ... - Page 42 en Installation instructions 28.2 Appliance dimensions You will find the dimensions of the appliance here ¡ Wear protective gloves so that you do not cut yourself. Parts that are accessible dur- ing installation may have sharp edges. ¡ Dimensions of the figures in mm. 28.3 Installation below a worktop WARNING ‒ Risk of fire! Observe the installation dimensions and the installation...
- Page 43 Installation instructions en Hob type a raised in mm a flush in mm b in mm Induction hob Full-surface induction hob Gas hob Electric hob 28.5 Installation in a tall unit 28.6 Corner installation Observe the installation dimensions and the installation Observe the installation dimensions and the installation instructions when installing in a tall unit.
- Page 44 en Installation instructions isolating switch must be integrated into the perman- For handleless kitchens with vertical bar handle ent electrical installation in accordance with the in- strips: stallation regulations. Attach a suitable filling piece in order to cover ‒ any sharp edges and to guarantee a safe install- Electrically connecting an appliance without a ation.
- Page 48 Valid within Great Britain: Imported to Great Britain by BSH Home Appliances Ltd. Grand Union House Old Wolverton Road Wolverton, Milton Keynes MK12 5PT United Kingdom Manufactured by BSH Hausgeräte GmbH under the trademark licence of Siemens AG *9001680369* 9001680369 (020506)
Need help?
Do you have a question about the HM876G0 6 Series and is the answer not in the manual?
Questions and answers