Advertisement
Quick Links
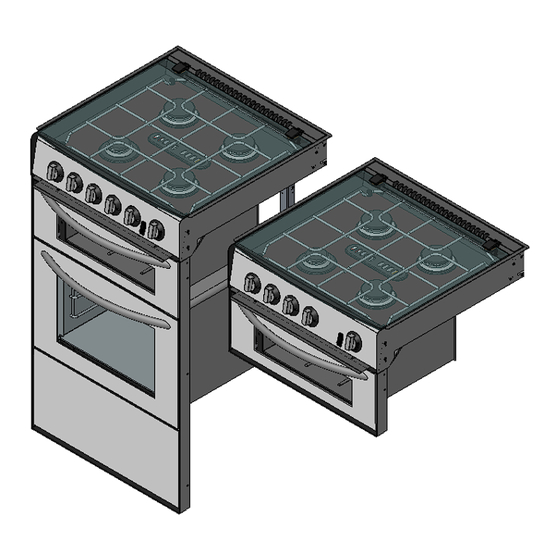
BUILD IN APPLIANCE
FOR USE WITH UNIVERSAL LPG
MODELS:
S~OH72000Z MK3 CAPRICE (ALL GAS)
S~HG72000Z MK3 MINIGRILL (ALL GAS)
S~OH73000Z MK3 CAPRICE (DUAL FUEL)
S~HG73000Z MK3 MINIGRILL (DUAL FUEL)
S~OH40XXXZ MK3 CAPRICE (3-BURNER FAN-ASSIST)
S~OH41XXXZ MK3 CAPRICE (4-BURNER FAN-ASSIST)
S~OH42XXXZ MK3 CAPRICE (DUAL FUEL FAN-ASSIST)
USER AND INSTALLATION INSTRUCTIONS
PLEASE READ THOROUGHLY AND KEEP FOR FUTURE REFERENCE
FOR USE IN AUSTRALIA
THETFORD AUSTRALIA PTY LTD
41 LARA WAY CAMPBELLFIELD VIC
TEL: 03 9358 0700
FAX: 03 9357 7060
Advertisement

Subscribe to Our Youtube Channel
Related Manuals for Thetford MK3 CAPRICE


Summary of Contents for Thetford MK3 CAPRICE
- Page 1 S~OH73000Z MK3 CAPRICE (DUAL FUEL) S~HG73000Z MK3 MINIGRILL (DUAL FUEL) S~OH40XXXZ MK3 CAPRICE (3-BURNER FAN-ASSIST) S~OH41XXXZ MK3 CAPRICE (4-BURNER FAN-ASSIST) S~OH42XXXZ MK3 CAPRICE (DUAL FUEL FAN-ASSIST) USER AND INSTALLATION INSTRUCTIONS PLEASE READ THOROUGHLY AND KEEP FOR FUTURE REFERENCE FOR USE IN AUSTRALIA...
-
Page 3: Wiring Diagram
EUROPEAN TRIMS AUSTRALIAN TRIMS WIRING DIAGRAM... - Page 4 Mk3 Minigrill & Mk3 Caprice Gas inlet location and details of front flue system as indicated by the arrows on the sectional diagrams below Control Positions FULL RATE LOW RATE...
- Page 7 INTRODUCTION This appliance must be installed in accordance with the manufacturer’s installation instructions, local gas fitting regulations, municipal building codes, AS/NZS5601 and any other relevant statutory regulations. Particular attention shall be given to the requirements regarding ventilation. Read the instructions before installing or using the appliance The appliance is designed for either high or low level installations.
-
Page 8: Operation
OPERATION This appliance is not to be used by persons (including children) with reduced physical, sensory or mental capabilities or lack of experience and knowledge, unless they have been given supervision or instruction. Warning: The appliance and its accessible parts become hot during use. - Page 9 Using the Hotplate Gas Burners 1. Ensure gas cylinder/supply is connected and turned on. In the event of a gas smell turn off at gas cylinder/mains and contact supplier. 2. Flame supervision: Each burner is controlled individually and is monitored by a thermocouple probe.
- Page 10 OPERATION Glass lids may shatter when heated. Turn off the hotplate and allow it to cool before closing the glass lid. Remove all spillage from the surface of the glass lid before opening. Using the Electric Hotplate Ensure the electricity is switched on. The hotplate control is numbered from 1 to 6.
- Page 11 OPERATION The pan supplied with the appliance is multi functional, for use in grill or oven. The handle can be removed or inserted whilst the pan is in use. Always remove the handle when the pan is in use. Using the Grill 1.
- Page 12 OPERATION The pan supplied with the appliance is multi functional, for use in grill or oven. The handle can be removed or inserted whilst the pan is in use. Always remove the handle when the pan is in use. Using the Oven 1.
- Page 13 OPERATION Care should be taken not to overload the oven, allow adequate spacing to ensure free circulation of heat. When roasting with aluminium foil ensure the foil does not impair circulation of heat or block any oven flue outlet. Temperature – shelf positions 1, 2 & 3 Dish Mark ¼...
-
Page 14: Installation
INSTALLATION Regulations and Standards This appliance must be installed in accordance with the manufacturer’s installation instructions, local gas fitting regulations, municipal building codes, AS/NZS5601 and any other relevant statutory regulations. Particular attention shall be given to the requirements regarding ventilation. Read the instructions before installing or using the appliance Failure to install the appliance correctly could invalidate any warranty or liability claims and lead to prosecution. - Page 15 INSTALLATION Fixing This appliance can be front or side fixed, holes are provided for either installation method. Front Fixed Appliance Side Fixed Appliance 1 front fix hole each side of Grill opening 1 side fix hole each side of Grill opening 1 front fix hole each side of Oven opening 1 side fix hole each side of Oven opening 2 fixing holes in each Hotplate side trim...
-
Page 16: Maintenance And Servicing
Who to Contact For service, please contact your authorised local Service Agent giving full details of the model, serial number and date of purchase. Manufactured by: THETFORD Limited. Unit 6 Brookfields Way, Manvers Rotherham S63 5DL. England 1. Remove appliance from housing Shut off both gas &... - Page 17 MAINTENANCE & SERVICING 5. Remove the grill burner assembly Shut off both gas & electric supply. Remove the hob surface (2). Release the locking screw on the injector holder. Unscrew the thermocouple from the control and remove the spark ignition lead from the generator. Lever off starlock washers from the grill flue, remove flue clamping screw from rear cross strut and remove flue.
- Page 18 16. Removing the Fan Guard (Fan-assisted oven versions only). Shut off both electrical and gas supply, then remove the oven door as described in section 15 above. Remove the oven shelves as per the operating instructions. Inside the oven, at the rear of the oven cavity, remove the fan guard by unscrewing ...
Need help?
Do you have a question about the MK3 CAPRICE and is the answer not in the manual?
Questions and answers