
Subscribe to Our Youtube Channel
Related Manuals for Siemens HB976GK 1 Series


Summary of Contents for Siemens HB976GK 1 Series
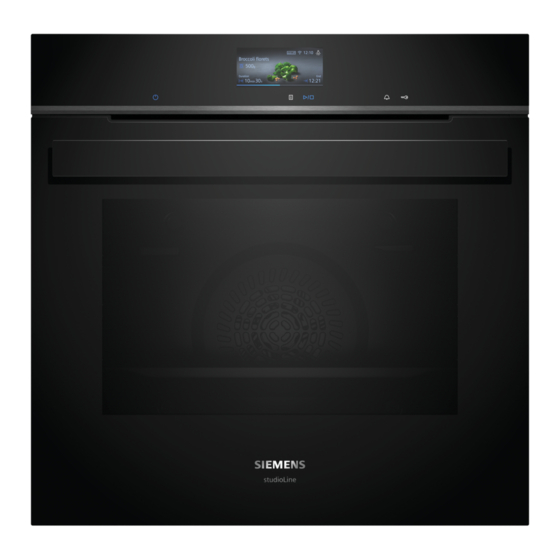
- Page 1 Oven HB976GK.1 User manual and installation instructions Register your product on My Siemens and discover exclusive ser- vices and offers. siemens-home.bsh-group.com/welcome The future moving in. Siemens Home Appliances...
-
Page 2: Table Of Contents
en Safety Futher information and explanations are available online: Table of contents 1 Safety Observe the following safety instructions. INFORMATION FOR USE 1.1 General information Safety .............. 2 ¡ Read this instruction manual carefully. Preventing material damage ...... 5 ¡ Keep the instruction manual and the Environmental protection and saving en- product information safe for future refer- ergy .............. 5... - Page 3 Safety en The telescopic shelves become hot when the 1.4 Safe use appliance is in use. Always place accessories in the cooking com- ▶ Allow hot telescopic shelves to cool down partment the right way round. before touching them. → "Accessories", Page 9 ▶ Only touch hot telescopic shelves with WARNING ‒ Risk of fire! oven gloves.
-
Page 4: Safety
en Safety If the insulation of the power cord is dam- The outside of the appliance gets very hot aged, this is dangerous. when the cleaning function is in progress. ▶ Never let the power cord come into contact ▶ Never hang combustible objects, e.g. tea with hot appliance parts or heat sources. -
Page 5: Preventing Material Damage
Preventing material damage en 2 Preventing material damage Do not keep moist food in the cooking compartment ▶ 2.1 General for a long time with the door closed. Do not store food in the cooking compartment. ATTENTION! ▶ Take care not to trap anything in the appliance Alcoholic vapours may catch fire in the hot cooking ▶... - Page 6 en Familiarising yourself with your appliance If the cooking time is relatively long, you can switch Allow frozen food to defrost before cooking. the appliance off 10 minutes before the cooking time ¡ This saves the energy that would otherwise be re- ends.
- Page 7 Cooking Functions en Your appliance has 5 shelf positions. The shelf posi- Symbol Meaning tions are numbered from bottom to top. Decrease or increase the adjustment The shelf supports are equipped with pull-out rails on value. one or more levels, depending on the appliance type. You can remove the shelf supports, e.g.
- Page 8 en Cooking Functions Home Connect Operating With Home Connect, you can connect and remotely mode control the oven with a mobile device, and use the full Cleaning Select the cleaning function for the functionality of the appliance. cooking compartment. Depending on the appliance type, additional or more → "Cleaning function 'Pyrolytic active- comprehensive functions are available for your appli- Clean'", Page 20...
-
Page 9: Accessories
Accessories en Symbol Type of heating Temperature What it's used for and how it works range Possible additional functions Bottom heating 30 - 250 °C Final baking or cooking food in a bain marie. The heat is emitted from below. Keeping warm 50 - 100 °C Keep cooked food warm. -
Page 10: Before Using For The First Time
You will find a comprehensive range of products for your appliance in our brochures and online: siemens-home.bsh-group.com Accessories vary from one appliance to another. When purchasing accessories, always quote the exact product number (E no.) of your appliance. -
Page 11: Basic Operation
Basic operation en Press to switch the appliance on. Ventilate the kitchen while the appliance is heat- ‒ Apply the following settings: ing. a Once the cooking time has elapsed, a signal tone Type of heating 4D hot air sounds. A note appears on the display confirming Temperature Maximum that the operation has finished. -
Page 12: Rapid Heating
en Rapid heating Set the required operating mode. 8.7 Displaying information → "Setting an operating mode", Page 11 In most cases, you can call up information about the → "Setting the type of heating and the temperature", function that you have just started. The appliance auto- Page 11 matically displays certain information, e.g. - Page 13 Time-setting options en 10.1 Setting the cooking time a When the time has elapsed, a signal sounds. A message appears on the display confirming that the You can set the cooking time for the operation of up to operation has finished. 24 hours. Once the cooking time has elapsed: Requirement: An operating mode and temperature or If required, you can select other settings and re-...
-
Page 14: Dishes
en Dishes Press "Start" 11 Dishes The "Dishes" operating mode helps you to use your ap- 11.3 Overview of the dishes pliance to prepare different meals by selecting the op- You can find out which individual dishes are available timum settings automatically. to you on the appliance when you call up the operating mode. -
Page 15: Favourites
Favourites en Tip: For some dishes, you can select a preferred Once the cooking time has elapsed: cooking method. If required, you can select other settings and re- ‒ → "Setting options for the dishes", Page 14 start the operation. When the food is ready, use to switch the ap- a The settings for the dish appear on the display. -
Page 16: Childproof Lock
en Basic settings 14 Basic settings You can configure the basic settings for your appliance Personalisa- Selection to meet your needs. tion Brand logo ¡ Indicators/symbols 14.1 Overview of the basic settings ¡ Do not display Here you can find an overview of the basic settings Operation after ¡... -
Page 17: Home Connect
Home Connect en 15 Home Connect This appliance is network-capable. Connecting your ap- 15.1 Setting up Home Connect pliance to a mobile device lets you control its functions Requirements via the Home Connect app, adjust its basic settings ¡ The appliance is connected to the power supply and and monitor its operating status. - Page 18 en Cleaning and servicing stalling it via the Home Connect app if you are in your 15.3 Operating the appliance with the WLAN home network (Wi-Fi). The Home Connect app Home Connect app will inform you once installation is successful. You can use the Home Connect app to set and start Notes the appliance remotely.
-
Page 19: Cleaning And Servicing
Cleaning and servicing en Using oven cleaner in a hot cooking compartment If different cleaning agents are mixed together, there damages the enamel. may be a chemical reaction between these. Never use oven cleaner in the cooking compartment Do not mix cleaning agents. ▶... - Page 20 en Cleaning function "Pyrolytic activeClean" Area Suitable cleaning agents Information Pull-out system ¡ Hot soapy water Use a brush to remove heavy soiling. Clean the pull-out rails while they are pushed in so that you do not remove the lubricant. Do not clean in the dishwasher. Note: To clean thoroughly, detach the pull-out system.
- Page 21 Cleaning aid "humidClean" en Press . 17.2 Setting the cleaning function a A notification stating that you should carry out the Ventilate the kitchen while the cleaning function is run- necessary preparatory work for the cleaning func- ning. tion appears on the display. Confirm the message.
-
Page 22: Drying Function
en Drying function Press . 18.2 Cleaning the cooking compartment a A notification stating that you should carry out the after using the cleaning aid necessary preparatory work for the cleaning aid ap- pears on the display. ATTENTION! Confirm the notification. The prolonged presence of moisture in the cooking compartment leads to corrosion. - Page 23 Appliance door en Use both hands to slide the appliance door on as Locking levers opened far as it will go. The hinge is now se- cured and cannot snap shut. Locking levers closed Open the appliance door fully. Close the locking levers on the left- and right-hand hinges.
- Page 24 en Appliance door Push the two sliding caps upwards in the direction compromise the functionality of the appliance. The of the arrow . discolouration can be removed using a stainless steel cleaner. Dry the door panels and refit them. → "Fitting the door panes", Page 24 20.4 Fitting the door panes Note: Ensure that the arrow is on the top left on the interme-...
- Page 25 Rails en Close the metal strip on the left and right . Push the inner pane in at the top . Push the sliding caps downwards in the direction of the arrow. Note: The lettering "Pyro" must be legible at the top, as shown in the picture.
-
Page 26: Rails
en Rails Push the rail into the front socket until the rail Pull the rail out towards the front. also rests against the cooking compartment wall, and then press this downwards . Remove the pull-out rail. 21.3 Removing the pull-out rail WARNING ‒ Risk of burns! The shelf supports get very hot Never touch the shelf supports when hot. -
Page 27: Troubleshooting
Troubleshooting en Guide the rail lengthways to the rear to the guide Release the PUSH tab. rods, and slide both retainers onto each lower rod. In doing so, use the rear retainer to grip the ver- tical rod. a The retainer clicks into place. Pull the pull-out rail out as far as it will go and slide it back in. - Page 28 en Troubleshooting Fault Cause and troubleshooting "Sprache Deutsch" There has been a power cut. appears in the dis- Configure the initial configuration settings. ▶ play. The operation does Different causes are possible. not start or is inter- Check the notifications that appear on the display. ▶...
-
Page 29: Disposal
Next time, set lower or higher values. ▶ Tip: A lot of other information about the food preparation and corresponding adjustment values can be found in the Home Connect app or on our website siemens-home.bsh- group.com . 23 Disposal 23.1 Disposing of old appliance... -
Page 30: Declaration Of Conformity
A detailed Declaration of Conformity can be found on- A detailed RED Declaration of Conformity can be found line at siemens-home.bsh-group.com/uk/ among the online at siemens-home.bsh-group.com among the ad- additional documents on the product page for your ditional documents on the product page for your appli- appliance. - Page 31 How it works en ¡ Place the cookware on the wire rack. Baking on one level Height ¡ Glass cookware is best. Tall baked items and tins/dishes on ¡ Follow the manufacturer's instructions for your roast- the wire rack ing dishes. Shallow baked items/baking tray Roasting in uncovered cookware ¡...
- Page 32 en How it works ¡ Distribute foods that are in the form of separate ¡ Follow the manufacturer's instructions on the pack- pieces, such as bread rolls and potato products, so aging. that they are spread out flat and evenly on the ac- cessory.
- Page 33 How it works en Food Accessory/cookware Shelf pos- Type of Temperature in Cooking time in ition heating °C/grill setting mins → Page 8 Pizza, fresh, thin-crust, on a pizza Pizza tray 220-230 20-30 tray Quiche Dark coated quiche 190-210 30-40 Tarte flambée Universal pan 260-270 10-15 Bake, savoury, cooked ingredi-...
- Page 34 en How it works Immediately place the meat into the pre-warmed 27.6 Special cooking methods and other cookware in the cooking compartment. applications To ensure that the temperature in the cooking com- Information and recommended settings for special partment remains constant, keep the cooking com- cooking methods and other applications, e.g.
-
Page 35: 28.1 General Installation Instructions
Installation instructions en Recommended settings for baking Food Accessory/cookware Shelf pos- Type of Temperature in Cooking time in ition heating °C mins → Page 8 Shortbread Baking tray 140-150 25-40 Shortbread Baking tray 140-150 25-40 Shortbread, 2 levels Universal pan 140-150 30-40 Baking tray Shortbread, 3 levels 5+3+1 130-140... - Page 36 en Installation instructions and comply with the applicable national ¡ Check the appliance for damage after un- safety requirements. packing it. Do not connect the appliance if ▶ If the power cord is too short, contact cus- it has been damaged in transit. tomer service.
- Page 37 Installation instructions en 28.4 Installation underneath a hob If the appliance is installed under a hob, the following The minimum worktop thickness a is based on the minimum dimensions must be adhered to (including required minimum clearance . substructure, if applicable). Hob type a raised in mm a flush in mm...
- Page 38 en Installation instructions ¡ Ensure that air exchange is guaranteed in accord- ¡ Contact protection must be guaranteed by the in- ance with the diagram. stallation. ¡ If the display on the appliance remains dark, it has not been connected correctly. Disconnect the appli- ance from the mains and check the connection.
- Page 39 Installation instructions en Screw the appliance into place. Secure the appliance using a suitable screw. Note: The gap between the worktop and the appliance must not be closed by additional battens. 28.11 Removing the appliance Thermal insulation strips must not be fitted to the side Disconnect the appliance from the power supply.
- Page 40 Valid within Great Britain: Imported to Great Britain by BSH Home Appliances Ltd. Grand Union House Old Wolverton Road Wolverton, Milton Keynes MK12 5PT United Kingdom Manufactured by BSH Hausgeräte GmbH under the trademark licence of Siemens AG *9001673565* 9001673565 (030314)
Need help?
Do you have a question about the HB976GK 1 Series and is the answer not in the manual?
Questions and answers