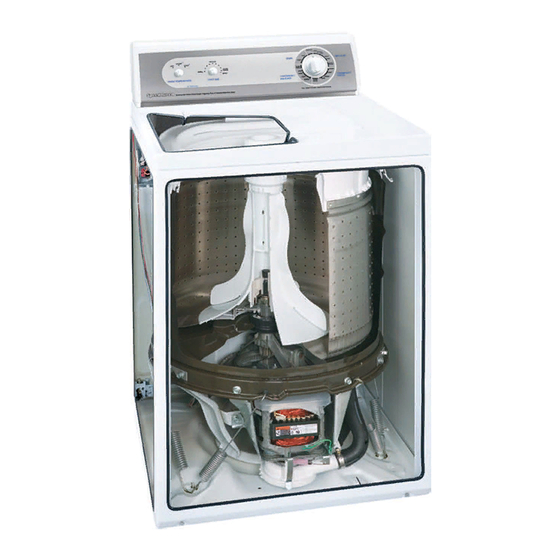
Speed Queen AWS17NW Installation Instructions Manual
Speed queen aws17nw: installation instruction
Hide thumbs
Also See for AWS17NW:
- User manual (27 pages) ,
- Brochure & specs (12 pages) ,
- Specifications (2 pages)
Table of Contents
Advertisement
Installation Instructions
for Topload Washers
Inside.....................................
Washer Dimensions...........................................................
Before You Start................................................................
Installation.........................................................................
Installer Checklist..............................................................
Para bajar una copia de estas instrucciones en español, visite www.speedqueen.com.
Keep these instructions for future reference.
(If this machine changes ownership, this manual must accompany machine.)
Date Purchased ________________
Model Number ________________
Serial Number _________________
www.speedqueen.com
2
2
3
Back Cover
Part No. 201471R1
April 2007
Advertisement
Table of Contents

Summary of Contents for Speed Queen AWS17NW
-
Page 1: Installation Instructions
Installation Instructions for Topload Washers Inside... Washer Dimensions... Before You Start... Installation... Installer Checklist... Para bajar una copia de estas instrucciones en español, visite www.speedqueen.com. Keep these instructions for future reference. (If this machine changes ownership, this manual must accompany machine.) -
Page 2: Washer Dimensions
• User’s Guide. • Product Registration Card. • Warranty Bond. NOTE: If the washer is delivered on a cold day TLW1978N (below freezing), or is stored in an unheated room or area during the cold months, do not attempt to operate it until the washer has had a chance to warm up. -
Page 3: Installation
The shipping plug will be released from the base of the washer when removing the cardboard base from the washer. Refer to Figure 3. NOTE: Do not tilt washer to front or sides when moving. Save the shipping brace and plug. They must be reinstalled whenever washer is moved or transported to a new location. -
Page 4: Step 3: Connect Fill Hoses
Water supply faucets must fit standard 3/4 inch (19.1 mm) female garden hose couplings. DO NOT USE SLIP-ON OR CLAMP-ON CONNECTIONS. Water supply faucets should be readily accessible to permit turning them off when washer is not being used. Recommended cold water temperature is 50 Fahrenheit (10 to 24 Celsius). -
Page 5: Standpipe Installation
Step 4: Connect Drain Hose to Drain Receptacle Remove the drain hose from its shipping position on the rear of the washer by unhooking the hose from the retainer clamp. Install the drain hose into the drain receptacle (standpipe, wall or laundry tub) following the instructions below. -
Page 6: Laundry Tub Installation
If standpipe is lower than 36 inches (91.44 cm), you must install No. 562P3 Siphon Break Kit. Refer to Figure 8. This kit is available (as optional equipment at extra cost) through an authorized dealer or parts distributor. Installation instructions are supplied with the kit. -
Page 7: Step 5: Position And Level The Washer
(supplied in accessories bag) on all four leveling legs. Refer to Figure 12. Place a level on the cabinet top and check if the washer is level from side to side and front to back. If washer is not level, tilt washer back to access the front leveling legs. - Page 8 • DO NOT overload circuits. • DO NOT use an extension cord. • DO NOT use an adapter. • DO NOT operate both a washer and gas dryer on the same circuit. Use separately fused 15 Amp circuits. The washer is designed to be operated on a separate...
-
Page 9: Grounding Information
Do not modify the plug provided with the washer - if it will not fit the outlet, have a proper outlet installed by a qualified electrician. -
Page 10: Step 8: Check Lid Switch
Step 8: Check Lid Switch Washer should stop agitating and spinning when lid is opened. W376IE0A W376I Figure 15 Step 9: Check Installation Refer to Installer Checklist on the back cover of this manual and make sure that washer is installed correctly. -
Page 12: Installer Checklist
• Wipe Out Inside of Washtub. CHECK Filter • Connect Fill Screens Hoses. COLD CHECK • Connect Drain Hose to Drain Receptacle. CHECK Installer Checklist Fast Track for Installing the Washer TLW1975N TLW2009N TLW2009N Cold Valve Connection Blue Hot Valve Connection Plain Washers TLW1988N TLW1988N...


Need help?
Do you have a question about the AWS17NW and is the answer not in the manual?
Questions and answers