Sunna Design Sol EVERGEN M Series Installation Manual
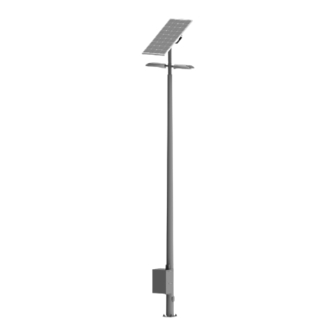
Low-mount battery cabinet
Hide thumbs
Also See for Sol EVERGEN M Series:
- User manual (35 pages) ,
- Installation manual (23 pages) ,
- Installation & user manual (22 pages)
Table of Contents
Advertisement
Quick Links
Advertisement
Table of Contents

Related Manuals for Sunna Design Sol EVERGEN M Series


Summary of Contents for Sunna Design Sol EVERGEN M Series
- Page 1 EVERGEN M SERIES LOW-MOUNT BATTERY CABINET INSTALLATION GUIDE Document: 82803_INSTALL_SOL_Low-Mount-Retrofit_RevC Sol by Sunna Design | 990 Biscayne Boulevard, Office 701, Miami, FL 33132, USA | 1.800.959.1329 | customerservice@solarlighting.com...
-
Page 2: Table Of Contents
Tools and Equipment ..............................4 Assembly ................................5 Appendix A: Retrofit Solar Harnessing ........................9 Appendix B: Retrofit Fixture Harnessing ....................... 13 Warranty ................................15 Sol by Sunna Design | 990 Biscayne Boulevard, Office 701, Miami, FL 33132, USA | 1.800.959.1329 | customerservice@solarlighting.com... -
Page 3: Warnings And Precautions
Adherence to the National Electrical Code (NEC) is mandatory. Non-adherence to code may void the warranty. Sol by Sunna Design | 990 Biscayne Boulevard, Office 701, Miami, FL 33132, USA | 1.800.959.1329 | customerservice@solarlighting.com... -
Page 4: Introduction
15/16" socket and wrench (if through-bolting) d. 9/16" socket e. Banding and equipment (if banding) Wire cutters (if required) g. Wire stripper (if required) Sol by Sunna Design | 990 Biscayne Boulevard, Office 701, Miami, FL 33132, USA | 1.800.959.1329 | customerservice@solarlighting.com... -
Page 5: Assembly
28.12 Drill holes in the locations marked in Step 1 shown. If mounting with banding, drill only the 1.5" wire entry hole. Sol by Sunna Design | 990 Biscayne Boulevard, Office 701, Miami, FL 33132, USA | 1.800.959.1329 | customerservice@solarlighting.com... - Page 6 Insert one of the bushings supplied in the EverGen system hardware kit into the 1.5" hole in the pole as shown. Insert the other bushing from the EverGen system hardware kit into the 1.5" hole in the bracket as shown. Sol by Sunna Design | 990 Biscayne Boulevard, Office 701, Miami, FL 33132, USA | 1.800.959.1329 | customerservice@solarlighting.com...
- Page 7 Fasten the bracket to the pole as shown. Torque the nuts to 72 ft-lbs. If banding, use the slots provided in the sides of the bracket following the banding manufacturer's instructions. Sol by Sunna Design | 990 Biscayne Boulevard, Office 701, Miami, FL 33132, USA | 1.800.959.1329 | customerservice@solarlighting.com...
- Page 8 See the EverGen M Series User Manual for the remaining installation steps along with additional details for some of the above steps. Sol by Sunna Design | 990 Biscayne Boulevard, Office 701, Miami, FL 33132, USA | 1.800.959.1329 | customerservice@solarlighting.com...
-
Page 9: Appendix A: Retrofit Solar Harnessing
Inspect it to see if it matches the Sol legacy PV harness connector shown below. Sol legacy PV harness connector Sol legacy PV harness connector (viewed from latch side) (viewed from non-latch side) Sol by Sunna Design | 990 Biscayne Boulevard, Office 701, Miami, FL 33132, USA | 1.800.959.1329 | customerservice@solarlighting.com... - Page 10 Cover the solar panel with a suitable opaque material so that it won’t generate electrical energy while you’re splicing in the adapter harness. Sol by Sunna Design | 990 Biscayne Boulevard, Office 701, Miami, FL 33132, USA | 1.800.959.1329 | customerservice@solarlighting.com...
- Page 11 Strip the two wires of the adapter harness 1” (25mm) as shown below. Cut and strip the positive and negative ends of the existing solar cable to 1" (25mm). Sol by Sunna Design | 990 Biscayne Boulevard, Office 701, Miami, FL 33132, USA | 1.800.959.1329 | customerservice@solarlighting.com...
- Page 12 (13mm), and insert the twisted wire bundle into the wire nut and twist clockwise until tight. Repeat Step F for the positive cables. Continue to Assembly Step 9 on Page 8. Sol by Sunna Design | 990 Biscayne Boulevard, Office 701, Miami, FL 33132, USA | 1.800.959.1329 | customerservice@solarlighting.com...
-
Page 13: Appendix B: Retrofit Fixture Harnessing
If the connector on the fixture cable to be reused matches the one above, connect it to the 2-position fixture connector on the EMS and proceed to Step 4 below. Sol by Sunna Design | 990 Biscayne Boulevard, Office 701, Miami, FL 33132, USA | 1.800.959.1329 | customerservice@solarlighting.com... - Page 14 (13mm), and insert the twisted wire bundle into the wire nut and twist clockwise until tight. Repeat with the Red adapter wire and the Positive wire from the fixture harness. Connect adapter to EMS. Sol by Sunna Design | 990 Biscayne Boulevard, Office 701, Miami, FL 33132, USA | 1.800.959.1329 | customerservice@solarlighting.com...
-
Page 15: Warranty
990 Biscayne Boulevard, Office 701, Miami, FL 33132, USA Phone: 1.772.286.9461 1.800.959.1329 (Toll Free in U.S. and Canada) Email: customerservice@solarlighting.com Website: solarlighting.com Document: 82803_INSTALL_SOL_Low-Mount-Retrofit_RevC Sol by Sunna Design | 990 Biscayne Boulevard, Office 701, Miami, FL 33132, USA | 1.800.959.1329 | customerservice@solarlighting.com...
Need help?
Do you have a question about the Sol EVERGEN M Series and is the answer not in the manual?
Questions and answers