
Related Manuals for pleasant hearth AN-1010


Summary of Contents for pleasant hearth AN-1010
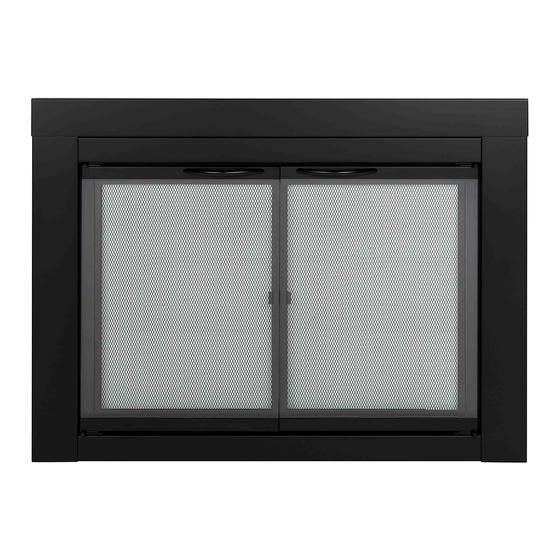
- Page 1 User Manual of Product 1: Pleasant Hearth AN-1010 Alpine Fireplace Glass Door, Black, Small...
- Page 2 W a r m i n g Y o u r H o m e. W a r m i n g Y o u r H e a r t. Fireplace Glass Door Owner's Manual WARNING! Never close the Fireplace Glass Doors while a fire is burning in the fireplace! This Fireplace Glass Door is intended for installation on a masonry fireplace ONLY DO NOT use this glass door on a pre-fabricated fireplace.
-
Page 3: Table Of Contents
TABLE OF CONTENTS Safety Information...........................2 Package Contents..........................3 Installation Instructions...........................4 Care & Maintenance..........................9 Warranty..............................9 SAFETY INFORMATION SAVE THESE INSTRUCTIONS Please read and understand this entire manual before attempting to assemble, operate or install the product. If you have any questions regarding the product, please call customer service at 1-877-447-4768, 8:30 a.m. -
Page 4: Package Contents
PACKAGE CONTENTS PART DESCRIPTION QTY. PART NO. 1/4-20 X 1/4” Machine Screw 10-09-115 1/4-20 X 1/2” Thread Cutting Screw 10-09-116 1/4-20 X 2” Thumbscrew (for lintel clamp) 10-09-117 Lintel Clamp 10-04-122 Key Bracket 10-04-123 8-32 x 5/8” Machine Screw (only for Riser Bar) 10-09-118 8-32 Hex Nut (only for Riser Bar) 10-09-119... -
Page 5: Installation Instructions
INSTALLATION INSTRUCTIONS Carefully remove all contents from the carton and place Fireplace Glass Door on a flat, padded surface to avoid damaging the finish. Always lift the door by the sides, not the top frame. Check hardware against the parts list. If you are missing parts, please call GHP customer service at 1-877-447-4768. - Page 6 INSTALLATION INSTRUCTIONS 3. NOTE: Fiberglass insulation may irritate your skin. Always wear gloves when handling. The fiberglass insulation provided is heat resistant. Your particular model may leave some of the insulation exposed to the inside of the fireplace. This is normal and should not be of concern.
- Page 7 INSTALLATION INSTRUCTIONS 5. While keeping the door panels fully open, place the Glass Door against the fireplace. Place the “T” head of the Key Bracket (E) into the slotted bracket on the back of the door as shown in the inset and turn bracket assembly Bracket to horizontal position as shown in Figure 5.
- Page 8 INSTALLATION INSTRUCTIONS 8. There are four door panel hinges (two in the top track and two in the bottom track). The door panel hinges are designed to be adjusted. If the door panels are not evenly aligned or if there is too much space between the center of the door panels (when they are in a closed position), you may adjust them as follows: Open the door panels.
- Page 9 INSTALLATION INSTRUCTIONS ALTERNATIVE MOUNTING METHOD (for top of glass door) ADDITIONAL TOOLS REQUIRED: Electric Drill, 7/32” High Speed Steel Bit, Pencil, and Safety Glasses 1A. There are two slotted brackets attached to the back of the glass door frame (at the top).
-
Page 10: Care & Maintenance
CARE AND MAINTENANCE Cleaning the Glass: Do not clean glass panels when they are hot! Cleaning the glass while it is hot may cause the glass to break. Clean the glass with a mild solution of household ammonia and water. Do not use scouring pads, glass wax, oil based cleaners, or scrapers. - Page 11 W a r m i n g Y o u r H o m e. W a r m i n g Y o u r H e a r t. PORTE EN VERRE DE FOYER Manuel du propriétaire AVERTISSEMENT ! Ne jamais fermer les portes en verre foyer tandis qu'un feu brûle dans la foyer ! Ce Porte en verre de foyer est prévu pour être monté...
-
Page 12: Consignes De Sécurité
TABLE DES MATIÈRES Consignes de sécurité...........................11 Contenu de l’emballage........................12 Instructions pour l’assemblage......................13 Entretien..........................18 Garantie..............................18 DIRECTIVES DE SÉCURITÉ CONSERVER CE MANUEL Assurez-vous de lire et de comprendre l’intégralité de ce manuel avant de tenter d’assembler, d’utiliser ou d’installer le produit. Si vous avez des questions concernant ce produit, veuillez téléphoner au service à... -
Page 13: Contenu De L'emballage
CONTENU DE L’EMBALLAGE PIÈCE DESCRIPTION QTÉ. NO. DE PIÈCE Vis à métaux 1/4-20 X 1/4 po. 10-09-115 Vis autotaraudeuse 1/4-20 X 1/2 po. 10-09-116 Vis de serrage de 1/4-20 X 2 po. 10-09-117 (pour la pince de linteau) Pince de linteau 10-04-122 Support clé... -
Page 14: Instructions Pour L'assemblage
INSTRUCTIONS POUR L’ASSEMBLAGE Enlever tous les articles de la boîte et placer le porte en verre sur une surface rembourrée plate pour éviter d’abîmer la finition. Toujours sou- lever le porte par les côtés, pas par le dessus. Vérifier que toutes les pièces sont présentes en utilisant la liste des pièces. - Page 15 INSTRUCTIONS POUR L’ASSEMBLAGE 3. REMARQUE : L’isolant en fibre de verre peut irriter la peau. Toujours porter des gants quand on le manipule. L’isolant en fibre de verre fourni résiste à la chaleur. Certains modèles peuvent laisser l’isolant exposé à l’intérieur du foyer. C’est normal et ne doit pas causer de soucis.
- Page 16 INSTRUCTIONS POUR L’ASSEMBLAGE 5. Placer la tête T du support clé dans le support rainuré au dos du porte comme à la encart et tourner l’ensemble support en position hori- zontale comme indiqué à la Figure 5. Recom- mencer pour le côté opposé. Assemblée Bracket B Assemblée...
- Page 17 INSTRUCTIONS POUR L’ASSEMBLAGE 8. Il y a quatre charnières de panneau de porte (deux dans la rainure supérieure et deux dans la rainure inférieure) Les charnières du panneau de la porte sont conçues pour être réglables. Si les panneaux de la porte ne sont pas bien alignés ou s’il y a un trop grand espace entre les centres des panneaux (quand ils sont fermés), on peut les régler comme suit :...
- Page 18 INSTRUCTIONS POUR L’ASSEMBLAGE AUTRE MÉTHODE DE MONTAGE (Pour le dessus de la porte en verre) OUTILS SUPPLÉMENTAIRES REQUIS : Perceuse électrique, foret en acier haute vitesse de 7/32 po., crayon et lunettes de sécurité 1A. Il y a deux supports rainurés fixés au dos du cadre de la porte en verre (sur le dessus).
-
Page 19: Entretien
ENTRETIEN Nettoyage du verre : Ne pas nettoyer les panneaux en verre quand ils sont chauds ! Nettoyer le verre quand il est chaud peut le faire casser. Nettoyer le verre avec une solution douce d’ammoniaque ordinaire et d’eau. Ne pas utiliser de tampons à... - Page 20 W a r m i n g Y o u r H o m e. W a r m i n g Y o u r H e a r t. Chimenea Puerta de Vidrio Manual del Propietario ¡ADVERTENCIA! ¡Nunca se cierran las chimenea puertas de vidrio, mientras que el fuego está ardiendo en la chimenea! Esta puerta de vidrio está...
- Page 21 INDICE Informacion de seguridad........................20 Contenido del paquete..........................21 Instrucciones de ensamblaje.........................22 Cuidado y mantenimiento........................27 Garantla...............................27 INFORMACION DE SEGURIDAD CONSERVE ESTE MANUAL Lea y comprenda completamente este manual antes de intentar ensamblar, usar o instalar el producto. Si tiene preguntas relacionadas con el producto, lIame al Servicio al Cliente al: 1-877-447-4768, de 8:30 am - 4:30 pm, hora central, de lunes - viernes.
- Page 22 CONTENIDO DEL PAQUETE PIEZA DESCRIPCIÓN CANT. PIEZA NÚM. 1/4-20 X 1/4” Tornillo de máquina 10-09-115 1/4-20 X 1/2” Tornillo de rosca cortante 10-09-116 1/4-20 X 2” Empulgueras 10-09-117 (para las abrazadera del dintel) Abrazadera del dintel 10-04-122 Soporte 10-04-123 8-32 x 5/8” Tornillos de máquina 10-09-118 (sólo para Montaje de barra) 8-32 Tuerca...
- Page 23 INSTRUCCIONES DE ENSAMBLAJE Extraiga el contenido de la caja y sitúe la pantalla de vidrio en una superficie plana y acolchada para evitar que se dañe el acabado. Agarre siempre la pantalla por los lados, nunca por el marco superior. Compruebe que tiene todos los cables y dispositivos electrónicos de la lista.
- Page 24 INSTRUCCIONES DE ENSAMBLAJE 3. NOTA: El aislamiento de la fibra de vidrio puede irritarle la piel.Lleve siempre guantes cuando maneje la fibra de vidrio. El aislante de fibra de vidrio que se prove es resistente al calor. Su modelo particular puede dejar algo de aislante expuesto en el interior de la chimenea.
- Page 25 INSTRUCCIONES DE ENSAMBLAJE 5. Manteniendo los paneles de puertas totalmente abiertas, coloque la puerta de cristal contra la chimenea. Colocar la "T" la cabeza del soporte de clave en el soporte de ranuras (E) en la parte de atrás de la puerta Ensamblaje como en el grabado y conjunto de soporte Soporte B...
- Page 26 INSTRUCCIONES DE ENSAMBLAJE 8. Hay cuatro bisagras para el panel de la puerta, (dos en la parte superior y dos en la parte inferior). Las bisagras del panel de la puerta están diseñadas para que se ajusten. Si los paneles de la puerta no están alineados de igual manera o si existe demasiado espacio entre el centro de los paneles de la puerta (cuando están cerrados) puede ajustarlos...
- Page 27 INSTRUCCIONES DE ENSAMBLAJE MONTAJE ALTERNATIVO (por encima de la puerta de vidrio) HERRAMIENTAS ADICIONALES NECESARIAS: Taladro eléctrico de alta velocidad sobre el acero de 7/32", lápiz y gafas de seguridad 1A. Hay dos soportes de ranura unidos a la parte posterior del marco de la puerta (en la parte superior).
- Page 28 CUIDADO Y MANTENIMIENTO Limpieza del Vidrio: No limpie los paneles de vidrio cuando están calientes. Si los limpia cuando están calientes puede hacer que se rompa el vidrio. Limpie el vidrio con una solución suave de agua y amoníaco. No utilice estropajos, cera, limpiadores derivados del petróleo o raspadores.
Need help?
Do you have a question about the AN-1010 and is the answer not in the manual?
Questions and answers