Table of Contents
Advertisement
Quick Links
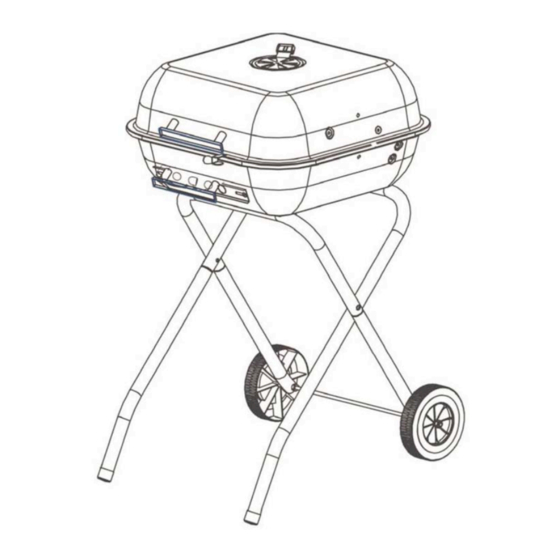
18½ in. Folding
Charcoal Grill
Owner's Manual
Model: CBFL-1850/S
Assembly Required
The following common tools (not included) are required for assembly:
Phillips screwdriver, two adjustable wrenches
OUTDOOR USE ONLY! NEVER USE INDOORS!
Read and follow all of these manufacturer instructions before beginning assembly or
operation. Failure to do so could result in fire, burns, or other serious personal injury.
Keep this owner's manual for future reference. If you sell or give this product to someone
else, make sure this manual accompanies this product.
Advertisement
Table of Contents

Related Manuals for Char-Broil CBFL-1850/S


Summary of Contents for Char-Broil CBFL-1850/S
- Page 1 18½ in. Folding Charcoal Grill Owner’s Manual Model: CBFL-1850/S Assembly Required The following common tools (not included) are required for assembly: Phillips screwdriver, two adjustable wrenches OUTDOOR USE ONLY! NEVER USE INDOORS! Read and follow all of these manufacturer instructions before beginning assembly or operation.
-
Page 2: Table Of Contents
Contents Important Safety Information and Warnings ….…………………………………………………..Carbon Monoxide Warning …..…………………………………………………………… California Proposition 65 Warning ………………………………………………………… Safe Grill Placement ………………………………………………………………………..Grill Preparation Safety ..…………………………………………………………………... Charcoal Lighting Safety ……………………………………………………………………. Grill Use Safety ……………………………………………………………………………….. After Use Safety……………………………………………………………………………….. Preparation ………………………………………………………………………………………………. Parts List …………………………………………………………………………………………………. Hardware List ……………………………………………………………………………………………. - Page 3 IMPORTANT SAFETY INFORMATION! DANGER CARBON MONOXIDE HAZARD! Burning charcoal releases carbon monoxide, a toxic odorless gas which can cause serious injury or death. NEVER burn charcoal inside homes, inside vehicles, or inside any other enclosed areas! If used indoors, toxic fumes, including carbon monoxide, will accumulate and cause serious injury or death.
-
Page 4: Grill Preparation Safety
able to support the weight of the grill. NEVER use on wood or other combustible surfaces. NEVER use this grill where children or pets could come into contact with the grill. DO NOT store or use grill near gasoline or other flammable liquids, gases or where flammable vapors may be present. -
Page 5: After Use
Grill is hot when in use. To avoid burns: DO NOT attempt to move the grill while lit or still hot. ALWAYS wear protective gloves or oven mitts. DO NOT TOUCH any hot grill surfaces. DO NOT wear loose clothing or allow hair to come in contact with grill. ... -
Page 6: Preparation
Preparation Remove all parts and hardware from the carton and place them on a clean soft surface. Compare the contents with the parts list and hardware list to make sure nothing is missing. Dispose of all packaging materials properly. Please recycle whenever possible. Parts Char‐Broil is a registered trade mark of W.C. Bradley Company. VDG, Inc. Licensee / September 14, 2010 Page 6... - Page 7 Parts Char‐Broil is a registered trade mark of W.C. Bradley Company. VDG, Inc. Licensee / September 14, 2010 Page 7...
- Page 8 Hardware Char‐Broil is a registered trade mark of W.C. Bradley Company. VDG, Inc. Licensee / September 14, 2010 Page 8...
-
Page 9: Assembly
Assembly STEP 1. With lid vent handle angled up, thread one M5x10mm bolt (A) through holes in lid vent (2) and lid (3). Thread one M5 hex nut (E) onto bolt (A). Tighten nut and bolt with Phillips screwdriver and adjustable wrench. - Page 10 STEP 2. Attach one handle (1) to lid (3) with two M6X15 screws (C) and two nylon washers (I). Tighten screws securely with Phillips screwdriver. STEP 3. Attach one handle (1) to bowl (4) with two M6X15 screws (C) and two nylon washers (I). Tighten screws securely with Phillips screwdriver.
- Page 11 STEP 5. Slide ends of wheel legs (10) into front top leg (12) so that axle holes in legs align. NOTE: The axle (15) has a notch at each end and will not slide all the way through the holes in the wheel legs.
- Page 12 STEP 8. From the outside, thread the M5x55 bolts (D) through the holes in the wheel leg, then through a nylon washer (J), and finally through the stationary legs. NOTE: The nylon washers help protect the finish. Thread an M5 lock nut (G) onto each bolt. Tighten with a Phillips screwdriver and adjustable wrench. STEP 9.
- Page 13 STEP 10. Attach each large hinge (6) and small hinge (5) to the inner sides of the lid with one M5x10 screw (B), one nylon washer (I), and one wing nut (F) as shown above. NOTE: The nylon washers go between the hinges and the wall of the bowl to help protect the finish. STEP 11.
-
Page 14: Folding And Transport
Folding and Transport Care and Maintenance Wash cooking grids and charcoal grates with hot, soapy water. Rinse well and dry completely with a towel. NEVER allow grates to drip dry, or dry in a dishwasher. They will rust. After washing and drying, lightly coat grates and grids with vegetable oil or vegetable oil spray. ... -
Page 15: Limited Warranty
wool or fine grit emery cloth. Coat the interior lightly with vegetable oil or vegetable oil spray. Limited Warranty Manufacturer warrants this grill for replacement or repair of parts to the original purchaser for a period of 90 days from original date of purchase. The original sales receipt is required for all warranty claims. This warranty is limited to non-commercial residential use only.
Need help?
Do you have a question about the CBFL-1850/S and is the answer not in the manual?
Questions and answers