Table of Contents
Advertisement
Quick Links
Advertisement
Table of Contents

Related Manuals for Atag VA68211RT


Summary of Contents for Atag VA68211RT
- Page 1 ATAG VA68211RT...
- Page 3 Operating Instructions Dishwasher ATAG VA68211RT Dear ATAG customer! We hope that you will have many years of use from your new machine. The machine has many features. To make the most of its functions, we recommend that you read the operating instructions before using the machine.
-
Page 4: Table Of Contents
Contents Front panel Troubleshooting Safety instructions Information for test institute Before washing for the first time Technical information Loading the dishwasher Installation Using the dishwasher Service Settings Programme chart Care and cleaning Your notes Front panel On/Left-on mode TAB (3-in-1/all-in-one detergent) 11 Delayed start Programme selector Salt indicator... -
Page 5: Safety Instructions
Safety instructions General Winter storage/Transport Read the operating instructions and keep them in a safe place! Store the dishwasher where the temperature remains above freezing. Never use the dishwasher for any purpose other than that specified in these operating instructions. Avoid long transport distances in very cold weather. -
Page 6: Before Washing For The First Time
Before washing for the first time Do as follows the first time: Programme key 1 Unscrew the lid as illustrated. Some dishwashers include programme keys in different 2 Place the funnel supplied with the dishwasher in the salt languages. Attach the programme key in the desired language compartment top-up hole. -
Page 7: Loading The Dishwasher
Loading the dishwasher Economic dishwashing NOTE! Run programmes only with a full load After topping up, it may take a while before the symbol goes out. Wait to run a programme until the dishwasher is full, this way you save energy. Use the Rinse & Hold programme to rinse the dishes if there are any unpleasant odours while you wait for the Setting the rinse aid dosage dishwasher to become fully loaded. -
Page 8: On/Left-On Mode
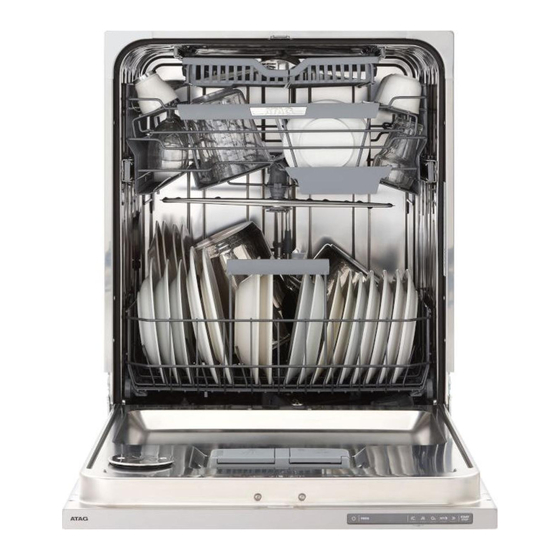
The dishwasher's baskets The dishwasher is equipped with a top cutlery tray, an upper basket and a lower basket with cutlery basket. Top cutlery tray The top cutlery tray has space for cutlery, ladles, whisks, serving cutlery and similar items. Raising the top cutlery tray 1 Pull out the top cutlery tray. - Page 9 Cutlery basket with lid Positioning of cutlery basket lid (in upper basket) The cutlery basket lid can be removed and used, for example, as an extra cutlery basket in the upper basket (see below). Foldable tines Lower the foldable tines (plate supports) when washing pots. NOTE! Check that the spray arms can rotate freely.
-
Page 10: Using The Dishwasher
Using the dishwasher Add detergent On/Left-on mode Press and hold the On/Left-on mode button until the display lights Programme selection Press the Programme selector one or more times until the desired programme symbol appears on the display. Auto wash The dishwasher can measure how dirty the dishes are and adjust water consumption and temperature accordingly. - Page 11 You can vary the temperature as shown below: Heavy wash: 60 °C / 70 °C Delicate wash If the dishes are not very dirty, you can select Delicate wash. This Normal wash: 60 °C / 65 °C programme is intended for glasses and porcelain that have just Daily wash: 60 °C / 65 °C been used and as such do not require such a powerful...
- Page 12 Flashing red NOTE! This indicates a fault. See further in the section Troubleshooting. If the machine does not start within 2 minutes of the last button Green press, the display returns to showing the last programme run. Unload. The dishwashing programme is finished. Standby light for two hours.
-
Page 13: Settings
Settings Do as follows to open the settings menu: First, open the door. Turn off the dishwasher using the On/Left-on mode button (press and hold). Release the button. Press and hold the On/Left-on mode button until the display lights up. Within five seconds, press and hold the Programme selector and the Long dry button. -
Page 14: Rinse Aid Indicator
Button press Options Settings Description Press Start/Stop to save the setting value and continue to the next setting. LCD contrast For adjusting the contrast of the display on the panel. (Low) (High) Press Start/Stop to save the setting value and continue to the next setting. Rinse aid Rinse aid dosage setting. - Page 15 Button press Options Settings Description Adjusting the water softener. Read off the appropriate Water hardness (Soft water) setting from the water hardness table below. °dH °fH 10-14 9-11 15-20 12-14 21-25 15-19 26-34 20-24 35-43 25-29 44-52 (Hard water) 30-39 53-70 40-49 71-88...
-
Page 16: Care And Cleaning
Care and cleaning Coarse filter NOTE! The coarse filter traps larger food particles, which cannot get The dishwasher must not be used without the filters in place! past the drainage pump. Empty the coarse filter as necessary. Dishwashing results may be affected if the coarse filter is 1 Lift the coarse filter by the handle. - Page 17 Door When cleaning the edge around the door, use only a slightly damp cloth (with a little cleaner if necessary). WARNING! Do not use a spray bottle or the like around the door lock. This is to ensure that water does not penetrate the door catch and come into contact with the electrical components.
-
Page 18: Troubleshooting
Troubleshooting Display Type of fault Action Overfilling Call the service division. Water outlet fault See "Water remains in the dishwasher" in the table below. Water inlet fault Check that the water tap is on. Inlet valve leakage Turn off the water tap and call the service division. Turn off the machine with the On/Left-on mode button and then turn it on again to clear the error message from the display. - Page 19 Problem Possible causes Action Spots on stainless steel or silver. Some foodstuffs, such as mustard, Rinse off these types of foodstuffs if not mayonnaise, lemon, vinegar, salt and starting the dishwasher immediately. Why dressings, can mark stainless steel if left for not use the Rinse &...
- Page 20 Problem Possible causes Action The dishes are not dry enough. Drying power too low. Activate the Long dry option. The dishwasher is not fully loaded. Fully load the dishwasher. Rinse aid needs topping up or dosage is set Top up with rinse add or increase the rinse too low.
-
Page 21: Information For Test Institute
Information for test institute Energy labelling European test standard: EN 60436 Number of standard place settings: Dishwashing programmes: Eco wash, High temperature Connection: Cold water 15 °C Dosages during testing Detergent: In accordance with EN 60436 Rinse aid: In accordance with EN 60436 Prewash: 7.5 gram Rinse aid dosage:... - Page 22 Loading the dishwasher See section Energy labelling.
-
Page 23: Technical Information
Technical information Information on energy labelling Information sheet, in compliance with Commission Delegated Regulation (EU) No. 1059/2010 ATAG Model designation: VA68211RT Number of standard place settings: Energy efficiency class: Annual energy consumption(AE 264 kWh per year Energy consumption of the standard cleaning cycle(E 0.93 kWh... -
Page 24: Installation
Installation 1189 [mm] 30-94 *Remove locking nuts and any coasters for an installed height of 820-824 mm. **Door length. It is important that you read through and follow the instructions Make sure the area on which the dishwasher is to be installed and directions below. -
Page 25: Service
Service Once the installation is complete, the stopcock should be opened Read chapter Troubleshooting before contacting the service to allow the pressure to settle for a while and to check that all department. Note down the details on the rating plate positioned connections are tight. -
Page 26: Programme Chart
Programme chart... -
Page 27: Your Notes
Your notes... - Page 28 Your notes...
- Page 29 Your notes...
- Page 30 Quick guide Load the baskets (See page 5.) Do not rinse dishes under running water before loading them in the dishwasher. Simply scrape off large food particles before loading the dishwasher. Check that the spray arms can rotate freely Check also that the water tap is on. Add detergent The detergent compartment has one smaller compartment for the prewash and one for the main wash.
- Page 32 en (01-15)
Need help?
Do you have a question about the VA68211RT and is the answer not in the manual?
Questions and answers