
Related Manuals for KSolare KSY-60KW Series


Summary of Contents for KSolare KSY-60KW Series
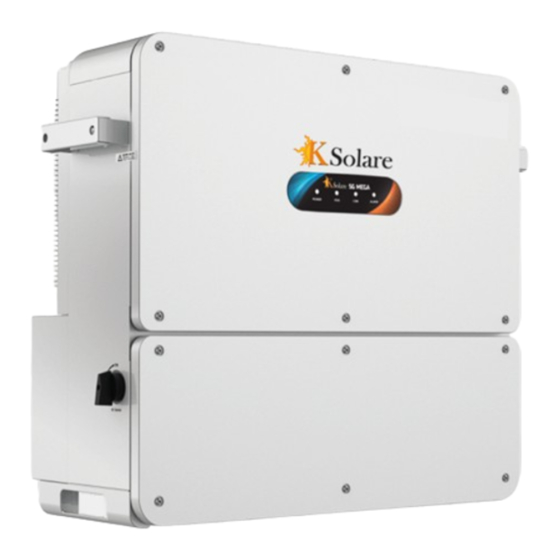
- Page 1 5G MEGA INVERTER KSY-60KW/70KW/75KW/80KW Series Three-Phase Grid-Tie Solar Inverter...
- Page 2 This manual is helpful for technicians who install, debug, operate and maintain string inverters of KSOLARE. Please read this manual carefully before operates the product. Readers are required to know the basic knowledge about electric components, wiring, signs and mechanical drawings.
-
Page 3: Table Of Contents
Contents 1 Safety Precautions ..........................1 1.1 Transport ............................ 1 1.2 Storage ............................1 1.3 Installation ..........................2 1.4 Operating ........................... 2 1.5 Maintenance..........................3 2 Product Description ........................... 4 2.1 Product Introduction ........................4 2.1.1 Schematic Diagram ........................4 2.1.2 Operating Mode.......................... -
Page 4: Safety Precautions
Safety Precautions In this chapter, it describes the safety precautions that must be observed when installing, operating and maintaining the inverter. Please read them carefully before operation and follow them in operation process; otherwise it might cause damage to the inverter, the generator and related equipment’s or cause serious injury or loss of life. -
Page 5: Installation
User Manual Put the desiccant into the cabinet and package the whole machine with packaging materials. When storing equipment, pay attention to ventilation and moisture. Stagnant water is strictly forbidden in the storage environment. Pay attention to the harsh environment, such as quenching, sudden heat, collision, dust, etc., to avoid damage to the string inverter. -
Page 6: Maintenance
1 Safety Precautions WARNING Power on the string inverter only after all installation work is completed and cables are not connected incorrectly. It is prohibited to conduct any insulation resistance test or voltage withstand test on the string inverter. Wrong voltage withstand test will damage the string inverter. When conducting insulation withstand voltage test on external equipment of the string inverter, the wiring between the string inverter and the external equipment must be disconnected. -
Page 7: Product Description
The KSY MEGA series string inverter is three-phase string-type grid-connected inverter independently developed by Ksolare Energy Pvt. Ltd. Its main function is to convert the DC power generated by the PV string into AC power and feed it into the power grid. -
Page 8: Operating Mode
User Manual MPPT circuit Fuse Current hall RCD leakage current Input EMI detection filter Three- BUS+ Output MPPT phase circuit inverter filter filter BUS- circuit MPPT circuit Input EMI filter MPPT circuit DC switch Figure 2-3 Schematic diagram of KSY MEGA 80KW -M 2.1.2 Operating Mode KSY MEGA three-phase string inverter has three working modes: standby mode, running mode, and shutdown mode. -
Page 9: System Configuration And Application
2 Product Description 2.2 System Configuration and Application 2.2.1 Application Description Figure 2-5 shows the application of the string inverter, and Figure 2-6 shows the networking design scheme of the distributed PV power station. Photovoltaic String AC power Isolation Grid panels inverter distribution unit... -
Page 10: Naming Rules
User Manual 2.3 Naming Rules Figure 2-8 Naming rules 2.4 Nameplate Label Note: The data is for reference only. For more details, please refer to the physical object or technical agreement of the corresponding product. 2.5 Inverter Configuration This section describes the internal components, back components and bottom interfaces of the string inverter. - Page 11 2 Product Description The PV side is connected normally but the grid Blue light slow blinking is not connected Both the PV side and the grid are not Blue light off connected The inverter is in grid-connected power-on Blue light on state Grid-connected operation...
-
Page 12: Labels On The Package
User Manual 1+ ~ 12(14)+ PV+ terminal block 1+ ~ 12(14)- PV- terminal block AC OUTPUT AC output terminal waterproof lock head WiFi/GPRS communication interface RS485 output terminal Figure 2-11 Bottom view of the inverter 2.6 Labels on the Package On the outer packaging of the product, there are some labels to guide the user to transport and store the product. - Page 13 2 Product Description Refer to the user manual: Please refer to the corresponding instructions in the user manual before operation. Discharge identification: This equipment has an energy storage device. Before maintenance, it is necessary to wait for the energy storage device to discharge to prevent electric shock.
-
Page 14: System Installation
System Installation 3.1 Unpack and Inspect After confirming that the outer packaging is intact, please carry out the unpacking inspection. Unpack the packaging box and check whether the appearance of the string inverter is in good condition. When opening the package, be careful to use the tool to avoid scratching the string inverter. Although the inverter has been strictly tested and inspected before leaving factory, accidental damage might happen during transportation. -
Page 15: Reserved Space Requirement
User Manual 3.4 Reserved Space Requirement When installing the string inverter, the space around the string inverter must be reserved for heat dissipation and maintenance. ≥ 200mm ≥ 300mm Figure 3-1 Reserved space requirements When installing multiple string inverters in a same surface, the side by side installation is recommended. -
Page 16: Installation Method
3 System Installation 3.5 Installation Method A hanging board is attached to the package of the string inverter. Fixed hanging board should be installed before the inverter is mounted and fastened on the hanging board. According to the actual installation environment, two installation modes can be selected, i.e. column-holding/rod-holding and wall-hanging. -
Page 17: Wall/Bracket Mounting
User Manual Hang the inverter on the hanging plate and fasten the plate and inverter from both sides with 4PCS M8 screws (supplied accessories); The installation process ends and the actual effect is as shown below: Figure 3-5 String inverter screw rod mounting diagram 3.5.3 Wall/Bracket Mounting This type of mounting allows the inverter to be mounted on a load-bearing wall or bracket. -
Page 18: Electrical Connections
3 System Installation 3.6 Electrical Connections 3.6.1 Cable Requirements The choice of cable should comply with relevant national standards and meet the load requirements. Power cable requirements Refer to the electrical data in the product data, and then consider the ambient temperature, current, margin and other factors to select the cable. -
Page 19: Cable Selection
User Manual 3.6.2 Cable Selection Name Label Recommended Cable Note Specifications PV branch input Industry general photovoltaic cable, cable ~12(14)+ model: PV1-F. 1- ~12(14)- It is recommended to use 4.0mm 6.0mm copper cable for each PV + and PV branch. AC output cable 4 core outdoor cable (A, B, C, N) or 3 The AC output has only 1 waterproof... -
Page 20: Open The Lower Door Panel
User Manual 3.6.6 Open the Lower Door Panel CAUTION Do not open the chassis door on the top of the inverter. Before the inverter opens the door, it must be ensured that the AC and DC are powered off. Please keep the 6 screws on the chassis door. Do not leave unused screws inside the chassis. Figure 3-11 Disassemble the lower door panel 3.6.7 Connect the AC Output Cable... -
Page 21: Connect Communication Cable
3 System Installation 3.6.8 Connect Communication Cable Choice of communication method The inverters support RS485 communication mode. Cable connection instructions The inverter is connected to a communication device (such as a data collection cabinet or a PC) via an RS485 communication line. On the RS485 adapter board X3, two RS485 interfaces (labeled P2, P3), as shown below. - Page 22 User Manual When the inverter is running in the grid, it is forbidden to perform maintenance operations on the DC input cable, otherwise it will cause electric shock hazard. If you want to remove the positive and negative connectors, make sure that DC switch has been placed in the “OFF”...
- Page 23 3 System Installation According to the correct polarity, crimp the cable to the corresponding core. Crimp method Positive Negative Figure 3-16 Crimp terminal With the correct polarity, insert the core into the male and female ends of the MC4 connector and tighten the connector back cover.
-
Page 24: Commissioning Guide
Commissioning Guide 4.1 Check before Power On DANGER Before proceeding to the next step of power on, please read carefully this manual "1 Safety Precautions" and do a detailed check according to the table below. In order to avoid danger, the multimeter and other instruments must be used to detect the voltage of the metal parts inside the casing (protective ground) of the string inverter. - Page 25 Poonam petrol pump, KSolare Technology Park, Sr.No. 62, Hissa No.03, Mangdewadi, Pune, Maharashtra 411046 Enquiry Email: Sales@ksolare.com service@ksolare.com Service Email: Contact: 8530111222 Follow Us On...
Need help?
Do you have a question about the KSY-60KW Series and is the answer not in the manual?
Questions and answers