Table of Contents
Advertisement
Quick Links
Advertisement
Table of Contents

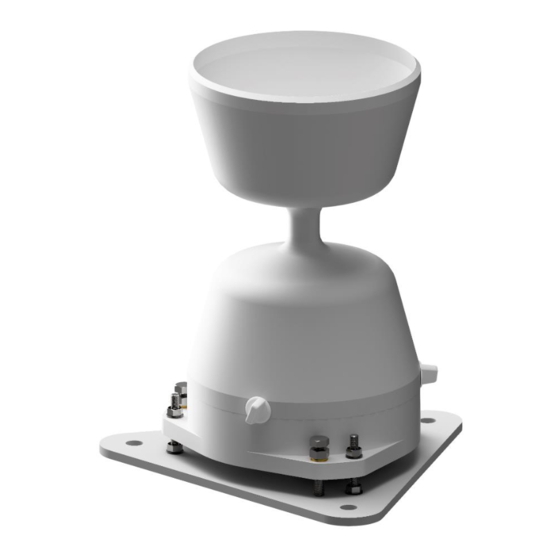
Summary of Contents for EML UM-P-780-700
- Page 1 Kalyx-RG Rain Gauge User Manual UM-780-700-Kalyx-RG Manual – v3.0...
- Page 2 The contents are subject to change without prior notice. Please observe that this manual does not create any legally binding obligation for EML towards the customer or end user. All legally binding commitments and agreements are included exclusively in the applicable supply contract or Conditions of Sale.
-
Page 3: Table Of Contents
Table of Contents List of Figures ............................4 List of Tables ............................4 General Information ........................5 About this Manual ..........................5 Version Information ........................5 Introduction ............................ 6 Site and Installation Requirements ....................6 Choosing a site ............................ 6 Levelling the rain gauge ........................ -
Page 4: List Of Figures
List of Figures Figure 1 - Levelling the Gauge (gauge type for illustration purposes only) ..........7 Figure 2 - Kalyx-RG fitted to mast mounting arm ................... 8 Figure 3 - Reed switch and resistor ......................8 Figure 4 - Filter in funnel ......................... 9 Figure 5 - Internal photograph highlighting water drains .............. -
Page 5: General Information
This manual is intended as a general guide for installing, wiring and using a Kalyx-RG rain gauge. The information contained in this manual may not cover all aspects of Kalyx-RG applications. Please refer to associated equipment manuals or consult papers and technical notes on the EML website (www.emltd.net). -
Page 6: Introduction
Those users who wish to enquire more fully into rain gauge exposure are referred to the EML website for more technical information and papers (www.emltd.net). -
Page 7: Levelling The Rain Gauge
The Kalyx-RG can be purchased with one of two Baseplate options and Mast Mounting Arm option. This allows the user to connect the product to an existing pole or mast assembly (also available from EML). An example of this configuration is shown in Figure 2. UM-780-700-Kalyx-RG Manual – v3.0... -
Page 8: Wiring Guidelines
Figure 2 - Kalyx-RG fitted to mast mounting arm Alternatively, the standard baseplate can be fixed to a standard wooden post (preferably concreted in the ground). 4. Wiring Guidelines This section gives information on the wiring of Kalyx-RG rain gauge. For most applications, the rain gauge may be connected directly to a pulse counting input (contact closure) on a data logger, but some care is needed if long cables are used. -
Page 9: Wiring For Internal Loggers
Wiring for internal loggers To connect an internal data logger or counter, two wires have to be connected to the green connector terminal block and taken to the contact closure input of your chosen logger. The Kalyx-RG includes a 2-way terminal for connection (the green terminal). As this is a contact closure (switch) device it does not matter which way you connect this to your logger or counter. -
Page 10: Maintenance And Calibration
Kalyx-RG gauge as we are dealing with low quantities of rain water in the tipping bucket mechanism compared to other EML gauges – so any dirt build up will represent a significant change in weight. Please always keep your gauge clean to ensure accuracy! EML recommends a quick clean every one to two months. -
Page 11: Calibration
Figure 7 - Removal of bucket Figure 6 - Pivot holding piece PLEASE NOTE: A spares kit is available with filter, cap, and screws. Contact EML sales (sales@emltd.net) for more information. Calibration The sensitivity of the rain gauge is accurately calibrated during the manufacturing stage (Figure 8 and Figure 9) to a nominal 0.2mm/tip using a purpose built calibration rig supplying an adjustable constant... -
Page 12: Specifications
WMO Compliant Output Contact Closure (Reed Switch) 2% up to 25mm/hr Typical Accuracy 3% up to 120mm/hr Rainfall Intensity 0-2000 mm/hr (with mathematical correction - contact EML) Operating Temperature C - 70 Funnel Diameter 12.7cm / 5 Inch Funnel Area 127cm / 19.64 sq.Inch... -
Page 13: Appendix A - Accessories
Appendix A – Accessories Optional bespoke anodised aluminium baseplate kit: Figure 10 - Aluminium Baseplate kit Optional bespoke HDPE baseplate kit: Figure 11 - HDPE Baseplate kit Optional bespoke Anodised aluminium mast mounting arm: Figure 12 - Aluminium mast mounting arm UM-780-700-Kalyx-RG Manual –... -
Page 14: Figure 13 - Contents Of Spares Kit
Kalyx-RG Spares Kit: The Kalyx-RG spares kit comprises of three new funnel screws, two filter caps and two piece of filter material. Figure 13 - Contents of spares kit Figure 14 - Kalyx-RG spares kit UM-780-700-Kalyx-RG Manual – v3.0 14 | P a g e...


Need help?
Do you have a question about the UM-P-780-700 and is the answer not in the manual?
Questions and answers