Redroad V17 - Cordless Vacuum Cleaner with LED Screen Manual
- Instructions manual (168 pages)
Advertisement
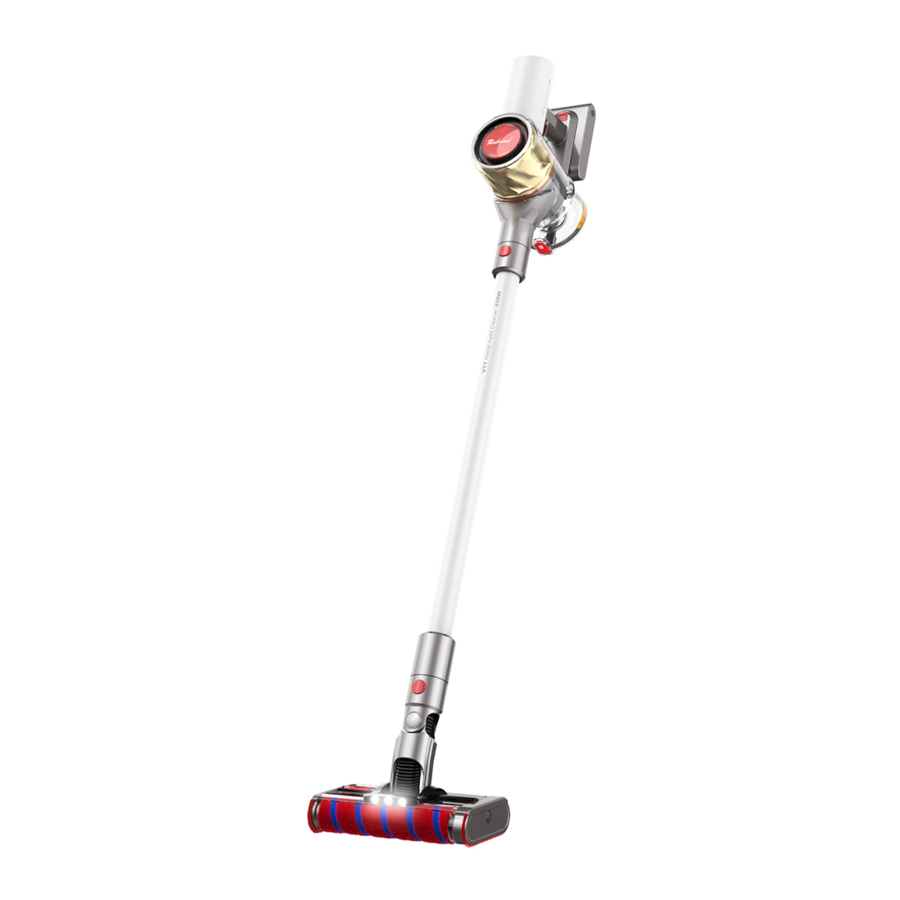
Product Introduction
Part Description

Product introduction Accessory

Installation

The installation of Holder for charging and storage
(The holder is optional and can be installed according to the actual situation.)
- The installation of storage holder shall be arranged in a cool and dry place nearby, and ensure that there is no electrical wiring or piping at the rear of the installation area. The recommended distance between the bases of the holder to the ground is above 90cm.
- Use an power tool to make a hole of 8 mm in diameter and about 30 mm in depth on the wall. Place the expansion pipes in the hole.
- Align the screw hole of the storage holder with the hole in the wall, and fix the storage holder on the wall with the screws.

Charging
Tips:
- Please fully charge the battery before the first use and after every use. Charging time is about 4 hours.
- The vacuum cleaner can' t be operateal while it's being charged.
- The battery temperature can be high after continuous use in super-strong mode. It is recommended to cool the main machine for 30 minutes before recharging.
- Charging progress can be seen from battery status LED indicator or display panel.

Battery Status LED Indicator

Tip: After a minute of full charge, the indicator light goes out and into power-saving mode.
![]() Indicates going out
Indicates going out
![]() Indicates flicker
Indicates flicker
![]() Indicates constant brightness
Indicates constant brightness
Display panel
When charging, the display panel displays the balance of power digitally. It indicates that the charge is completed when 100% is displayed.
Product use
Display Panel Function Introduction

Electronic lock: long press for 1.5 second to switch working mode
Reset Filter element:
- "Filter Element Reset", press for 3 seconds to enter the "Filter Element Reset" interface, and then press for 3 seconds to confirm the reset. First, press for 3 seconds to enter the Menu, click to select
Electric power monitoring ring:
- Super: Red
- Strong: Blue
- Power Saving: Green
Battery small icon:
- White>20%
- Red <20%
- Red flicker<10%
Shift gear:
- Click to switch to Power Saving, Strong, or Super mode
Language Settings:
- "Language Selection", press for 3 seconds to enter the "Language"interface, click to select your language, and then press for 3 seconds to complete the set. Press for 3 seconds to enter the Menu, click to select your language, and then press for 3 seconds to complete the set.
Tip: When an exception occurs during the use of the product that requires your attention, the screen will display the prompt information and follow the instructions on the screen to maintain normal performance.
Language settings
Refer to the following methods to set the display language according to your need. Press the " " button for 3 seconds to enter the "Language Selection" interface, click the "" button to slide through the language list, select the appropriate language and then press the "" button for 3 seconds to save.

Tip: If there is no operationin more than 30 seconds, it will automatically exit the language setting interface, and the information displayed on the screen will go out.
Clean mode
The main machine has 2 working modes, which can be switched according to different clean needs.
Mode 1: discontinuous working mode
Press the host tigger to start working, release the tigger to stop the operation immediately.

Mode 2: Continuous working mode
In standby mode, long press "" for 1.5 seconds to turn on the continuous working mode, then "![]() "will appear on the screen, and press the button for 1.5 seconds again to turn off the continuous working mode. The use of continuous operation mode can free your fingers and aviod fatigue of the constant pressing on the tigger.
"will appear on the screen, and press the button for 1.5 seconds again to turn off the continuous working mode. The use of continuous operation mode can free your fingers and aviod fatigue of the constant pressing on the tigger.

Tip:
- In the running state of this mode, it can be suspended or re-started by short-press switch, and the working mode of the main machine will not change.
- If you need to exit the continuous working mode, press the "
![]() " key and hold for a longer time.
" key and hold for a longer time.
Product Usage Scenario Introduction
Floor brush
It is suitable for the cleaning on marble and hard floor.

Tip: The suction head of soft wool rolling brush can also be installed directly on the main machine.
Pet brush
It is suitable for cleaning dust and mites on general fabrics such as bedding, knitting sofa, blanket, etc.

Tip: It is not recommended to use on the surface of easy-to-hook or easy-to-scratch materials(such as silk, etc.).
Two-in-one brush
It is suitable for cleaning curtain, keyboard, ceiling, car, tea table, etc.

Crevice tool
It is suitable for cleaning the narrow areas such as the corner of the window, the corner of the wall and interior of the car.

Tip:
- Do not vacuum water;
- When the battery is protected by high temperature, the power will be cut off automatically. Please wait for the battery to be used after the temperature is normal.
Mainenance and servicing
Matters need attention
- Make sure the power adapter is disconnected before cleaning the machine and be careful not to touch the switch to start the vacuum cleaner.
- Replace the parts if necessary. Please use the parts supplied by the original factory to avoid damaging the vacuum cleaner because of incompatibility..
- Please fully charge the product in case of not using the product for a long time and unplug the power adapter plug and place it in a cool and dry place. Do not place it under direct sunlight or in wet environment. Recharge the product at least once every three months to avoid damage to the battery due to over discharge.
Clean main mechine
Wipe the main machine with a soft dry cloth.
Clean dust tank
If the dust reaches "MAX" mark, the continuing use will affect the dust collection performance, please clean it up as soon as possible after use.
- Dumping: Press the release button on the bottom cover of the dust tank to empty the dust.

- Clean the inner wall of the dust tank with a dry clothor paper towel.


Clean The Seperator
- The dust seperator be twisted off per the unlocking direction of the diagram.

- Rinse the seperator until they are clean and fully air-dried.
Tip: Make sure it is dry and then reinstall it for use(dry it for at least 24 hours).


Clean filter kit of the main machine
- Fix the main unit in a flat position and rotate the top cover of the filter in the anticlockwise direction.

- Rinse the filter kit with clean water. Turn the filter kit for 360°and tap it several times against the sink to make sure the dirt is shaken off. Dry the filter kit.
Tip: Make sure it is dry and then reinstall it for use(dry it for at least 24 hours).


Clean the soft wool roller
- Remove the soft wool roller
Perss down the release button of brush, and pull the roller sideway out.

- Clean the roller and transparent cover plate.
Use a pair of scissors to pick up and cut the hair and fiber on the brush. Wipe the dust on the groove and transparent cover with a dry cloth or paper towel, dry well before install-ing and usage.

- Clean the roller.
When it is dirty, wash the brush with water until it is clean.

- Drying roller
When drying, place the rollingbrush vertically and let it stand for at least 24 hours to dry thoroughly.


Clean pet brush
- Rotate the lock counterclockwise with the coin until you hear the click.
Tip: It is recommended to clean it up after each use.

- Remove the brush head from the pet brush after unlocking, rinse and clean the brush head.

- Put the brush head vertically when drying, and place it for at least 24 hours in order to completely dry it.

- Confirm that the brush is completely dry then assemble it in reverse order of the split.


Basic date
| Main Machine | |||
| Product Name | Hand-held Vacuum Cleaner | Model | V 17 |
| Charging Voltage | 26V | Rated Voltage | 21.6 V |
| Rated Power | MAX 450 W | Battery Capacity | 4000 mAh |
| Charging Time | 4.5 hours | Dust tank apacity | 0.6 L (MAX) |
| Product Size | 1221 X 256 X 202mm | Net Product Weight | About 1.6 kg |
| Floor Brush | Pet Brush | ||
| Model | LFT-12B | Model | CWS-012 |
| Rated Power | 40 W | Rated Power | 20 W |
| The types of batteries that may be used | |||
| Model: ZL-82990640 | Capacity: 4000mAh | Power: 86.4Wh | Voltage: 21.6V |
| The types of Chargers that may be used | |||
| Manufacturer | Model | Input | Output |
| Manufactory Co., Ltd. E-TEK Electronics | ZD024M260100EU | AC 100-240V 0.8A | DC 26V 1.0A |
| Manufactory Co., Ltd. E-TEK Electronics | ZD024M260100US | AC 100-240V 0.8A | DC 26V 1.0A |
| Manufactory Co., Ltd. E-TEK Electronics | ZD024M260100EK | AC 100-240V 0.8A | DC 26V 1.0A |
| Manufactory Co., Ltd. DE-TEK Electronics | ZD024M260100BS | AC 100-240V 0.8A | DC 26V 1.0A |
| Manufactory Co., Ltd. E-TEK Electronics | ZD024M260100CN | AC 100-240V 0.8A | DC 26V 1.0A |
| Executive Standard: IEC/EN 60335-1;IEC/EN 60335-2-2;EN 61000;EN55014;EN62233 | |||
This appliance contains a chargeable lithium battery pack, which is harmful to the environment when scrapped. Please take the battery out of the appliance according to the following instructions and dispose it reasonably before scrapping the appliance:
- Please cut off the power and run out of power as much as possible before removing the batteries, then unscrew the machine handle and the shell bottom to fix screw.
- After gently separating the battery pack and the handle assembly, remove the battery pack. Be careful not to damage the battery shell to avoid danger.
- Please transfer the removed batteries to a professional recycling agency.
Frequently Asked Questions
When the vacuum cleaner is not working properly, please refer to the table below for exception handling.
| Common Fault | Possible Cause | Solution to the Problem | |
| The vacuum cleaner doesn't work | The product is no power or under-powered | Please fully chargethe product before using it | |
| Automatic protection is triggered by high temperature due to blockage | Clean up the suction inletor passage and restart it after cooling | ||
| A clogged suction inletor passage. | Remove foreign matters from the suction inlet passage | ||
| Product Suction Weakening | The dust tank full and the filter kit is clogged with fine dust. | Clean up the trash in the dust tank and the filter kit. | |
| Accessory blocking | Clean the blockage in the accessory. | ||
| Abnormal Sound of Motor Operation | The main suction portion or metal connecting rod is blocked. | Clean obstacles in the main suction portion and metal connecting rods. | |
| Screen Display | Charging | Over-discharge protection | Remind to charge, remove the protection after charging |
| Blockage ofair duct | Blocking protection of main suction motor | Cleaning of dust suction port and air duct | |
| brush headWinding of | Over-current protection of floor brush motor | Clean the dirt on the brush head | |
| Filter element replacement | Discharge for 30 hours | Replace the filter element, remove the reminder after restart to resetting the machine | |
| E04 | No-load protection of main suction motor | Contact after-sales maintenance service | |
| E05 | Over-temperature Protection | Turn on the machine after cooling | |
| E06 | Over-temperature Protection | Automatic restore the charging function after the temperature back to normal | |
| Under the chargingstatus indicator light is not on. | The main machineand the power adapter jack are not connected well | Check if the power adapter is plugged in. | |
| The battery is full and the battery is in the dormant state. | Normal service | ||
| Excluding both of the above situations, if problems still exist. | Please contact the company after-sales service for maintenance. | ||
| Charging too slowly | Battery temperature is too low or too high. | Please wait for the battery temperature to return to normal before charging. | |

VideosRedroad V17 Cordless Stick Vacuum Cleaner Review Video
Documents / ResourcesDownload manual
Here you can download full pdf version of manual, it may contain additional safety instructions, warranty information, FCC rules, etc.
Download Redroad V17 - Cordless Vacuum Cleaner with LED Screen Manual
Advertisement


Need help?
Do you have a question about the V17 and is the answer not in the manual?
Questions and answers