Table of Contents
Advertisement
Advertisement
Table of Contents

Related Manuals for Cuckoo CBM-AAB161S


Summary of Contents for Cuckoo CBM-AAB161S
- Page 1 Multi-Functional Bread Maker USER MANUAL CBM-AAB161S OCEANIA PTY. LTD.
-
Page 2: Table Of Contents
CONTENTS CONTENTS IMPORTANT SAFEGUARDS··········································································································································································· 3 SPECIFICATIONS ···························································································································································································· 4 PARTS & PANEL DESCRIPTIONS ································································································································································ 5 QUICK FUNCTION GUIDE ········································································································································································· 6~8 QUICK GUIDE ···························································································································································································· 9~11 FUNCTION INTRODUCTION ······································································································································································· 12 HOW TO USE ·························································································································································································· 13~14 COMMON INGREDIENTS ······································································································································································ 15~16 TROUBLESHOOTING ············································································································································································· 17~18 RECIPES ·································································································································································································· 19~23... -
Page 3: Important Safeguards
IMPORTANT SAFEGUARDS To prevent personal injury or property damage, read and follow all instructions and warnings. When using electrical appliances, basic safety precautions should always be followed including the following: • Read all instructions. • Do not touch hot surfaces. Use handle or knobs. Always use hot pads or oven mitts when handling hot bread and bread pan. -
Page 4: Specifications
SPECIFICATIONS Model name CBM-AAB161S Power supply 220-240V~, 50/60Hz Power consumption Heating: 500W, Motor: 100W, Class I Baking capicity 1,000g (Bread pan) Power cord length Dimension 350mm (W) x 225mm (D) x 290mm (H) Weight 5.6kg... -
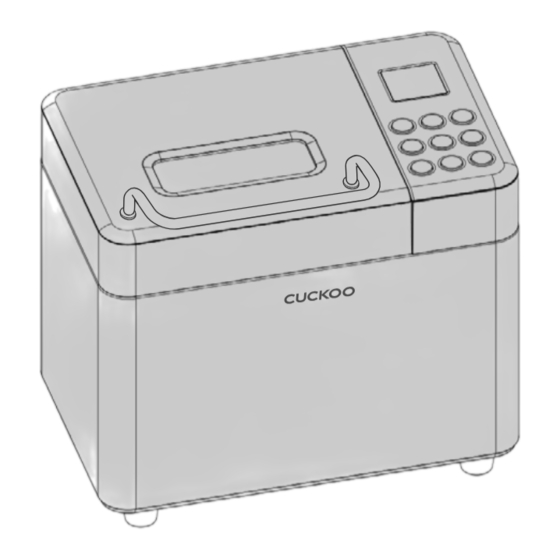
Page 5: Parts & Panel Descriptions
PARTS & PANEL DESCRIPTIONS Parts Handle View Window Automatic Fruit LCD Display & Nut Dispenser Control Panel Kneading Paddle Baking Pan Stainless Steel Body Base Baking Cavity Accessories... -
Page 6: Quick Function Guide
QUICK FUNCTION GUIDE Menu Options Basic: For white and mixed breads consisting mainly of basic bread flour. French: Longer kneading, rising, and baking times. Produces a fluffy bread with a crispy crust. Whole Wheat: For recipes using whole wheat flour or whole wheat flour blended with regular. - Page 7 QUICK FUNCTION GUIDE Panel Buttons • Menu: Press this button to cycle through and choose from the 15 menu options above. The number of the currently selected menu function will be shown on the LCD display. • Weight: Press this button to cycle through and choose your desired loaf size (500g, 750g or 1000g) Note the weight can only be customized with menu options 1-7.
- Page 8 QUICK FUNCTION GUIDE 500g 750g 1000g Indicates the selected loaf size (500g, 750g, or 1000g) Indicates the preset timer has been set to begin the baking process after the input delay time has elapsed Indicates the bread maker is currently in the mixing stage of the baking process Indicates the bread maker is currently allowing your dough to rest before resuming the baking process Indicates the bread maker is currently in the fermentation stage of the baking process...
-
Page 9: Quick Guide
QUICK GUIDE Do not touch or obstruct the steam vent, lid, body, or viewing window while the bread maker is in operation. HOW TO USE THE BAKING PAN To use the baking pan's handle, turn the baking pan counter-clockwise then pull the handle out. Place the baking pan back into the baking cavity, ensuring the pan is firmly locked in place. - Page 10 QUICK GUIDE HOW TO USE AUTOMATIC FRUIT & NUT DISPENSER The automatic dispenser will add chopped fruits, nuts, and other add-ins automatically during optimal stages throughout the baking process. To use, simply add your desired mix-ins to the dispenser then install it on the inside of the lid. After installing, close the lid and initiate the desired function.
- Page 11 QUICK GUIDE HOW TO CLEAN 1. Unplug the cord from the electrical outlet and allow the appliance to cool completely before cleaning. 2. After the bread is removed from the bread pan, and the pan has cooled, fill it half-full with warm water and a small amount of dish soap.
-
Page 12: Function Introduction
FUNCTION INTRODUCTION In the event of a temporary power outage, the bread maker will resume its initiated function if the power is returned within 10 minutes. If the power interruption lasts longer than 10 minutes, the unit will not resume the function and the LCD display will revert back to standby mode. -
Page 13: How To Use
HOW TO USE Remove the baking pan from the baking cavity by using the handle. Press the kneading paddle into the drive shaft located inside the bread pan. Add the called-for ingredients to the baking pan in the following order: liquids, sugar, salt, flour, then yeast. - Page 14 HOW TO USE Plug the power cord into an available outlet. The bread maker will beep and the LCD display will default to menu option 1. Press the MENU button until the number of your desired function is displayed. Press the WEIGHT button until your desired loaf size is displayed. Note the weight can only be customized with menu options 1-7.
-
Page 15: Common Ingredients
COMMON INGREDIENTS 1. Bread Flour Bread flour is the most important ingredient in making bread. It is also recommended to include in most yeast- bread recipes. Also called high-gluten flour due to its higher gluten and protein contents, this can help keep the bread from collapsing after rising. - Page 16 COMMON INGREDIENTS 9. Salt Although bread tends to grow larger when salt isn't added to the recipe, do not add too much salt to your recipe. 10. Eggs Eggs can improve the bread's texture, add more nourishment, and increase its size. The egg must be whisked in with the other liquid ingredients.
-
Page 17: Troubleshooting
TROUBLESHOOTING ▼If you run into issues while operating your bread maker, check this chart before contacting our customer service center. PROBLEM POSSIBLE CAUSE SOLUTION... - Page 18 TROUBLESHOOTING ▼If you run into issues while operating your bread maker, check this chart before contacting our customer service center. PROBLEM POSSIBLE CAUSE SOLUTION ENVIRONMENT FRIENDLY DISPOSAL You can help protect the environment! Please remember to respect the local regulations: please dispose any non-working electrical equipments to an appropriate waste disposal center.
-
Page 19: Recipes
RECIPES No Menu Ingredient 1,000g 750g 500g Remark Water 10.1oz/300ml 8.1oz/240ml 6.1oz/180ml put on the corner. Salt 1 1/2 tsp. 1 tsp. 1/2 tsp. put on the corner. Basic Sugar 3 tbsp. 2 1/2 tbsp. 2 tbsp. put on the corner. Bread 4 tbsp. - Page 20 RECIPES No Menu Ingredient 1,000g 750g 500g Remark Water 8.1oz/240ml 6.1oz/180ml 4oz/120ml Salt 1 1/2 tsp. 1 tsp. 7/10 tsp. put on the corner. Sugar 3 1/2 tbsp. 3 tbsp. 2 tbsp. put on the corner. Gluten Free 3 tbsp. 2 1/2 tbsp.
- Page 21 RECIPES HOME MADE PROGRAM Program Setting Default Time (Minutes) Adjustable Time (Minutes) Stir 1 1-30 rest 1 0-30 Stir 2 0-30 rest 2 0-30 Stir 3 0-25 Ferment 1 0-60 Ferment 2 0-60 Ferment 3 0-60 0-80 Bake 3 Crust Colors Medium Keep Warm 0-60...
- Page 22 RECIPES CBM-AAB161S CUCKOO BREAD MAKER PROGRAM SETTING CYCLE PROCESS Basic 1000g : 3hrs 15mins / 750g : 3hrs 10mins / 500g : 3hrs 5mins 2 lbs : 3 hrs 15 mins / 1.5 lbs : 3 hrs 10 mins / 1 lb : 3 hrs 5 mins...
- Page 23 RECIPES Dessert 1 hr 40 mins Knead Ferment Bake Keep Warm 15 mins 30 mins 55 mins 60 mins Dough 1 hr 30 mins Stir 50 secs Knead Rest Knead Rest Ferment Ferment 7 mins 8 mins 15 mins 10 mins 10 mins 40 mins 1 hr 20 mins...
- Page 24 CUCKOO OCEANIA PTY. LTD. Contact us : 1300 98 13 13 Z0383-0120C0...
Need help?
Do you have a question about the CBM-AAB161S and is the answer not in the manual?
Questions and answers