Table of Contents
Advertisement
Quick Links
H A IK U
WARNING: Ensure power is disconnected at the fuse/breaker distribution panel before installing or
servicing the wall control and fan!
CAUTION: Installation must be completed in strict conformance with local building and electrical
codes.
WARNING: If installing the fan in Australia, qualified licensed professionals should perform all
installation work.
Review the safety guidelines in the complete Haiku® Installation Guide. If you have questions about any
aspect of the installation process, contact Haiku Technical Service at www.haikufan.com for assistance.
PARTS AND HARDWARE
If you are missing any parts or hardware required for the installation of your Haiku wall control, contact Haiku
Technical Service. Note: Drawings are not to scale.
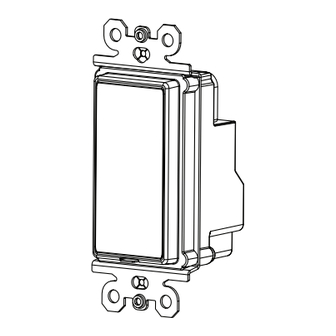
Wall control
Note: If your wall control kit does not include a wall plate, Big Ass Fans recommends using a Decora® wall
plate. Other brands may not be compatible. The junction box and wire connectors are customer supplied.
INSTALLATION
While installing the fan(s) according to the complete Haiku Installation Guide, follow the steps below to
install the Haiku wall control and RF board. It is possible to link up to four (4) Haiku fans to a single controller
to simultaneously control airflow, lights, and special features. If installing linked fans, the first fan must be
located within 20 ft (6 m) of the wall controller. Successive fans must be within 20 ft (6 m) of each other and
with no physical obstructions.
Step 1. Set the wall control address
a) Remove the rubber covering from the back of the wall control. Locate the
DIP switch and rotary switch. See bottom right of this page for the switch
location on the wall control.
b) Toggle DIP switch 1 either on or off, and then turn the rotary switch to one
of sixteen channels. Use a small screwdriver or similar tool to turn the
rotary switch. Together DIP switch 1 and the rotary switch allow 32 unique frequency settings (two sets of
16) to prevent interference between multiple wall controls.
c) Set DIP switches 2–4 as shown below. Make sure switch 3 is off. Settings for switches 2 and 4 depend on
whether the wall control will control a single fan or multiple fans, and whether any of the fans has a light.
Fan(s) with light
For multiple fans, this setting applies
if any of the fans has a light
Fan(s) without light
©2013 DELTA T CORP. ALL RIGHTS RESERVED.
HAIKU
®
by BIG ASS FANS
WA L L C O N T R O L K I T
®
(2) #6-32 x 7/8" screw
Single fan
003927
REV. I
RF board
Multiple fans
Antenna retainer
ON
1
2
3
4
1
Advertisement
Table of Contents

Related Manuals for BIG ASS FANS HAIKU


Summary of Contents for BIG ASS FANS HAIKU
- Page 1 While installing the fan(s) according to the complete Haiku Installation Guide, follow the steps below to install the Haiku wall control and RF board. It is possible to link up to four (4) Haiku fans to a single controller to simultaneously control airflow, lights, and special features. If installing linked fans, the first fan must be located within 20 ft (6 m) of the wall controller.
- Page 2 Single fan First fan (fan closest to wall control) Subsequent linked fan(s) Step 3. Remove lower cover Remove the lower cover from the fan as shown below. On Haiku Bamboo fans, pry off the cover. On Haiku ® ® composite fans, twist the lower cover counterclockwise to remove it.
- Page 3 HAIKU ® by BIG ASS FANS H A IK U WAL L CON TR OL ( C ON T.) Step 4. Install RF board CAUTION: Do not touch the fan electronics during installation unless necessary! CAUTION: Do not adjust the DIP switch settings on the fan’s circuit board! Adjust only the DIP switches on the RF board(s) that will be plugged into the fan(s).
- Page 4 While supporting the wall control, connect the wires with wire connectors as shown below. Switch leg wiring is recommended by Big Ass Fans. If switch leg wiring is not possible, secure the end of the red wire with a wire connector.
- Page 5 Step 9. Install lower cover or (optional) LED light kit If you purchased the Haiku LED light kit, proceed to the instructions included with the kit. If you did not purchase the LED light kit, proceed to the step for installing the lower cover in the complete Haiku Installation Guide.
- Page 6 HAIKU ® by BIG ASS FANS H A IK U WAL L C ON TR OL ( C ON T. ) WALL CONTROL OPERATION The fan is controlled independently from the light. Both the wall control and the IR remote can be used to control the fan and the light.
- Page 7 H A IK U WAL L C ONT RO L ( CON T.) OPERATING THE LIGHT The Haiku LED light kit operates independently from the fan, providing a variable level of illumination that is increased or decreased by pressing the Up or Down Light button on the wall control.
- Page 8 *003927* 003927 REV. I...
Need help?
Do you have a question about the HAIKU and is the answer not in the manual?
Questions and answers