
Related Manuals for RealSimulator FSSB-R3 Lighting

Summary of Contents for RealSimulator FSSB-R3 Lighting
- Page 1 ELECTRONICA, MECANICA Y CONTROL, S.A. RealSimulator User Guide FSSB-R3 Lighting & MKII ULTRA...
- Page 2 FSSB-R3 Lighting & MKII ULTRA User Guide v3.01 © EMYCSA - RealSimulator Avda. Manoteras, 22 – nave 42 28050 – Madrid (Spain) Phone: (+34) 91 383 83 25 Email: technic@realsimulator.com...
-
Page 3: Table Of Contents
Contents Document Revision History Overview Package Content and Technical Data Package content Technical data Installation Standalone joystick Upgrade for the HOTAS Warthog Internal USB Connector First Connection Tools Installation Firmware Update RS_HID_DEV_TOOL and FSSB-R3L Overview The RS_HID_DEV_TOOL program MJF_FW_F16-18 Firmware Overview RS_HID_DEV_TOOL and FSSB-R3L + RS Grips How this firmware works... - Page 4 DX BUTTONS KEYSTROKES I have just received my RealSimulator device and I want to install it, but I do not find the drivers in anyplace. I can’t update the firmware of my device with DCC. I want to install a new version of RS_HID_DEV_TOOL or DCC, but I cannot uninstall the older one.
-
Page 5: Document Revision History
- New User Guide including only the supported firmwares for Lighting and MKII ULTRA. - Added new faqs. IMPORTANT NOTE: All the information contained in this document is valid for FSSB-R3 Lighting and MKII “ULTRA” models, except where otherwise indicated. -
Page 6: Overview
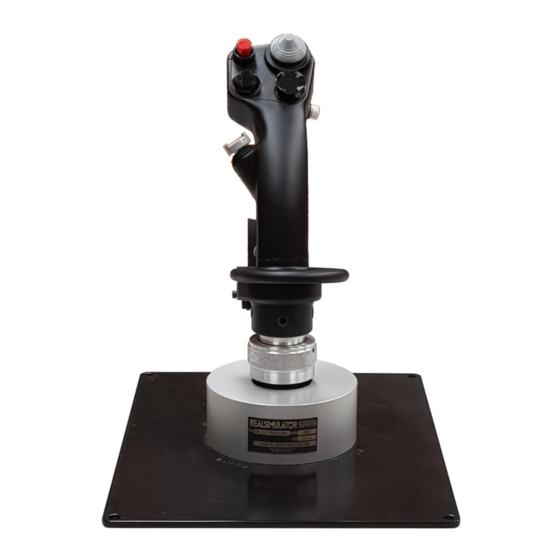
Version: 3.01 PICTURE DESCRIPTION The FSSB-R3 Lighting is the new standard in high quality force sensors. It puts the new levels of quality, sensitivity and precision in hard to reach values even for expensive professional equipment. The new design of the sensor board gives a tact, smoothness and accuracy of flight control which makes that the flight experience cannot be compared to anything experienced before. - Page 7 This User Guide is valid for the FSSB-R3 Lighting model. If you have doubt about the model you have purchased, you can identify it easily by the aluminum case and the label. Here you have some pictures to clarify the identification.
- Page 8 FSSB R3 Warthog FSSB R3 Lighting FSSB R3 Lighting Aluminum case: Natural color Aluminum case: natural color Aluminum case: natural color Label: Aluminum/Black Label: Gold/Black Label: Gold/Gray (Current model since 2020) FSSB-R3L MKII ULTRA Aluminum case: Light titanium or natural color Label: White/Black 8 / 110...
-
Page 9: Package Content And Technical Data
The package, showed in the before picture, contains the following components: • FSSB-R3 Lighting device. • USB wire (USB type A to mini USB type B). • Auxiliary 6-pin to 5-pin cable for TM Warthog board. - Page 10 • Functional with Cougar or Warthog stick. • HOTAS Warthog electronic board fixation by 2 M3x5 screws. • Measurement electronic with separate channels. • HAT as POV or TRIM. • Electronic neutral position adjusts. • Acoustic advice. • RGB Light advice. •...
-
Page 11: Installation
Installation EMYCSA RealSimulator Date: 29-12-2022 Version: 3.01 PICTURE DESCRIPTION The FSSB-R3L can be used in two ways, as an upgrade for the HOTAS Warthog or independently as a standalone joystick. In both cases, for its installation the following tools are needed: Philips PH1 screwdriver. - Page 12 We have made a video guide called “FSSB-R3 Warthog Alone” where you can watch step by step how to install the FSSB-R3. You can find this video guide on RealSimulator FSSB-R3 Lighting video gallery: (https://realsimulator.com/download/videos/FSSB_R3_Warthog_Alone.mp4) or, directly clicking the next image or hyperlink...
-
Page 13: Upgrade For The Hotas Warthog
TUSBA to connect the Cougar Throttle and your actual Cougar grip. In this User Guide you will find a special chapter focused to the new Realsimulator’s grips, as the F16SGRH, when is connected to the FSSB-R3L, thoroughly explaining all the new features that both devices offer when they work together. -
Page 14: Internal Usb Connector
To the TM pcb (J1) Internal USB Connector Now, all FSSB-R3 Lighting sold since June 2022 have a dual USB connection, the external and traditional through a mini-USB type B connector and an internal one through a 5-way JST connector (B5B-PH-K-S). - Page 15 With this new connection, the cable comes out from inside the FSSB-R3L and thus avoids rigid parts external to the FSSB-R3L, such as the USB cable connector. 15 / 110...
-
Page 16: First Connection
First Connection EMYCSA RealSimulator Date: 29-12-2022 Version: 3.01 PICTURE DESCRIPTION The first time that you connect your FSSB-R3L in your computer, you will take notice about really your FSSB-R3L are several devices living in the same hardware. In fact, inside your FSSB-R3L there are: •... - Page 17 Sometimes the Boot device goes out and it is not fully installed, if this happens, don’t worry, it will be installed in another occasion or when you upgrade the device. As soon as the Boot goes out a USB Composite Device with several USB Input Devices will start looking for drivers.
-
Page 18: Tools Installation
The package also includes the RealSimulator device metadata files, the latest firmware and the product User Guide. To download the tools, please, go to the Downloads page of the RealSimulator website by clicking the hyperlink below: https://www.realsimulator.com/downloads/... - Page 19 your computer needs it. In platforms with Windows 8.1 or higher, “DCC” tool will be installed (with support for BLE devices). In previous versions of Windows, the package installs a “light” version of the program without support for BLE, named “DCC v1.xx (NO_BLE)”. This version does not allow upgrading BLE devices as the RS grips (F16SGRH / F18CGRH).
- Page 20 If you want to install all program features (DCC, RS_HID_DEV_TOOL, Metadata files, firmwares and User Guides) select the Complete setup type and click Next to continue. Or select Custom if you want to choose the features to install and click Next to continue.
- Page 21 If the User Account Control window appears, click the Yes button to continue. The installation of RS_TOOLS_V1_02 may take several minutes to complete. Wait until the wizard finishes the installation and click Finish. 21 / 110...
- Page 22 For this, click in the windows START button and select Devices and Printers. You should see an icon device like these FSSB-R3 Lighting with SSF firmware FSSB-R3 Lighting with MJF_FW_F16-18_5 NOTE: sometimes Windows does not update immediately the icon device and you see the standard game device icon, in those occasions press the F5 key to force windows to update the icon devices cache.
- Page 23 Finally, if you press the windows START button and look the All App section in the “R” letter you will find in the Realsimulator folder shortcuts to the DCC and RS_HID_DEV_TOOL programs, the RealSimulator devices User Guide and the FSSB R3 BluePrint.
- Page 24 C:\Program Files (x86)\RealSimulator Code\RS_HID_DEV_TOOL The User Guide, Metadata, Firmware, BluePrint files and Templates are in: %APPDATA%\Realsimulator Data\ 24 / 110...
-
Page 25: Firmware Update
To start the DCC program, launch it by double clicking the DCC desktop icon or click in the windows START button and select All Program > Realsimulator > DCC. If the User Account Control window appears, click YES to continue. - Page 26 Select the tab labelled as FSSB R3 FWU and follow the instructions given in the groupbox Instructions to update the device. Disconnect the FSSB-R3L and HOTAS Warthog (if it is installed and connected) from computer, unplugging the USB cables. If DCC detects the devices connected, the instruction messages will be in red and when the devices are disconnected the messages will be in green.
- Page 27 Cougar and Warthog. • Num. “3” and “4”: firmwares deprecated • Num. “5”: it is the firmware for the FSSB-R3 Lighting to include support for the new Realsimulator v2 grips, as for example: - MJF_FW_F16-18_5_01_0.FSSB_R3: this firmware includes latest features for the R3L and support for RS grips (F16 and F18) and TM compatible grips.
- Page 28 To start the updating we must plug in the FSSB-R3L USB cable, which will launch the bootloader for some seconds and DCC program will start the communications with the device sending the new firmware. During this data transference we will be able to see the progress in the Progress bar and the status image in normal colour.
-
Page 29: Rs_Hid_Dev_Tool And Fssb-R3L
PICTURE DESCRIPTION Overview RS_HID_DEV_TOOL is a GUI developed by RealSimulator to facilitate the configuration of devices manufactured by RealSimulator. In general, it allows calibrating, customizing and adjusting easily the different options offered by the device to get the maximum performance from your hardware. -
Page 30: The Rs_Hid_Dev_Tool Program
To start, launch the RS_HID_DEV_TOOL application by double clicking the RS_HID_DEV_TOOL desktop icon or click the Windows START button and select All Apps > Realsimulator > RS_HID_DEV_TOOL. If the User Account Control window appears, click YES to continue. Select the “FSSB R3 RH” tab and you should see the following window, where we have identified with numbers the different information and configuration areas. - Page 31 Below we present you a description of each area of previous image; we want to inform you that some images have not been updated and they are of previous versions, but they show you the necessary information. 1. Area showing the firmware version installed in the device and the name of .xml file containing the configuration and keystrokes settings.
- Page 32 4. Buttons to select the Configuration or Game mode, button to launch and configure the Overlay and button to open the Macros window. Below you will find a complete explanation about these features and how they work. 5. Animated area where shows in an X/Y graphic the Roll and Pitch measures. The actual measure is showed with a red pointer.
- Page 33 7. Text window named Output to test the keystrokes. 8. Configuration area for keystrokes and explanations assigned to each slot and DX button status. When you press a button, the assigned DX button turns on and the keystroke is shown in the Output box. This area contains a textbox for the slot names, buttons to SWAP, COPY, PASTE and CLEAR the slot information and two buttons to show Keystrokes/Explanations and buttons names.
-
Page 34: Mjf_Fw_F16-18 Firmware
Falcon BMS only supported a maximum of 32 buttons per HID, so if you have installed an old program version, it will be necessary update it to the last version. Other new feature included in this firmware is that it supports the new RealSimulator v2 grips with haptic feedback. - Page 35 Special Modes Menu as with the classic firmwares. In any way, if you are going to connect a RS grip to the FSSB-R3 Lighting this firmware allows you to play without connection problems because the FSSB-R3L assumes all the stick functions and the Bluetooth connection isn’t necessary.
- Page 36 FSSB-R3L with a TM compatible grip As you can see, the new FSSB-R3 RH tab includes new functionalities as keystrokes, macros, overlay generation and other new settings. Every FSSB-R3L slot has the following settings: • HAT as POV or TRIM. •...
- Page 37 When you plug in the FSSB-R3L with this firmware installed to an USB port, the joystick will be displayed in Windows and all applications that can handle HID devices, with the name “FSSB R3 MJF SGRH”, as you can see in the next image in the Game Controllers window.
-
Page 38: Rs_Hid_Dev_Tool And Fssb-R3L + Rs Grips
RS_HID_DEV_TOOL and FSSB-R3L + RS Grips There are two important concepts that you need to know before starting with the explanation of how this FSSB-R3L firmware and RS_HID_DEV_TOOL work. The first one is that the RS_HID_DEV_TOOL application can work in two modes selectable by buttons: in Configuration Mode and in Game Mode. - Page 39 The program saves the information in two places: a) On the computer, in an .xml file, in the folder %APPDATA%\Realsimulator Data\FSSB R3. Here, it saves the configuration settings, the keystrokes and the explanations associated with all slots.
-
Page 40: How This Firmware Works
How this firmware works From the point of view of FSSB-R3L, the RS grip is a grip with buttons and hats and a rotary switch. The Rotary switch is placed under the TRIM hat switch cap, as a black ring with rotary movement, and it allows, with a single thumb movement, to swap between the 8 configurable memory slots that the FSSB R3L has, allowing to reconfigure your... - Page 41 In normal operation (with the RS_HID_DEV_TOOL closed) you can change its settings immediately with the rotary switch, selecting another slot. When the RS_HID_DEV_TOOL is opened the user can change the settings of this area with the buttons and numeric Up/down controls to configure it. Finally with the Save button can save the configuration in the non-volatile area.
- Page 42 (Instant = changed, Memory = unchanged, Flash = unchanged) 3. Change the Roll sensitivity to 1,97 lb (Instant = changed, Memory = unchanged, Flash = unchanged) 4. Click the Save button to pass the information from Instant area to the slot memory in Memory area and in Flash memory.
-
Page 43: Slot Configuration
confirmation will be sent. (Instant = unchanged, Memory = unchanged, Flash = changed) 7. Finally, you should save the configuration in a file on your computer to restore it when you want, or to share it with your friends. To do this, click File in the upper menu bar and select Save to keep the file name or Save As to change it, and press Save in the folder dialog to finish. -
Page 44: Full Scale Control (Fsc)
In every slot you can configure the following: a) Analog settings: • Full Scale Control. • Roll Sensitivity. • NASA Roll sensibility. • Pitch Sensitivity. • NASA Pitch Sensibility. • Roll Control Assistance. • BFA Roll level. • BFA Pitch level. •... -
Page 45: Roll Sensibility
FSC = 4:4 FSC = 2:4 ROLL SENSIBILITY This control allows changing the Roll axis sensibility in discrete steps from 1.30 lb. to 13 lb. The step value is not fixed; it is variable in function of sensibility value. It goes from small values of 0,025 lb. -
Page 46: Pitch Sensibility
In short, since your arm is stronger when pulling inward than outward, they found that making rolling right more sensitive than rolling left was more ergonomic. Rolling left, the stick had a maximum displacement at 8 lbs. Rolling right, the stick had a maximum displacement at 6 lbs. -
Page 47: Roll Control Assistance (Rca)
Equal to in the previous NASA Roll adjust, if you want to adjust more realistically your stick, adjust the NASA Pitch sensibility between a value of 110% and a 133% and find the more comfortable value for you. ROLL CONTROL ASSISTANCE (RCA) This feature enables (ON) and disables (OFF) the Roll Control Assistance. -
Page 48: Roll And Pitch Trim
This feature allows the user to reduce the sensitivity of the axes to increase precision in maneuvers that require precise or small inputs, such a refueling. The feature is activated through an ON/OFF button and the sensitivity reduction is shown numerically in a text box and modified with an Up/Down indicator. “Trigger 1” enables/disables the feature while it is pressed, i.e., if you enable this feature by setting the button in ON, when you press the trigger button, the axes measures will be reduced to the percent selected in the value textbox. -
Page 49: Keystrokes On/Off
Hardware TRIM selects a different option than None. With the system enabled you can use the TRIM hat switch to manual and slowly trim the attitude of your plain in the axes selected by the selector or to apply a correction over a previous trim value. Additionally to this previous way to trim the plain, there is another fast possibility to trim the plain attitude;... -
Page 50: Sound (On/Off)
HAT POV Up in POV mode HAT POV Up in TRIM mode DX Trim buttons are always operatives whether the HAT button is on TRIM or POV option; POV (Point of View) option is only operative when HAT button is on POV. SOUND (ON/OFF) Let you activate and deactivate the beep sound. -
Page 51: Dx Center Buttons Mode
DX buttons in OFF DX buttons in ON Finally, the animated area with the joystick does not show actions when disabled. DX CENTER BUTTONS MODE The F16SGRH has hat switches in TRIM, RW, NWS, TMS, DMS, CMS, PADLE and PINKY switches as you can see in the image below. Each hat switch has 5 positions: up, right, down, left and center, although some of them don’t use the 5 positions. - Page 52 In ON mode, all center positions are enabled. This mode is also called Native mode because all assigned combinations are available. In COMP mode, all hat switches work as in the real stick, i.e. when you press the NWS switch only the DX button 1 is enabled, it does not matter in what direction you press the hat switch, only the DX button 1 is enabled.
-
Page 53: Warning Sound Level
button press. In the image below, you can see in orange color the center positions available only by double click. This mode corrects the problem of sending false DX buttons that happens in ON mode when you press a combined action of center + another position. For example, in ON mode, when you press to activate the DX button 48 (WR Center + Up), the DX buttons 1 and 48 are active. -
Page 54: Keystrokes And Explanations
We have implemented this feature in the FSSB-R3L with a warning sound and a light blinking. The level is showed on a textbox and the selection is done with the Up/Down indicator associated, with range of 1% to 99% in steps of 1%. Value in textbox of 1% disables the feature both for the warning and for the maximum alarm. - Page 55 is saved in volatile memory, but it is only saved in flash memory when you press the alert button (for a more detailed explanation, please visit the section “How this firmware works”) and it is saved to a file when press File > Save. As said in other sections of User Guide, remember to save in both parts regularly.
- Page 56 Next, with the button “Explanation/Keystrokes” in Explanation, click the text box assigned to the DX button lighted and a new window will be displayed to enter the key codes sequence. In the window, you find information about the Actual Key Code assigned to the DX button, the standard buttons “CANCEL”...
- Page 57 Finally, you can check the keystroke operation. For that, click the CLEAR button associated to the Output text box to clear its content and press the “Trigger 1” switch in the stick and check that the key codes entered are shown in the“Output” text box. To send the keystrokes, it is necessary to have the Keystrokes button ON.
- Page 58 IMPORTANT: Key codes input in the InputKeyScan window is made according to the key map of USA keyboard, this is used in the games to assign actions to keys. Below is an image of this US key map. And here, as an example a keyboard map of DCS for the A-10 Warthog. As you can check, both key maps have the same keyboard symbol layout, so users with this keyboard have the keys in the same place than the game keyboard map.
-
Page 59: Macros
In conclusion, all you need for a correct operation is the keyboard map of the game or a USA keyboard layout printed and you can press on your keyboard the key of the game key map although it is different. Here you have a link to download and print the USA keyboard layout: https://en.wikipedia.org/wiki/British_and_American_keyboards#/media/File:KB_United_States-NoAltGr.svg MACROS... - Page 60 The system allows configuring up to a maximum of 10 macros (0 to 9) selectable with the numeric Up/Down control Macro Num. Below the numeric control, there is a text box where the user can write a title to easily remember the macro function. Each macro can accept 20 configurable events and each event can use a Key code and a Delay in 1/10 seconds during which the keystroke will be sent.
- Page 61 We have assigned a time of 1/10 seconds as time to send each keystroke. Also, you can see you forgot to include the time of 2 seconds the simulator needs to execute the keystroke “A”. To solve this problem, you can use the extra actions assigned to the right mouse button: Insert, Delete and Exit.
- Page 62 When you click “0”, all windows are closed automatically and the text box assigns the “MACRO,0”, as you can see in the picture below. Now, it is time to test the macro. For that, press Trigger 1 (DX button 0) and verify the sequence and times in the output window.
-
Page 63: Dx Events And Keystrokes Generation By Pulses
Save file dialog Load file dialog DX EVENTS AND KEYSTROKES GENERATION BY PULSES This new feature aims to generate events in a cadent manner following the ON/OFF time pattern defined by the user while the button is pressed. It allows to automatically send pulses instead of an ON signal while the button is pressed. -
Page 64: Shifter And Toggle
Let us see the sequence when we press Trigger 1 (button 0) more than 0,1 second and the sequence when we release before the time limit: TRIGGER TRIGGER 1 PRESSED PRESSED PAUSE PAUSE 1/100s SHIFTER AND TOGGLE These two new functions allow to change the active slot to a predefined slot through an activation of a previously assigned button, without the use of the rotary switch. -
Page 65: Digital Mouse
This haptic vibrational feedback is only available in the Realsimulator v2 grips. At this moment, the feature is already associated to the warning and maximum force signals, by generating two continuous vibrations of different levels. This feature complements the existing Light and Sound features and offers a clear feedback to the VR users. -
Page 66: Neutral Position Adjustment (Npa)
independent of slot. These are: • Neutral Position Adjustment (NPA). • Angle adjust. • DX/Raw measures indicators. • Overlay. • Documentation. • Load, save and print a .xml configuration file. NEUTRAL POSITION ADJUSTMENT (NPA) This is a feature with no access from the RS_HID_DEV_TOOL, but very important because it let you at any time, even in flight time, adjust or compensate any possible physical distortion in the gravity vector over you FSSB R3L. -
Page 67: Dx/Raw Measures Indicators
and we have rotated the base for a comfortable access to the buttons stick. Now apply force to the stick according to the Y axis of the cabin, or towards our chest or moving away from it perpendicularly. In this way, we will get an answer in the X/Y graph as image below left. - Page 68 access it by clicking on the button Overlay Settings. As we explain previously the RS_HID_DEV_TOOL has two working modes: Configuration mode and Game mode. We suggest to change the mode to Game before clicking the Overlay Setting button, so everything will work properly and we won’t need to return to the main window to change the mode.
- Page 69 (dot, dot, dot, … ) associated to the Warning Sound Level setting of FSSB-R3 Lighting Right Hand. The tone volume is controlled with the upper track bar. This feature is not associated with the program detection like the Display Overlay.
-
Page 70: Documentation
With this action, the main window of RS_HID_DEV_TOOL will also be automatically minimised. Finally, the configuration shown in the RS Overlay Settings window is automatically saved in the folder “%APPDATA%\Realsimulator Data\FSSB R3\” with the same name as the .xml configuration file and the extension .GameList. DOCUMENTATION The program includes a direct and quick option to access the User Guide. - Page 71 save it in the stick if it is connected (see the next section for offline mode). • Save: to save the actual slots configuration with the same name as actual. • Save As: to save the actual slots configuration with a different name from actual. When a configuration file is opened, it is sent to the device to be active.
- Page 72 And similarly, if you have connected the RS F-18 grip, you will have this template: There, in the upper part, you can find the Slot Name and Slot number of the slot shown and in the lower part the File Information and the Slot Configuration. Also, in the upper part, you can see the Print Selection area that enables you to print the slot shown, using the button “Print Actual”...
-
Page 73: Rs_Hid_Dev_Tool And Fssb-R3L + Tm Compatible Grips
To print only one slot, first select the slot in the lower line by clicking the box number and it will change to lime colour. Finally, click the Print Active button. To print a selection of slots, first click the ALL or the Active button if you want to print a selection of actives and no active slots or only active slots. - Page 74 • Warning Sound Level: 1% …. 99%. • Angle Adjust: -180º …. 180º. • Roll Control Assistance (RCA): ON / OFF. • Precision Mode: ON / OFF (0-100%). In the RS_HID_DEV_TOOL window you can see the previous features enabled and the rest disabled in gray.
-
Page 75: Smm (Special Modes Menu) Launcher
DMS Right DMS Down DMS Left CMS Up CMS Right CMS Down CMS Left CMS Centre 19 - 26 Spare Trim Up Trim Right Trim Down Trim Left 31 - 63 Spare DX Trim buttons are always operatives whether the HAT button is on TRIM or POV option;... -
Page 76: Sound On/Off Control
Press SMM launcher whatever it be (CMS center or Paddle + Pinky) Press HAT Up -> HAT as POV (Default) Press HAT Down -> HAT as TRIM control over DX buttons 27, 28, 29 and 30 SOUND ON/OFF CONTROL Let you activate and deactivate the beep sound. How it works: Press SMM launcher whatever it be (CMS center or Paddle + Pinky) Press Paddle + HAT Left two seconds ->... -
Page 77: Zeroize
ZEROIZE Launching the Zeroize option you will reset all variables to default values. How it works: Press SMM launcher whatever it be (CMS center or Paddle + Pinky) Press Trigger2 -> Zeroize will set all variables to default values. MEMORY SLOTS The FSSB R3L has four memory slots to save custom configurations. -
Page 78: Ssf Firmware
SSF Firmware EMYCSA RealSimulator Date: 29-12-2022 Version: 3.01 PICTURE : SSF _FW_2_00_2.FSSB_R3 UBLISHED IRMWARE ERSIONS DESCRIPTION SSF firmware is the MJF firmware customized with the suggestions and necessities of space ships fighter gamers. The modifications included are a third axis (Yaw), only one additional DX Button set, and some controls and functions to improve the flight precision and swap between axes quickly. - Page 79 In this case, you can see two FSSB R3 SSF RH devices. The first (upper) show the standard joystick information, i.e., Roll, Pitch and Yaw axes, 32 DX buttons and Point of View Hat, and the other (lower) only show a second DX buttons set. First device Second device With the RS_HID_DEV_TOOL program you have the possibility of enable or remove...
- Page 80 CMS Right CMS Right CMS Down CMS Down CMS Left CMS Left CMS Centre CMS Centre Trim Up Trim Up Trim Right Trim Right Trim Down Trim Down Trim Left Trim Left 24 - 32 Spare Spare Trim buttons (20 to 23) are operatives when HAT is in TRIM option; in POV (Point of View) option is operative the DX Point of View HAT.
-
Page 81: Smm (Special Modes Menu) Launcher
• Light: ON / OFF. • DX Button: ON / OFF. • Add/Remove Buttons: 1 / 2 devices. • Full Scale Control (FSC): 4:4 / 3:4 / 2:4 / 1:4. • Roll Sensibility: 1,3 …. 13 lb. • NASA Roll Sensibility: 50% ..200%. •... -
Page 82: Neutral Position Adjustment (Npa)
- Change to CMS Centre as launcher. Press Paddle + Pinky -> beep, beep -> press CMS centre. - Change to Paddle + Pinky as launcher. Press CMS Centre -> beep, beep -> press Paddle + Pinky. NEUTRAL POSITION ADJUSTMENT (NPA) NPA let you at any time, even in flight time, adjust or compensate any possible physical distortion in the gravity vector over you FSSB R3L. -
Page 83: Roll And Pitch Sensibility Control
How it works: Press SMM launcher whatever it be (CMS center or Paddle + Pinky) Press DMS Up -> 4:4 Full range (default) Press DMS Right -> 3:4 Full range Press DMS Down -> 2:4 Full range Press DMS Left -> 1:4 Full range ROLL AND PITCH SENSIBILITY CONTROL TMS controls sensibility in Roll and Pitch axes. -
Page 84: Precision Mode On/Off
Press Paddle and hold it pressed. Press CMS in one way for two seconds. UP -> Slot 1. RIGHT -> Slot 2. DOWN -> Slot 3. LEFT -> Slot 4. To recover a profile (load data from the slot and configure the R3L) Press SMM launcher whatever it be (CMS center or Paddle + Pinky) Press CMS in one way for two seconds. -
Page 85: Ssf Lh Firmware
SSF LH Firmware EMYCSA RealSimulator Date: 29-12-2022 Version: 3.01 PICTURE : SSF _LH_2_00_2.FSSB_R3 UBLISHED IRMWARE ERSIONS DESCRIPTION SSF LH firmware is the SSF firmware for left hand joysticks. At this moment the firmware has the same features than RH firmware but has been customized with a different VID_PID to allow the coexistence with the standard right hand FSSB-R3. - Page 86 In this case, you can see two FSSB R3 SSF LH devices. The first (upper) show the standard joystick information, i.e., Roll, Pitch and Yaw axes, 32 DX buttons and Point of View Hat, and the other (lower) only show a second DX buttons set. First device Second device With the RS_HID_DEV_TOOL program you have the possibility of enable or remove...
- Page 87 CMS Right CMS Right CMS Down CMS Down CMS Left CMS Left CMS Centre CMS Centre Trim Up Trim Up Trim Right Trim Right Trim Down Trim Down Trim Left Trim Left 24 - 32 Spare Spare Trim buttons (20 to 23) are operatives when HAT is in TRIM option; in POV (Point of View) option is operative the DX Point of View HAT.
-
Page 88: Smm (Special Modes Menu) Launcher
• DX Button: ON / OFF. • Add/Remove Buttons: 1 / 2 devices. • Full Scale Control (FSC): 4:4 / 3:4 / 2:4 / 1:4. • Roll Sensibility: 1,3 …. 13 lb. • NASA Roll Sensibility: 50% ..200%. • Pitch Sensibility: 4 …. 13 lb. •... -
Page 89: Neutral Position Adjustment (Npa)
- Change to Paddle + Pinky as launcher. Press CMS Centre -> beep, beep -> press Paddle + Pinky. NEUTRAL POSITION ADJUSTMENT (NPA) NPA let you at any time, even in flight time, adjust or compensate any possible physical distortion in the gravity vector over you FSSB R3. How it works: Press SMM launcher whatever it be (CMS center or Paddle + Pinky) Press Trigger1, leave the stick alone and wait until the sounds finish. -
Page 90: Roll And Pitch Sensibility Control
Press DMS Up -> 4:4 Full range (default) Press DMS Right -> 3:4 Full range Press DMS Down -> 2:4 Full range Press DMS Left -> 1:4 Full range ROLL AND PITCH SENSIBILITY CONTROL TMS controls sensibility in Roll and Pitch axes. There are two ways to adjust the sensibility in axes, with preset values or continuously step by step, every 0.5 lb. -
Page 91: Precision Mode On/Off
RIGHT -> Slot 2. DOWN -> Slot 3. LEFT -> Slot 4. To recover a profile (load data from the slot and configure the R3) Press SMM launcher whatever it be (CMS center or Paddle + Pinky) Press CMS in one way for two seconds. UP ->... -
Page 92: Setting Up Your Game For The Fssb-R3L
Setting up your game for the FSSB-R3L EMYCSA RealSimulator Date: 29-12-2022 Version: 3.01 PICTURE DESCRIPTION Overview This section is focused mainly for beginners to give them a first overview on how to configure the main flight simulation games to integrate correctly the FSSB-R3L. - Page 93 As you can see there are three game devices connected to the computer: the F16SGRH, the FSSB-R3 Lighting and the TUSBA for the F-16 throttle. As you have already read in this document we suggest unpairing the F16SGRH if we use it with the FSSB-R3L to avoid duplication of information.
-
Page 94: Falcon Bms
As you can see in the previous composition image both mentioned rules are met. Finally, there is an important concept you must remember: how your device can interact with the game. Although surely you know it, I will repeat it; your device has got the next features: •... -
Page 95: Dx Buttons
After this you can move the stick and check the center ball of X/Y graphic responds to your movement. Also you can check the 8 JOYSTICKS BUTTONS work when you press the grip buttons. • S1: Trigger 1 • S5: NWS •... - Page 96 Manual.pdf”) where you will find an extensive explanation about the how to do it. If you have a FSSB-R3 Warthog or a FSSB-R3 Lighting with the classic firmwares, your device are not able to send keystrokes, so you will need to use the DX buttons.
- Page 97 • Click on the Import Key File button to import the key file, in our example “BMS – Full.key”. • Verify the M3 cell show in green the text: “Imported Key File is OK”. • Select the TM Warthog tab and choose the option Warthog Stick only. This file only use the 19 first DX buttons, if you want use the rest of available buttons you will have to modify the profile creating a new profile from this one in the existing tabs named Own #1 to Own #10.
-
Page 98: Keystrokes
• You can repeat the action with other buttons to verify them. KEYSTROKES If you have a FSSB-R3 Lighting with a firmware installed with support for keystrokes generation as the released MJF_F16-18_4 that has keyboard emulation, you can use 98 / 110... - Page 99 this option. As we said before in previous sections, it is the key file who has the key map with the relation between the keys and the actions. Fortunatly it is already done the great work of generate the files and the keyboard layout to help us. We will show with an example how to add a new action to to our FSSB-R3L, we are going to add the action “EJECT”...
-
Page 100: Dcs
After click the OK button you can check it in BMS Falcon. As you can see, it is a very easy method and also allows you introduce until 8 x 64 differents actions. Finally, as general rule, don’t forget disabling always the DX Button button in the slot where you use Keystrokes. -
Page 101: Axes
Sim on the Aircraft Control Mode drop down. AXES In our example, we will use the two axes of FSSB-R3L for Pitch and Roll, that as you have seen before they are located in the first HID device of FSSB R3L. For throttle we will use the TUSBA device. -
Page 102: Point Of View
well configured (green boxes) but the Throttle axis is bad assigned, it is assigned to JOY_RZ and it must be JOY_RY; so first we will delete the actual axis and after we will assign the axis to the correct value by double click over the box and selecting JOY_RY. We have finished the axes configuration, so it is a good moment to save our configuration by click on the SAVE PROFILE AS with the name F16_Sample. -
Page 103: Dx Buttons
And this will be the definitive configuration after delete the default non valid assignations. DX BUTTONS Now we will see an example about how to assign a button to an action. We wil assign the individual Up and Down Landing Gear movement to the Up and Dow switches of Weapon Release swicth (I am doing the example with a F16SGRH grip). -
Page 104: Keystrokes
We will repeat the action wiht the Landing Gear Down to finish. KEYSTROKES You can only use this method to generate actions if you have a FSSB-R3 Lighting with a firmware installed with support for keystrokes generation as the released MJF_F16- 18_4 that has keyboard emulation. - Page 105 When complete the profile you can test it on the Ouput box and if every is OK, don’t forget to save the profile. As general rule, I suggest to disable the DX Button button in the slot where you use Keystrokes to prevent undesirable actions.
-
Page 106: Faq
FAQ Links: • I have just received my RealSimulator device and I want to install it, but I do not find the drivers in anyplace. • I can’t update the firmware of my device with DCC. -
Page 107: I Have Just Received My Realsimulator Device And I Want To Install It, But I Do Not Find The Drivers In Anyplace
MS operating system. The FSSB-R3 will work in all situations. RealSimulator provides two tools to configure and upgrade the device: Device Control Center (DCC): is the firmware update tool for the RealSimulator devices. RealSimulator HID Device Tool (RS_HID_DEV_TOOL): is a GUI application to configure and calibrate RealSimulator devices. -
Page 108: My Device Has Suddenly Stopped Working After Connecting It Or Turning On The Computer
My device has suddenly stopped working after connecting it or turning on the computer. As the title says, if sometime your device does not work after connect it to the computer or after a power on and you are running Windows 10, then please, read this paragraph. -
Page 109: How To Centre My Device
FSSB R3L. The procedure to launch this feature depends of type of grip you have mounted in the FSSB-R3L. With Realsimulator grips the sequence is: Trigger 1 + NWS Center 109 / 110... -
Page 110: I Can't Centre My Device, Is It Damaged
With TM and compatible grips: Press SMM launcher (CMS center or Paddle + Pinky) Press Trigger 1 After press the buttons sequence and during the adjust time, the base will sound an intermittent beep and a green light will flash (if they are enabled). Please, release the grip during this time and don’t move the FSSB-R3L.
Need help?
Do you have a question about the FSSB-R3 Lighting and is the answer not in the manual?
Questions and answers