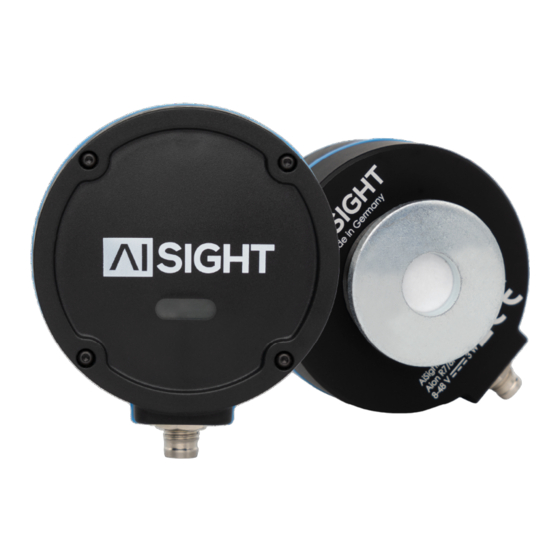
Summary of Contents for AiSight Aion
- Page 1 Service and installation instructions AiSight Aion Gertraudenstraße 10-12, 10178 Berlin Email: info@aisight.de Phone: +49 (0) 30 40363399 V1.0...
-
Page 2: Table Of Contents
Powering with the AC Power Supply 3.2.2. Powering with DC cable 3.2.3. Cable Management 3.3. Connecting 3.3.1. Required parts 3.3.2. Sensor Node Overview 3.3.3. Wi-Fi Requirements 3.3.4. Provisioning Notes and Version Control Gertraudenstraße 10-12, 10178 Berlin Email: info@aisight.de Phone: +49 (0) 30 40363399 V1.0... -
Page 3: Introduction
Introduction Aion measures vibration, geomagnetic, and temperature data of your machine. The sensor picks up the vibration data of your machine which is then sent to our cloud. As a result, we can detect anomalies and faults in your machine and prevent bigger failures. Once a significant fault is detected you will get notified and you will be able to repair the damage in time without needing to stop the full production. - Page 4 This manual contains the requirements for the correct installation, provisioning, and operation of Aion designed for the sole purpose of condition monitoring. The Aion is designed for, and must only be handled and installed by trained personnel. Not following this manual may cause malfunction of the sensor node, unprecise anomaly detection, damage to the machines and to the environment.
-
Page 5: Proper Handling
To drop the item ● Hit the item against sharp or hard surfaces ● Touch the pins of the connector of the Aion connector or its power supply with any ● metal tools or conductive devices Use excessive force when mounting the unit ●... -
Page 6: Caution And Warnings
1.2. Risk Assessment The risk assessment of the sensor is based on the CENELEC GUIDE 32 and it can be shared. Please contact AiSight if you need any further information. 1.3. Compliance 1.3.1 FCC Compliance Statements This device complies with part 15 of the FCC Rules. -
Page 7: Ised Compliance Statements
2. L’appareil doit accepter tout brouillage radioélectrique subi, même si le brouillage est susceptible d’en compromettre le fonctionnement. Conformément aux exigences canadiennes (RSS-102, 2.6), une distance minimale de 20cm doit être maintenue entre l'appareil et l'utilisateur pendant les opérations. Gertraudenstraße 10-12, 10178 Berlin Email: info@aisight.de Phone: +49 (0) 30 40363399 V1.0... -
Page 8: Service And Installation Instructions
Figure 4.1. The “x” axis is aligned with the logo, while the “y” is aligned with the M8 connector. The “z” axis covers the resulting dimension, perpendicular to the body of the sensor. The Aion can be installed on Motors, Pumps or Gearboxes through the magnet on its back. - Page 9 For additional information regarding the mounting of Aion, please contact AiSight. Safety Precautions The magnet on the back of the Aion is very strong, and it is mandatory to take exceptional care with handling it in the vicinity of magnetic surfaces and the user's fingers.
-
Page 10: Powering
AC power supply compatible with the product, the TRE25R240 with 3m long cable and female M8 4 pin connector, as shown in Figure 4.3. Figure 4.3 - AiSight custom power supply with M8 connector In cases where AC connection is not possible close to the machine (either by physical or... -
Page 11: Powering With The Ac Power Supply
The cable is present in both powering alternatives, and it must be securely installed independently. The customer can install the cable inside distribution trays and ducts. For external installation, if existing cables (for power or communication) or safe mechanical lines Gertraudenstraße 10-12, 10178 Berlin Email: info@aisight.de Phone: +49 (0) 30 40363399 V1.0... - Page 12 The white light will indicate that the sensor is on. The light should shortly change to a blue color, which will indicate that the sensor ready is ready for the next step. Gertraudenstraße 10-12, 10178 Berlin Email: info@aisight.de Phone: +49 (0) 30 40363399 V1.0...
-
Page 13: Connecting
Connect the sensor node to the power supply (TRE25240) or to the 24V power cable. Make sure the plug is securely tightened to the sensor connector. Once Aion has a blue steady LED light, as shown in Figure 4.5, it is ready to be provisioned using the app. - Page 14 Figure 4.6(b). Observe the node serial number on its lid and choose the matching number in the app. Gertraudenstraße 10-12, 10178 Berlin Email: info@aisight.de Phone: +49 (0) 30 40363399 V1.0...
- Page 15 Figure 4.7(a). Select the network that will be used for the nodes. Insert the network password, as shown in Figure 4.7(b). Gertraudenstraße 10-12, 10178 Berlin Email: info@aisight.de Phone: +49 (0) 30 40363399 V1.0...
- Page 16 Once the password is inputted, the app will move to the next screen, Figure 4.8. Initially, the app will confirm that it sent the credentials to the sensor node and, if everything is correct, confirm the Wi-Fi connection. Gertraudenstraße 10-12, 10178 Berlin Email: info@aisight.de Phone: +49 (0) 30 40363399 V1.0...
- Page 17 Figure 4.9. If the node stays with the yellow LED on, the network requirements presented at the beginning of this document must be reviewed. Gertraudenstraße 10-12, 10178 Berlin Email: info@aisight.de Phone: +49 (0) 30 40363399 V1.0...
- Page 18 Figure 4.9. Sensor node provisioned and connected to the Wi-Fi Gertraudenstraße 10-12, 10178 Berlin Email: info@aisight.de Phone: +49 (0) 30 40363399 V1.0...
-
Page 19: Notes And Version Control
All the suggestions on how to improve the service and installation must be sent to info@aisight.de Version Date Approved by Reason/Changes 22.06.2022 Alberto Rinaldi Part “Compliance” reviewed 09.02.2021 Alberto Rinaldi Initial version Gertraudenstraße 10-12, 10178 Berlin Email: info@aisight.de Phone: +49 (0) 30 40363399 V1.0...


Need help?
Do you have a question about the Aion and is the answer not in the manual?
Questions and answers