AiSight Aion User Manual
Hide thumbs
Also See for Aion:
- Service and installation instructions (19 pages) ,
- User manual (25 pages)
Table of Contents
Advertisement
Quick Links
Advertisement
Table of Contents

Related Manuals for AiSight Aion


Summary of Contents for AiSight Aion
- Page 1 User Manual AiSight Aion...
-
Page 2: Table Of Contents
Definitions and Glossary Proper Handling Caution and Warnings Risk Assessment Datasheet Package Sensor Node Description Sensor Orientation Storage Conditions Decommissioning Installation of Aion Mounting Mounting Accessories Powering Connecting Operating Notes and Version Control Gertraudenstraße 10-12, 10178 Berlin V1.0 Email: info@aisight.de... -
Page 3: Introduction
1. Introduction Aion measures vibration, geomagnetic, and temperature data of your machine. The sensor picks up the vibration data of your machine which is then going through our machine learning algorithm. As a result, we can detect anomalies and faults in your machine and prevent bigger failures. - Page 4 This manual contains the requirements for the correct installation, provisioning, and operation of Aion designed for the sole purpose of condition monitoring. The Aion is designed for, and must only be handled and installed by trained personnel. Not following this manual may cause malfunction of the sensor node, unprecise anomaly detection, damage to the machines and to the environment.
-
Page 5: Proper Handling
To drop the item ● Hit the item against sharp or hard surfaces ● Touch the pins of the connector of the Aion connector or its power supply with any ● metal tools or conductive devices Use excessive force when mounting the unit ●... -
Page 6: Risk Assessment
3.2. Risk Assessment The risk assessment of the sensor is based on the CENELEC GUIDE 32 and it can be shared. Please contact AiSight if you need any further information. Gertraudenstraße 10-12, 10178 Berlin V1.0 Email: info@aisight.de... -
Page 7: Datasheet
Input connector IEC Type C Input voltage 90 – 264 VAC Input frequency 47 – 63 Hz Output voltage Maximum output ripple <200 mV pk-pk Output power >18W Gertraudenstraße 10-12, 10178 Berlin V1.0 Email: info@aisight.de Phone: +49 (0) 30 40363399... - Page 8 72mm x 61mm x 26mm Weight 130g Mounting Accessories M5 tapped hole, magnet, motor fins adaptor, screw pad adaptor, food contact safe cyanoacrylate or industrial- grade epoxy Connectivity M8-4 connector Gertraudenstraße 10-12, 10178 Berlin V1.0 Email: info@aisight.de Phone: +49 (0) 30 40363399...
-
Page 9: Package
1x Sensor-Actuator power cable with a female M8 4-pin connector ● 1x 10ml general-purpose silicone grease ● 1x Motor fin adaptor ● 1x Threaded adaptor ● 1x SmCo Stainless Steel Magnet ● Figure 5.1 - Aion Packaging Gertraudenstraße 10-12, 10178 Berlin V1.0 Email: info@aisight.de Phone: +49 (0) 30 40363399... -
Page 10: Sensor Node Description
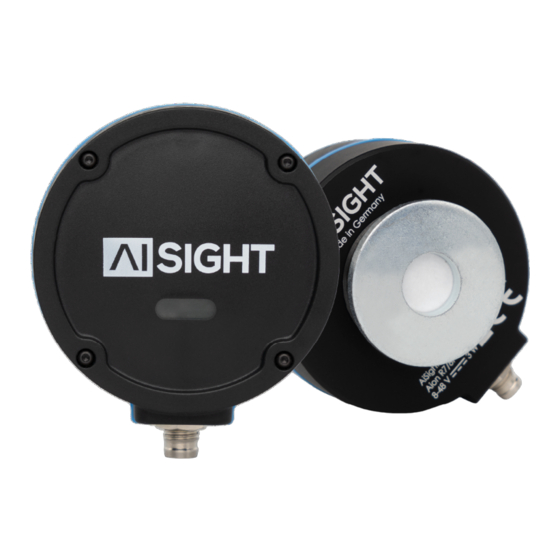
Figure 5.2 - Aion Figure 5.3 - Power Supply TRE25R240- 1131G64 The QR code is connected to a web address containing all the most updated information and guidelines given from AiSight to their customers. 5.1. Sensor Node Description Sensor node AiSight Logo... -
Page 11: Sensor Orientation
5.2. Sensor Orientation The Aion is a three axial vibration and geomagnetic sensor. The axes for both measurements are configured as shown in Figure 5.5. The “x” axis is aligned with the logo, while the “y” is aligned with the M8 connector. The “z” axis covers the resulting dimension, perpendicular to the body of the sensor. -
Page 12: Decommissioning
The user is permitted to remove and discard any remaining of adhesive parts (if included in the mounting options). 6. Installation of Aion To successfully install Aion and directly read the data on the AiSight dashboard three steps are needed: Mounting: Mount Aion with the help of the provided mounting accessories... -
Page 13: Mounting Accessories
It is advised to align the X or Y axes of Aion with the shaft of the machine. Figure 6.1 - Ideal mounting points for rotating machines 6.1.1. Mounting Accessories The Aion sensor can be equipped with various mounting accessories depending on the application and the customer’s needs. - Page 14 Once the mounting accessory is successfully fixed in the desired position of the machine, Aion sensor can be coupled to it and the User can go to step n. 2 of powering Aion. For additional information regarding the mounting installation procedure, please refer to the document “Service and Installation instructions”...
-
Page 15: Powering
TRE25R240 with 3m long cable and female M8 4 pin connector, as shown in Figure 6.3. Figure 6.2 - AiSight custom power supply with M8 connector use a 2-wire or 4-wire cable with M8 4-pin female connector to directly ●... - Page 16 Pin 4 [Black cable] - DO NOT CONNECT Only authorized and technically trained personnel should handle and install the power supplies and cables, specifically when access to panels and switchboards are necessary. Gertraudenstraße 10-12, 10178 Berlin V1.0 Email: info@aisight.de Phone: +49 (0) 30 40363399...
-
Page 17: Connecting
7. Connecting Once Aion has a blue steady LED light, it is ready to be BLE provisioned using the Aisight App available on the App store. https://apps.apple.com/de/app/aisight-ble-provisioning/id1531196751 Figure 8.1. Sensor node connected to power and ready to be provisioned The provisioning can be performed by the following steps: Download and open the AiSight App https://apps.apple.com/de/app/aisight-ble-... - Page 18 Gertraudenstraße 10-12, 10178 Berlin V1.0 Email: info@aisight.de Phone: +49 (0) 30 40363399...
- Page 19 Figure 4.15. If the node stays with the yellow LED on, the network requirements presented at the beginning of this document must be reviewed. Gertraudenstraße 10-12, 10178 Berlin V1.0 Email: info@aisight.de Phone: +49 (0) 30 40363399...
- Page 20 Figure 4.15. Sensor node provisioned and connected to the Wi-Fi A visual description of the provisioning procedure can be found in the video AiSight Aion | How to connect Aion to Wi-Fi. Gertraudenstraße 10-12, 10178 Berlin V1.0 Email: info@aisight.de Phone: +49 (0) 30 40363399...
-
Page 21: Operating
8. Operating The success of the installation of the Aion Sensor node can be checked by using the website dashboard validate.aisight.de. Interesting the MAC address in the field “mac address” and press the button “Go” to check the status of the sensor node (Figure 8.1). - Page 22 Aion are working correctly ○ Failure ○ Good ● Temp. : temperature in degrees Celsius measured by the embedded sensor in Aion ● P2P: values as factors of gravitational acceleration (G) of the peak-to-peak in the three axis (X, Y, Z).
-
Page 23: Notes And Version Control
This is the latest version of the documentation. We are open to corrections and improvements. All the suggestions on how to improve the service and installation can be sent to info@aisight.de Gertraudenstraße 10-12, 10178 Berlin V1.0 Email: info@aisight.de Phone: +49 (0) 30 40363399...
Need help?
Do you have a question about the Aion and is the answer not in the manual?
Questions and answers