Golight Stryker - Searchlight Manual
- Instruction manual (2 pages) ,
- Instruction manual (2 pages) ,
- Instruction manual (2 pages)
Advertisement
INTRODUCTION
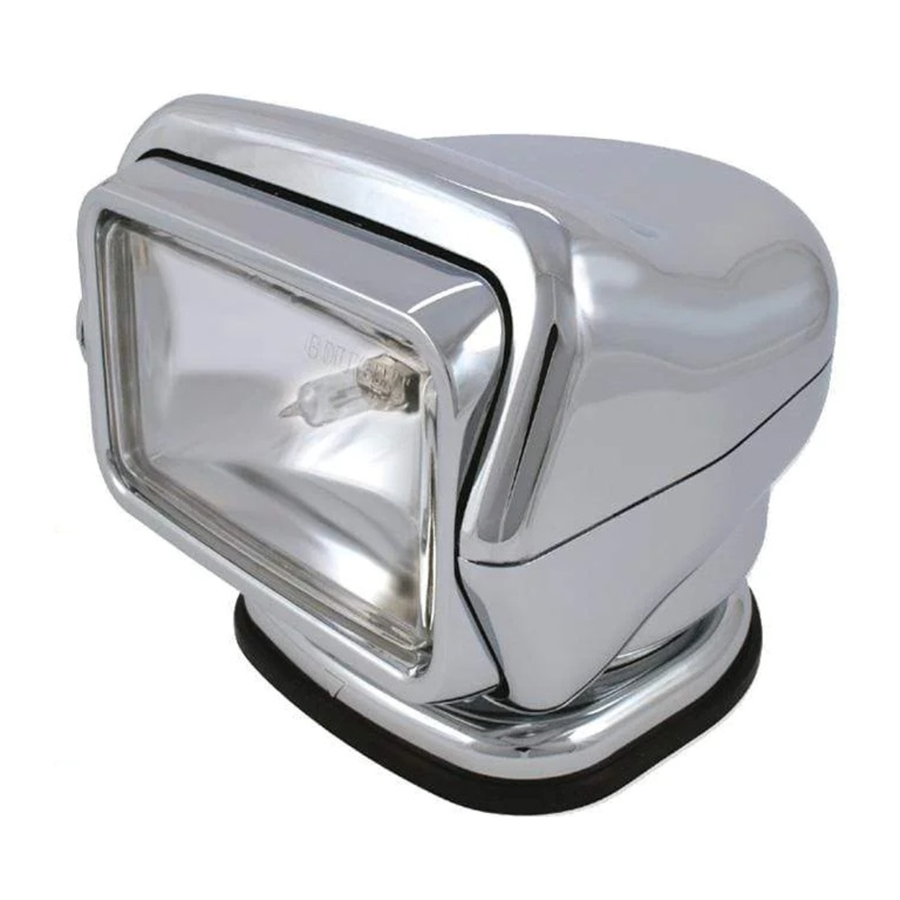
The Golight Stryker is designed to permanently attach to a vehicle. The 2-Speed Searchlight with Directional Flexibility is controlled by a wireless remote, which gives the operator a full 370° horizontal rotation and a 135° vertical tilt with fingertip control. The Stryker provides superior light penetration with the new Cr5 PentaBeam II technology.
The Stryker Includes:
- Stryker Searchlight
- Remote Control
- 2 GP Super Alkaline Batteries 23A 12V
- Rockguard
- Permanent Mounting Gasket
- Permanent Mounting Plate
- Mounting Screws
MOUNTING INSTRUCTIONS
Determine the location for the light on your vehicle or boat. Center the mounting plate with the vise screw on the mounting plate to the back. Mark the hole locations for the three mounting screws and drill a pilot hole for each with 1/8 inch bit. Fasten the stainless steel mounting plate with the 3 #10 – 16x3/4 type AB cross recessed pan head tapping screws, stainless steel. Drill a 1/4 inch hole in the center mounting plate hole to accommodate a power cord. Install the provided grommet in the hole. Bring the power cord through the grommet. When connecting the positive and negative wires keep in mind that the Stryker electronics are not polarized. You do not have to be concerned with connecting the positive and negative wires incorrectly. The 12volt DC power wire should be joined to the leads under the lamp with appropriate automotive wire attachments. Keep the wire connection above the mounting surface. It is recommended that the power wire be connected to an ignition circuit or install a separate on/off toggle switch between the light and the power source.
Wet mounting surface with a small amount of water or lubricant for easier installation, then place the light over the mounting plate by sliding the front of the light over the front of the mounting plate, first pull the light backwards, then seat the back of the light on to the mounting plate. Displace the back of the gasket and install the vise screw (provided). Tighten the vise screw using a Phillips head screwdriver. Replace the gasket.
Each spotlight needs to be wired on a single dedicated circuit and the power fused at 10 amps. With the power connected, your light is ready for operation.
PROGRAMMABLE REMOTE INSTRUCTIONS
The Golight Stryker is controlled with a programmable remote with 6561 different channels. This feature allows you the freedom to change the channel selection, and the receiver relearns the new selection.
PROGRAMMIJNG THE TRANSMITTER.
This light has been pre-programmed at the factory, and it is not necessary to re-program the transmitter, unless you experience outside interference.
![]()
Disconnect power by removing fuse or disconnecting vehicle battery.- Remove battery cover from remote control.
- Set the 7 dip switches to a selection of your choice. There are 3 positions on each; positive, negative and neutral. Use a small screwdriver and select a position for each dip switch. *Please note that the orientation of the +/- switch positions may vary among different models of wireless remote controls.
- Insert both GP 23A 12V batteries. Be sure batteries have adequate charge.
- Replace battery cover.
- Depress the on/off button and hold it down. Red LED will light.
- While holding the on/off button down, reinstall the power (replace fuse or connect vehicle battery).
- Keep your finger on the on/off button for 5-6 seconds, and then release. The light should now be programmed.

INSTALLATION OF WIRELESS DASH CONTROL
If you have a wireless dash control, please note that it is vital for this to be attached to a flat / smooth surface with the 4 mounting screws included. The arrow under the rubber cover should point up.
OPERATION OF THE UNT
- Using the remote control, turn on the light by depressing the on/off button.
- With the 4-way arrows on the remote control, rotate your light to the desired location. Depending upon conditions, the wireless remote may be used up to 100 feet from the Stryker.
- The speed of the light rotation can be controlled by depressing the fast/slow button one time and by depressing it again to restore the original speed.
- The spotlight should not be turned on when the snap on lens cover (rockguard) is attached.

Documents / ResourcesDownload manual
Here you can download full pdf version of manual, it may contain additional safety instructions, warranty information, FCC rules, etc.
Advertisement


Need help?
Do you have a question about the Stryker and is the answer not in the manual?
Questions and answers