Table of Contents
Advertisement
Quick Links
Technical Support and E-Warranty Certificate www.vevor.com/support
Induction Hob User Manual
LI4-65
MODEL:
We continue to be committed to provide you tools with competitive price.
"Save Half", "Half Price" or any other similar expressions used by us only represents an
estimate of savings you might benefit from buying certain tools with us compared to the major
top brands and doses not necessarily mean to cover all categories of tools offered by us. You
are kindly reminded to verify carefully when you are placing an order with us if you are
actually saving half in comparison with the top major brands.
Advertisement
Table of Contents

Related Manuals for VEVOR LI4-65


Summary of Contents for VEVOR LI4-65
- Page 1 Technical Support and E-Warranty Certificate www.vevor.com/support Induction Hob User Manual LI4-65 MODEL: We continue to be committed to provide you tools with competitive price. "Save Half", "Half Price" or any other similar expressions used by us only represents an estimate of savings you might benefit from buying certain tools with us compared to the major top brands and doses not necessarily mean to cover all categories of tools offered by us.
- Page 2 CustomerService@vevor.com This is the original instruction, please read all manual instructions carefully before operating. VEVOR reserves a clear interpretation of our user manual. The appearance of the product shall be subject to the product you received. Please forgive us that we won't inform you again if...
- Page 3 Warning-To reduce the risk of injury, user must read instructions manual carefully. This device complies with Part 15 of the FCC Rules. Operation is subject to the following two conditions:(1)This device may not cause harmful interference, and (2)this device must accept any interference received, including interference that may cause undesired operation.
-
Page 4: Table Of Contents
CONTENTS BEFORE USE ....................... 5 SAFETY INSTRUCTIONS .................. 6 INSTALLATION .....................8 ELECTRICAL CONNECTION ................9 Induction cooker related faults: ................ 10 TEMPERATURE LEVEL TABLE ..............14 TECHNICAL INFORMATION ................15 CLEANING ......................15 NOISES MADE BY THE HOB ................16 AFTER-SALES SERVICE ................. 17... -
Page 5: Before Use
BEFORE USE IMPORTANT: The cooking zones will not switch on if pots are not the right size. Only use pots bearing the symbol “INDUCTION SYSTEM” (Figure below) or enameled pots. Place the pot on the required cooking zone before switching the hob on EXISTING POTS AND PANS Use a magnet to check if the pot is suitable for the induction hob: pots and pans are unsuitable if not magnetically detectable. -
Page 6: Safety Instructions
SAFETY INSTRUCTIONS YOUR SAFETY AND THAT OF OTHERS ARE VERY IMPORTANT his manual and the appliance itself provide important safety messages, to be read and always observed. This is the warning / caution-safety symbol, regarding safety, warning of potential risks to users and other All messages relevant to safety specify the potential risk to which they refer and indicate how to reduce the risk of injury, damage and electric shocks due to incorrect use of the appliance. - Page 7 Do not touch the appliance heating elements during and after use. Do not allow the appliance to come into contact with cloths or other flammable materials until all the components have cooled sufficiently. Do not place flammable materials on or near the appliance. ...
-
Page 8: Installation
INSTALLATION After unpacking the product, check for any damage during transport. In case of problems, contact the dealer or the After-Sales Service. For built-in dimensions and installation instruction, see in below figures 2. It is essential that the Radiant Cooktop is well ventilated and that the air intake and exit are not blocked. -
Page 9: Electrical Connection
For safety the gap between the hob and any cupboard above it should be at least 760mm. ELECTRICAL CONNECTION Disconnect the appliance from the power supply. Installation must be carried out by qualified personnel who know the current safety and installation regulations. The manufacturer declines all liability for injury to persons or animals ... -
Page 10: Induction Cooker Related Faults
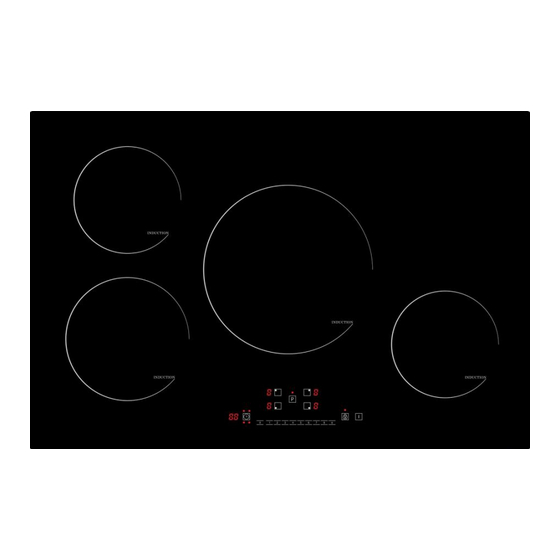
Customer Service Email: CustomerService@vevor.com (Please send relevant videos and pictures to our email address, and attach your Amazon order number. After confirming the problem, we will definitely... - Page 11 INSTRUCTION FOR USE To avoid permanently damaging the glass-ceramic top, do not use: Pots with bottoms that are not perfectly flat. Metal pots with an enameled bottom. CONTROL PANEL LAYOUT Switching the hob On/Off To switch the hob on, press the button and the cooking zone displays light up.
- Page 12 Each cooking zone has various power levels, after selected the cooking zone, adjustable with the buttons, going from “1”: min. level, to “9”: max. level. Deactivation of cooking zones Select the cooking zone you wish to switch off. Press the corresponding button.Press the key “...
- Page 13 To deactivate the timer, press the “ ” button to set the display showing “00” or hold the button with the clock symbol for at least 4 seconds. Booster When this button is pressed, the cooktop stops at Max Power in five minutes.
-
Page 14: Temperature Level Table
TEMPERATURE LEVEL TABLE Temperature Type of Level use level cooking (indicating cooking experience and habits) Frying - Ideal for browning, starting to cook, frying level boiling deep frozen products, fast boiling Browning - Ideal for sautéing, maintaining a lively boil, sautéing - cooking and grilling High... -
Page 15: Technical Information
Note: The data in the table is for guidance only. The relation between the heat setting and the cooking zone consumption of power is not linear. When you increase the heat setting it is not proportional to the increase of the cooking zone consumption of power. -
Page 16: Noises Made By The Hob
TROUBLESHOOTING GUIDE Read and follow the instructions given in the section “Instructions for use”. Check that the electricity supply has not been shut off. Dry the hob thoroughly after cleaning it. If, when the hob is switched on, alphanumeric codes appear on the ... -
Page 17: After-Sales Service
the pots and pans used and the amount of food they contain, and are not indicative of a defect of any kind. In addition, the induction hob is equipped with an internal cooling system to control the temperature of electronic parts; as a result, during operation and for several minutes after the hob has been switched off, the noise of This is perfectly normal and essential for the cooling fan will be audible. - Page 18 Technical Support and E-Warranty Certificate www.vevor.com/support...
Need help?
Do you have a question about the LI4-65 and is the answer not in the manual?
Questions and answers