
Related Manuals for BREMA Maidaid M155-65


Summary of Contents for BREMA Maidaid M155-65
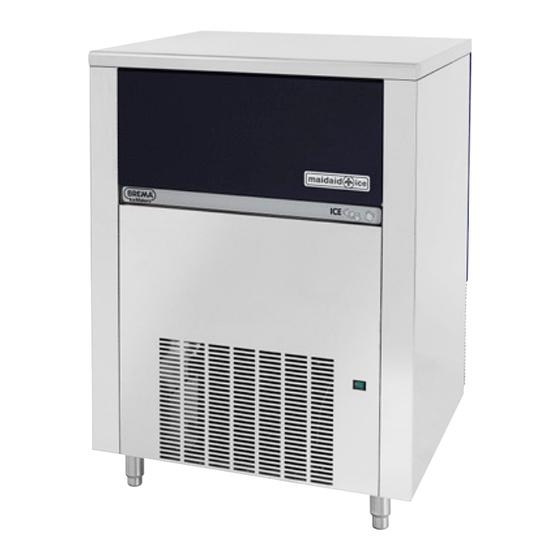
- Page 1 automatic ice-cube maker M22-5 M155-65 User & Installation Instructions 241635 rev. 00 • It is strictly forbidden to reproduce this instruction manual or any part thereof.
- Page 2 EC DECLARATION OF CONFORMITY The above-mentioned apparatus is designed for the production of ice. We the undersigned declare under our own exclusive responsibility that the ice maker referred to in this declaration is in full compliance with the requirements of the following European Directives, standard, regulations, technical specifications and subsequent modifications.
-
Page 3: Table Of Contents
Dear Customer, Congratulations on having chosen a quality product which will certainly fully meet your expectations. Thank you for having purchased one of our products. Please read this instruction manual carefully before using your new automatic ice-cube maker. TABLE OF CONTENTS IMPORTANT ADVICE AND RECOMMENDATIONS TECHNICAL SPECIFICATIONS ADVICE ABOUT TRANSPORTATION... -
Page 4: Important Advice And Recommendations
13 NOTES FOR CLEANING OF PRODUCT WITH ELECTRONIC TIMER (OPTIONAL FUNCTION) 13.1 CLEANING 13.2 SANITIZING 14 PERIODS AT A STANDSTILL The figures in this manual are of a general nature. Some details may therefore differ depending on the specific model. The Manufacturer declines all liability for any inaccuracies in this manual due to printing or transcription errors. - Page 5 WARNING: Do not use electrical apparatus in the ice compartments WARNING: Do not keep explosive substances in the apparatus compartment, such as aerosol spray cans with flammable propellant In the event of damage to the refrigerant circuit: switch off the machine immediately, disconnect it from the power supply, ventilate the environment, call authorized service.
- Page 6 - know and apply the national safety requirements applicable to this appliance In the event of the appliance being sold or transferred to another person, this manual must be handed over to the new user, in order to enable him to become familiar with the operation of the equipment and the corresponding advice and recommendations.
- Page 7 • in addition to rendering any form of warranty null and void, modifying (or attempting to modify) this appliance is extremely dangerous • open and close the door carefully without slamming it • do not use the ice container to cool or preserve food or drinks, as these operations could cause the drain system to become clogged, thus leading to the container filling up and water leaking out •...
-
Page 8: Advice About Transportation
Should you decide to scrap appliance, first disconnect the power cable from the mains, and then cut the cable off. In addition, proceed as follows: • break off and remove the door in order to prevent the possible danger of a child getting trapped inside •... -
Page 9: Connection Diagram
The appliance must be installed by authorized personnel, in compliance with the current laws in force and the Manufacturer’s instructions. Once you have removed the packaging according to the instructions on the box, MAKE SURE THAT THE APPLIANCE IS IN A PERFECTLY GOOD CONDITION. -
Page 10: Connection To The Electricity Mains
• a tap must be installed between the water mains and the feed pipe of the appliance, so that the water supply may be shut off if necessary • where the feed water is particularly hard, you are advised to install a polyvalent cartridge filter. Any solid particles (e.g. sand) may be eliminated by installing a mechanical filter, which must be periodically inspected and cleaned. -
Page 11: Start-Up
6.2 START-UP When you start up the appliance the first time, or when you start it up again after a long period at a standstill, fill the basin manually with water (Fig. 8). This filling operation must be carried out by opening the door, raising the flaps (if any) and pouring the water directly into the internal basin. In the cycles subsequent to the initial one, the appliance will be filled with water in a fully automatic way. -
Page 12: Adjusting Dispensed Quantity
The appliance is equipped with an ice-cube dispenser (18) on the front. To take the required quantity of ice, place a glass or a suitable container under the dispenser and press the button (19) to turn on the supply. 8.1.a ADJUSTING DISPENSED QUANTITY (Fig. 11) IMPORTANT: •... -
Page 13: Automatic Cleaning (Optional Function)
Do not use corrosive substances to remove limescale from the appliance, because this will invalidate the warranty, and may cause serious damage to the materials and components of the appliance. Do not use jets of water to clean the appliance. All cleaning operations must be carried out only after the electric power and water supplies have been disconnected, as described previously, by professionally qualified and authorized personnel. - Page 14 8. remove top of appliance by lifting rear part and releasing it from front hooks (Fig. 18). NOTE: on some models the top is secured to the rear panel of the appliance with a screw, which must be removed before lifting the top and repositioned when cleaning and sanitizing operations are finished 9.
-
Page 15: Note For Ice Maker With Continuous Delivery
9. drain sanitizing solution remaining in pump body by introducing pressurised water into the suction pipe and checking that the water exits from the delivery pipe (Fig. 20) 10. thoroughly rinse inner basin, door and container with cold water 11. thoroughly rinse ice-cube slide, evaporator cover panel, sprayer bank and the corresponding side caps, flag support assembly, overflow pipe, pump filter and sprayer bank feed pipe under running water 12. -
Page 16: Note For Ice Maker With Vertical Evaporator System
To access pump filter and pump side of inner basin, see chapter 6. 11.5 NOTE FOR ICE MAKER WITH VERTICAL EVAPORATOR SYSTEM Perform cleaning and sanitizing operations as described in chapters 10 and 11, in accordance with the following instructions: •... -
Page 17: Operation
12.2 OPERATION The appliance has a thermostat probe in the ice bin, which stops ice production when the ice accumulated in the bin reaches the probe connected to the thermostat. When ice is taken from the bin, the thermostat will automatically reactivate ice production, thus creating a new supply of ice. FUNCTIONS ON/OFF PUSH BUTTON... - Page 18 Once the washing cycle is over, the appliance resumes its operation at the same point it was when the WASH push button was pressed. It is possible to exit at any time the washing cycle by pressing the WASH or the DEFR. push button. 13 NOTES FOR CLEANING OF PRODUCT WITH ELECTRONIC TIMER (OPTIONAL FUNCTION) To carry out the cleaning and the sanitizing operations, follow the directions below: 13.1 CLEANING...
- Page 19 4. with plastic tool, push the “W” button (wash position) through dedicated hole below “ON/OFF” button. (Fig 17) The blue LED starts to flash. The appliance will carry out a complete washing and rinsing cycle 5. switch off machine and disconnect it from electricity mains and water supply 6.
Need help?
Do you have a question about the Maidaid M155-65 and is the answer not in the manual?
Questions and answers