Table of Contents
Advertisement
Quick Links
Welcome to the family. Let's get started.
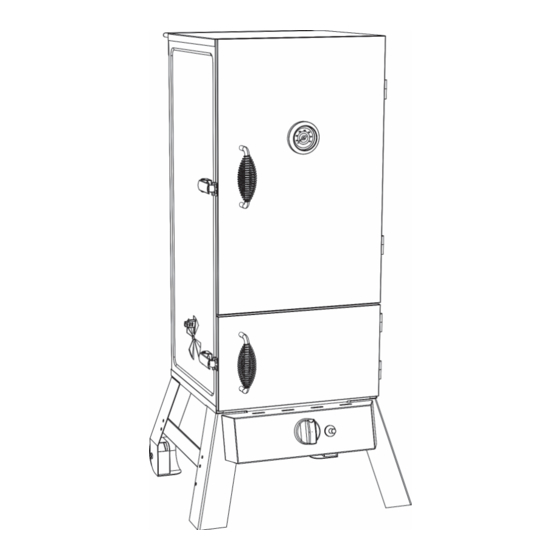
MPS 230S
DUAL FUEL SMOKER
Manual applies to the following model number(s)
MB20051620
Your model number
Mfg. Date - Serial Number
These numbers are located on the rating label of the unit.
IMPORTANT
Please record this information immediately and keep in a
safe place for future use.
Master it. Masterbuilt.
Manual Code: 9805200004 200812-GH
Advertisement
Table of Contents

Subscribe to Our Youtube Channel
Related Manuals for Masterbuilt MB20051620


Summary of Contents for Masterbuilt MB20051620
- Page 1 Your model number Mfg. Date - Serial Number These numbers are located on the rating label of the unit. IMPORTANT Please record this information immediately and keep in a safe place for future use. Manual Code: 9805200004 200812-GH Master it. Masterbuilt.
-
Page 2: Carbon Monoxide Hazard
DANGER MB-DFS-EU-190411 IF YOU SMELL GAS: 1. SHUT OFF GAS TO THE APPLIANCE. 2. EXTINGUISH ANY OPEN FLAME. 3. OPEN DOOR. 4. IF ODOUR CONTINUES, KEEP AWAY FROM THE APPLIANCE AND IMMEDIATELY CALL YOUR GAS SUPPLIER OR YOUR FIRE DEPARTMENT. DANGER •... - Page 3 WARNINGS AND IMPORTANT SAFEGUARDS READ ALL INSTRUCTIONS When using this appliance, basic safety precautions should always be followed including the following: • USE OUTDOORS ONLY. • Read the instructions before using the appliance. • WARNING: Accessible parts may be very hot. Keep young children away. •...
- Page 4 • Do not use wood pellets. • Never use smoker for anything other than its intended use. • Accessory attachments not supplied by Masterbuilt Manufacturing, LLC are NOT recommended and may cause injury. • Always use smoker in accordance with all applicable local, state and federal fi re codes.
- Page 5 DO NOT USE. The hose must be replaced prior to the smoker being put into operation. The hose assembly supplied with smoker MUST be used. For replacement parts, if needed, contact Masterbuilt Customer Service at 44 20 8036 3201 (UK) or 0031 4 7799920 (EU).
-
Page 6: Cleaning And Storage
WARNINGS AND IMPORTANT SAFEGUARDS CLEANING AND STORAGE • ALWAYS MAKE SURE SMOKER IS COOL TO THE TOUCH BEFORE CLEANING AND STORING. • Keep smoker area clear and free from combustible materials such as gasoline and other fl ammable vapours and liquids. •... - Page 7 Structural Proximity and Safe Usage Recommendations REMINDER: Maintain a minimum distance of 3 m from rear, sides and top of smoker to overhead construction, walls, rails or other combustible construction. This clearance provides adequate space for proper combustion, air circulation and venting. Before using smoker, check wind direction and place LP gas cylinder DOWNWIND 30.5 cm in upright position.
-
Page 8: Leak Testing
FUMES TO DIMINISH BEFORE LIGHTING SMOKER. IF BUBBLES CONTINUE TO APPEAR DURING ANY PORTION OF LEAK TEST, STOP. DO NOT USE THE SMOKER. CONTACT LOCAL PROPANE DEALER OR MASTERBUILT CUSTOMER SERVICE AT 44 20 8036 3201 (UK) OR 0031 4 7799920 (EU). -
Page 9: Getting Started
Operating Instructions - Propane PRESEASONING PRESEASON SMOKER PRIOR TO FIRST USE. Curing will rid the smoker of chemicals and oils left over by the manufacturing process allowing them to burn off. 1. Perform leak test. See Leak Testing instructions in this manual. 2. -
Page 10: Ignition Instructions
Operating Instructions - Propane IGNITION INSTRUCTIONS • Inspect hose before each use. If there are signs of abrasion, wear, cuts Fig. 1 Counter or leaks, the hose must be replaced. DO NOT USE. Clockwise Clockwise • Inspect burner before each use. Check burner and burner venturi tube for insects and insect nests. -
Page 11: Match Lighting Instructions
Operating Instructions - Propane IGNITION INSTRUCTIONS • Visually check burner fl ame (Fig. 3). A CORRECT FLAME should be blue with a small amount of yellow at the tip. An INCORRECT FLAME is excessively yellow and irregular. If an incorrect fl ame occurs, turn burner control knob to OFF position, turn OFF LP gas cylinder valve. - Page 12 Operating Instructions - Charcoal IGNITION INSTRUCTIONS 1. Disconnect LP gas cylinder and place at least 8 m away from unit. 2. Fill flame disk bowl with up to 1.4 kgs of charcoal. Stack charcoal in a pyramid. 3. Add lighter fl uid following directions on fl uid container. Before lighting, place lighter fl uid at least 8 m away from unit.
-
Page 13: Parts List
PARTS LIST Actual product may differ from picture shown PART NO QUANTITY DESCRIPTION PART NO QUANTITY DESCRIPTION Smoker Body Burner Large Smoker Door w/ Logo Plate Side Leg Brace Air Damper - Round Door Latch Left Rear Leg w/ Wheel Heat Shield Right Rear Leg w/ Wheel Cooking Grate Support... -
Page 14: Hardware List
MASTERBUILT customer service at 0031 4 7799920 or service.europe@masterbuilt. STOP com. In the UK contact 44 20 8036 3201 or support.uk@masterbuilt.com. Please have the model number and serial number available. These numbers are located on the silver rating label on the back of the appliance. - Page 15 ASSEMBLY Do not fully tighten screws until step 7 is complete. Leg frames may need to be adjusted during assembly.
- Page 16 ASSEMBLY Hole pattern for leg brace Hole pattern for leg brace...
- Page 17 ASSEMBLY Venturi Valve Orifi ce Venturi Ignition Wire Piezo Ignitor...
- Page 18 ASSEMBLY...
- Page 19 ASSEMBLY Fully tighten all hardware at this time. Repeat step for remaining side leg brace (18) and rear leg brace (30). Repeat step on opposite side.
- Page 20 ASSEMBLY...
- Page 21 ASSEMBLY...
- Page 22 ASSEMBLY...
- Page 23 ASSEMBLY...
- Page 24 ASSEMBLY...
- Page 25 ASSEMBLY...
-
Page 26: Troubleshooting Guide
Gas leaking from cracked, cut or burned Damaged hose Turn off gas at LP cylinder. hose Replace hose. Contact Masterbuilt Customer Service. Gas leaking from LP cylinder Failure due to rust or mishandled equipment Replace LP cylinder. Gas leaking from gas cylinder valve Failure of valve due to rust, mechanical failure Turn off... - Page 27 Masterbuilt accessories or solid, non-fl ammable surface under the base; commercial use; amendments; changes; negligence; abuse; improper care / maintenance; hazards on the road;...
- Page 28 Rest assured, we’re here to help. masterbuilt.com/pages/support Customer Service Masterbuilt Manufacturing, LLC Laan van Ambacht 2E, 2631RJ Nootdorp, Netherlands 3 Maritime House, The Hart, Farnham, Surrey, GU9 7HW United Kingdom EU 0031 4 7799920 @masterbuilt UK 44 20 8036 3201...
Need help?
Do you have a question about the MB20051620 and is the answer not in the manual?
Questions and answers