
Related Manuals for Harmopool Harmo Kubi ZVWX4015

Summary of Contents for Harmopool Harmo Kubi ZVWX4015
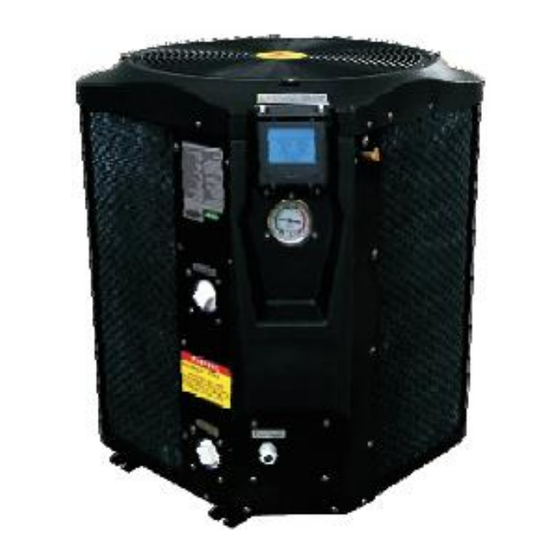
- Page 1 Swimming pool heat pump Harmo Kubi (Model ZVWX4015, ZVWX5010, ZVWX5020, ZVWX5030) Instruction manual Imported by: Zwembad BVBA Industrieweg 9 3190 Boortmeerbeek België www.harmopool.eu...
-
Page 2: Table Of Contents
Table of contents Table of contents ........................2 Introduction ..........................3 Characteristics ........................3 Specifications ........................... 4 Performance data ........................ 4 Dimensions of the heat pump ........Fout! Bladwijzer niet gedefinieerd. Installation ..........................6 Installation items ......................... 6 Location ..........................6 Distance .......................... -
Page 3: Introduction
Warranty ..........................26 Introduction In order to provide our customers with quality, reliability and versatility, this product has been made to strict production standards. This manual includes all necessary information about installation, debugging, discharging and maintenance. Read the manual carefully before you open or maintain the unit. The manufacturer of this product cannot be held responsible for injuries or damage, as a result of improper installation, debugging or unnecessary maintenance. -
Page 4: Specifications
Specifications Performance data Unit Model ZVWX5030 ZVWX4015 ZVWX5010 ZVWX5020 12,0 14,0 Heating Capacity in A27/W27°C* 39780 46580 10200 BTU/h 30600 Heating Capacity in A15/W26°C* 27880 31280 BTU/h 7480 22100 Power Input 0,55 1,63 Maximum Pool Volume 12,2 Running Current COP at A15/W26 COP at A27/W27 Min air temperature Deg C... -
Page 5: Dimensions Of The Heat Pump
Dimensions of the heat pump Model ZVWX5010 ZVWX5020 Size (mm) ZVWX5030 A 670 G 101 F 250 ZVWX4015... -
Page 6: Installation
Installation Installation items The factory only provides the heat pump unit; the other items that are mentioned in the illustration are to be provided by the user or installer. Attention! ○ All feeding of chemicals to the pool water has to be done downstream of the heat pump. ○... -
Page 7: Distance
Distance Install the heat pump as close to the swimming pool as possible to minimize the loss of heat through the piping. Put it on a solid base and place the rubber blocks under the heat pump to eliminate vibrations. Normally, the pool heat pump is installed within a 7,5 meter radius of the pool. -
Page 8: Configuration
Configuration Note: the above piping connection is only an example for demonstration. -
Page 9: Installation Of The Bypass
Installation of the bypass With the bypass set correctly, your heat pump will deliver its best performance. The bypass has to be built as shown below: ○ Install the bypass with all 3 valves entirely open ○ Slightly close valve 1 ○... -
Page 10: Electrical Wiring
Electrical wiring For the electrical connection of the heat pump use the connectors L, N and grounding. Verify the local power supply and the operating voltage of the heat pump. It is recommended to use a separate circuit breaker (slow type – D curve) for the heat pump together with the proper wiring characteristics. -
Page 11: Start-Up Procedure
Start-up procedure After the installation is completed, you should follow these steps. 1. Set the by-pass valve 1 entirely open. Turn on your filter pump. Check for water leaks and verify flow to and from the pool. 2. Turn on the electrical power supply to the unit and turn the unit ON with the switch. Slightly close valve 1 until the heat pump starts. -
Page 12: Guidelines
Guidelines Water chemistry Special attention should be paid to the chemical balance of the pool water. The values should always stay within the following limits: Free chlorine (mg/l) TAC (mg/l) Salt (g/l) Attention! ○ Failure to keep the swimming pool water between above limits will invalidate the warranty ○... -
Page 13: Spring Start-Up
Spring start-up If your heat pump has been winterized, perform the following steps when starting the system in the spring: 1. Inspect the system for any debris or structural problems. 2. Connect the water inlet and outlet unions firmly. 3. Turn on the filter pump to supply water to the heat pump. Adjust the by-pass to allow water flow through the heat pump. -
Page 14: Lcd Controller Display
LCD Controller Display Setting step 1. Under running status, press to adjust the temperature. 2. Standby status: Press M 5 seconds,get a sound “B” ,LCD display will show “0" “27” “SET” to enter cooling temp. setting,press to alter cooling temp. Press “SET”again to confirm. Press M again “1””... -
Page 15: The Functions Of Controller Display
The functions of controller display Under running status, press to adjust the temperature. Setting operation parameter o Under standby status, press M button 5s to enter Operation Parameter setting interface. o Press M again to start setting (parameter from 00-G,see the Operation Parameter Table). o Under parameter setting, press to set data. - Page 16 How to know the current status Under running status , press M for 5 seconds to check the current status of the unit! You can check water-in/water out temp, condenser temp and ambient temp. Please note no motion on the display for 10s. The LCD will display water-in/water out temp/(under running)or ambient temp.(unit stops).
-
Page 17: Operation Data Setting Table
Operation data setting table This data setting table is suit for heat pump with heating and cooling function. If heat pump without cooling function, parameter 0,2,3,4,5 will not work. Digit Meaning Range Default Adjust (yes/no) Return water temp. 8-28°C 12°C Setting (cooling mode) Return water temp. -
Page 18: Maintenance And Inspection
Maintenance and inspection Meanings of symbols used in this manual: Be sure not to do. Be sure to follow the instruction. Never insert your finger or stick, etc. Never step onto the indoor/outdoor unit and do not put anything on them. Danger of electric shock. -
Page 19: Warnings
Warnings ○ Improper installation will create an electrical hazard, which could result in serious injury. ○ DO NOT attempt any internal adjustments inside the heater. ○ Keep your hands and hair clear of the fan blades to avoid injury. ○ If you are not familiar with your pool filtering system and heater: −... -
Page 20: Safety Precautions
○ When the heat pump does not cool or heat, there is a possibility of refrigerant leakage. If any refrigerant leakage is found; stop operations and ventilate the room well and consult your dealer immediately. If a repair involves recharging the unit with refrigerant, ask the service technician for details. - Page 21 ○ Since rotating parts and parts which could cause an electric shock are used in this product, be sure to read these “Safety Precautions” before use. ○ Since the cautionary items shown here are important for safety, be sure to keep it together with the installation manual in a handy place for easy reference.
- Page 22 o The unit may accumulate dirt, which may cause overheating or fire. o Ensure that the area is well-ventilated when the unit is operated together with a combustion appliance. Inadequate ventilation may cause oxygen starvation. o After the heat pump is used for several seasons, perform, inspection and maintenance in addition to normal cleaning.
- Page 23 Caution: o Install an earth leakage breaker depending on the installation location of the heat pump (such as highly humid areas). If an earth leakage breaker is not installed, it may cause electric shock. o Ensure that the drain water is properly drained. If the drain passage is improper, water may drip down from the unit, wetting and damaging the furniture.
-
Page 24: Problems And Solutions
Problems and solutions Malfunction Controller Reason Resolution display Water in temp. PP 01 The sensor is open or Check or replace a new sensor sensor failure short circuit Water out temp. PP 02 The sensor is open or Check or replace a new sensor sensor failure short circuit Coil sensor failure... -
Page 25: Wiring Diagram
Wiring diagram Model ZVWX5010 - ZVWX5020 - ZVWX5030... - Page 26 Warranty...
Need help?
Do you have a question about the Harmo Kubi ZVWX4015 and is the answer not in the manual?
Questions and answers