
Subscribe to Our Youtube Channel
Related Manuals for Hisense L Series


Summary of Contents for Hisense L Series
- Page 1 QUICK SETUP GUIDE Read the guide carefully and ensure you have fully understood its contents before operating this device for the first time. English...
- Page 3 ▌Important Notice Paragraphs beginning with the symbol indicate important instructions, tips or conditions for the following settings. For your own safety and the optimal performance of your device, ensure to read the safety instructions before performing any installation. Compatibility with 3rd party products, software and services are not guaranteed. We cannot be held liable for any damage or loss suffered whilst operating, using or connecting to incompatible devices or apps.
- Page 4 The intended use and ambient conditions for this device This device is intended for the rendering of video and audio signals, on a table-top, in a home or office environment. It must not be used in rooms with a high level of humidity or dust concentration. The warranty is only valid if used as intended by the manufacturer. WARNING High humidity and dust concentration may lead to current leaks in the device.
- Page 5 „ Power Supply - Do not place the power cable near a high temperature object. - Do not move the device with the power cable plugged into a Incorrect voltages can damage the device. Only connect this unit socket. to a power supply with the correct voltage and frequency noted - Do not use a damaged or loose power cable, or a damaged on the type plate, using the supplied power cable.
- Page 6 „ Warning about off-gassing „ Long periods of absence New furniture, carpet, paint, building materials and electronics As long as the power plug is connected to a live socket outlet, can release chemicals into the air through evaporation. After the device will consume power even in standby mode. The power you set your device up and turn it on for the first time, you may plug and all connected antenna cables should be disconnected notice a slight smell within a couple of hours.
- Page 7 „ Packaging „ Outdoor Antenna Grounding Keep the anti-moisture materials and plastic bags out of reach of If an outdoor antenna used, be sure the antenna system is children. protected against voltage surges and built-up static charges. Plastic bags can cause suffocation and the anti-moisture material „...
- Page 8 - If any object or water enters this device, please unplug this device and contact the service staff of Hisense. - Clean the lens periodically with a clean cloth and make - Do not place any exposed fire source (e.g. burning candle) sure the Laser TV is turned off before you start.
-
Page 9: Table Of Contents
Congratulations on the purchase of your new Laser TV! This Guide will walk you through a few easy steps to set up your Laser TV. Please visit Hisense official website for more details. Product image is only for reference, actual product may vary in appearance. -
Page 10: Accessories List
Accessories List • Laser TV × 1 • Laser TV Quick Setup Guide × 1 • Remote control × 1 • Laser TV Warranty Card × 1 • AA or AAA batteries × 2 • Cleaning kit for the lens × 1 •... -
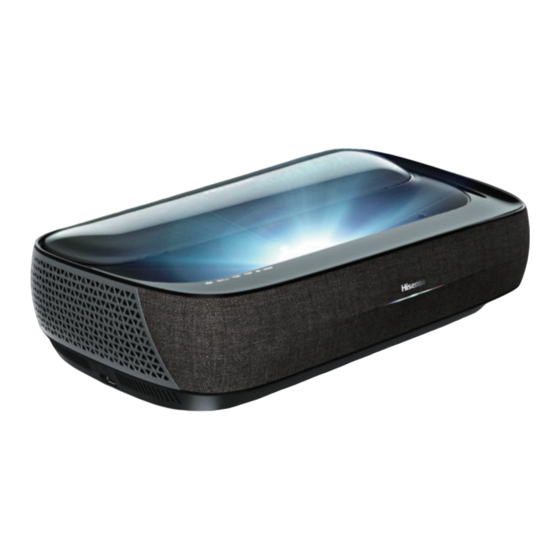
Page 11: Laser Tv Diagram
Laser TV Diagram Air vents Power Indicator Remote control receiver Eye protection sensor Power button Lens with laser Foreign Object Detect We strongly recommend that two people handle this device when moving it from one place to another. Be sure to protect the lens when you handle this device. -
Page 12: Step 1 Mount The Screen
STEP 1 Mount the Screen Screen installation please refer to the specific screen installation guide! STEP 2 Install the Laser TV We strongly recommend that two people handle this device when moving it from one place to another. Be sure to protect the lens when you handle this device. - Page 13 Ethernet (you will need a router for Internet connectivity) (not included) Satellite antenna NOTE: ANT1 Jack supports power supply for satellite antenna (13/18V, 0.5A max.) Outdoor Antenna Cable ANT OUT Antenna Cable (75Ω) VHF/UHF Antenna CAM CARD SMART CARD NOTE: Before you insert/remove the CI+ module, ensure that the TV is switched off.
- Page 14 NOTE: When connecting a hard disk or a USB hub, always connect the mains adapter of the connected device to the power supply. Exceeding a total current consumption may result in damage. The USB1.1 and USB2.0 devices maximum current consumption are 500mA. The USB3.0 device maximum current consumption is 1A.
- Page 15 Wired setup LAN ( Connect your Laser TV to your network by connecting the LAN port on the back of your Laser TV to an external modem or router using a LAN (Ethernet/Cat 5) cable. See the illustration below. Laser TV PORT IP Sharer (Router) External Modem (with DHCP server)
- Page 16 WARNING: Insufficient ventilation space will cause Plug the power cord into a wall outlet. this device to overheat or become damaged. Press the POWER button to turn on the Laser TV. • Do not block the air vents or place any object on this device. •...
-
Page 17: Step 3 Adjust The Display Image And The Screen
STEP 3 Adjust the Display Image and the Screen FIT THE BOTTOM OF THE IMAGE TO THE SCREEN • Follow the steps in the order shown below, only if they apply • Make sure the bottom of the image always stays parallel to your situation. - Page 18 ADJUST THE UPPER-RIGHT CORNER OF THE IMAGE ADJUST THE UPPER-LEFT CORNER OF THE IMAGE 1. If the top of the image is lower on the left and higher on 1. If the top of the image is higher on the left and lower on the the right, rotate the front-right foot and the back-right foot right, rotate the front-left foot and the back-left foot of the TV clockwise to the same height.
- Page 19 4. If the upper-left corner is inside the screen after adjusting, rotate the front-left foot and the back-left foot counterclockwise to the same height, and rotate the TV counterclockwise, to make the image is parallel with the screen. If the back feet are already at their maximum height, rotate the FILL THE TOP OF THE IMAGE TO THE SCREEN left- and right-front feet counterclockwise.
-
Page 20: Step 4 Use Your Remote
STEP 4 Use Your Remote BUTTONS ON YOUR TV REMOTE NOTE: The button labels are provided as a reference. The actual appearance of the remote that is included with the TV, may differ from this diagram. POWER: Switch the TV on or into standby mode SUBTITLE: Activate or deactivate the subtitle mode INPUT: Select input sources... - Page 21 REMOTE CONTROL RANGE INFORMATION 1. Slide the back cover to open the battery • The remote control can work at a distance of up to 8 metres compartment of the remote control. in front of the Laser TV. (This distance is used by infrared means in an unpaired state.) •...
-
Page 22: Step 5 Proceed Through The Screen Setup Menu
STEP 5 Proceed through the Screen Setup Menu PROJECTION MODE If you need to flip the image over top-to-bottom and/or left-to- right, select the Projection Mode. Alignment grid AUTO GEOMETRIC CORRECTION 4. Click "+" on your mobile device to take a photo of the full Before you use Auto Geometric Correction function, ensure screen. - Page 23 MANUAL GEOMETRIC CORRECTION Select points and move it to fit the projected image into the screen. NOTE: Manual Geometric Correction may not be applicable in some models/countries/regions. 1. Press / / < / > buttons on your remote control to move focus, and press OK button to choose a point you need to adjust.
-
Page 24: Maintenance & Quick Problem-Solving Tips
Maintenance • Do not touch this device when it is running or just turned off because it may be hot. • Do not wipe this device with oil because it may deteriorate the exterior or damage the paint. Contact with rubber or ethylene products for a long time may cause stains on this device. - Page 25 I have connected an external source to my TV and I get no picture and/or sound. 1. Check for the correct output connection on the external source and for the correct input connection on the TV. 2. Make sure you have made the correct selection for the input mode for the incoming signal. The picture is normal but there is no sound 1.
-
Page 26: Product Specifications
Product Specifications Model Name 100" Laser TV 24.0 × 6.1 × 13.6 inches Dimension (W × H × D) (610 × 155 × 346 mm) Weight 24.7 lbs (11.2 kg) Active Screen Size (Diagonal) 100 inches 3840 × 2160 Screen resolution Audio power 2 ×... -
Page 27: Recycling / Licenses
The terms HDMI and HDMI High-Definition Recycling / Licenses Multimedia Interface, and the HDMI Logo are trademarks or registered trademarks of HDMI Licensing Administrator, Inc. in the This symbol on the product or on its packaging indicates that United States and other countries. this product must not be disposed of with your household waste. - Page 28 ES-A2234Z0-1...
Need help?
Do you have a question about the L Series and is the answer not in the manual?
Questions and answers