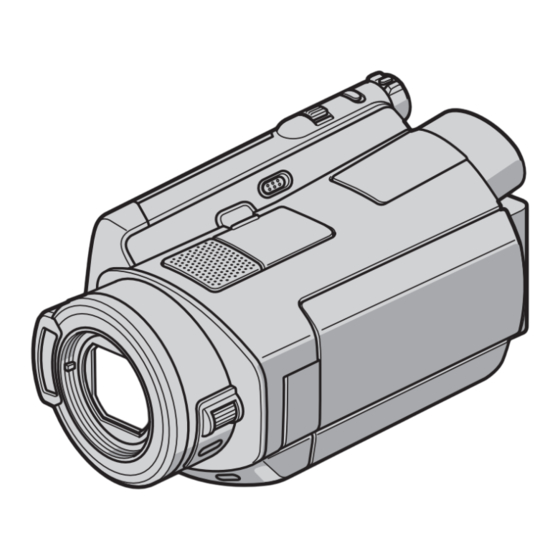
Sony HANDYCAM HDR-SR7E Operating Manual

Sony HANDYCAM HDR-SR7E Operating Manual

Digital hd video camera recorder
Hide thumbs Also See for HANDYCAM HDR-SR7E:

Advertisement

Quick Links

Digital HD Video Camera Recorder
Operating Guide
HDR-SR5E/SR7E/SR8E
For details on the advanced operations, please refer to
"Handycam Handbook" (PDF).
© 2007 Sony Corporation
3-210-379-11(1)

Advertisement

Table of Contents
loading

Summary of Contents for Sony HANDYCAM HDR-SR7E

  • Page 1 3-210-379-11(1) Digital HD Video Camera Recorder Operating Guide HDR-SR5E/SR7E/SR8E For details on the advanced operations, please refer to “Handycam Handbook” (PDF). © 2007 Sony Corporation...
  • Page 2: Read This First

    Never use the plug without the fuse cover. Applicable Accessory: Remote If you should lose the fuse cover, please Commander contact your nearest Sony service station. Notes on use FOR CUSTOMERS IN EUROPE • The camcorder is not dustproofed, dripproofed or waterproofed.
  • Page 3 • When connecting your camcorder to another this case, an indicator appears in the viewfinder device with communication cables, be sure to (HDR-SR7E/SR8E) or on the LCD screen insert the connector plug in the correct way. (p. 30). Pushing the plug forcibly into the terminal will When the camcorder is connected to a damage the terminal and may result in a malfunction of your camcorder.
  • Page 4: Table Of Contents

    Table of Contents Read this first ................... 2 Notes on use ....................2 Getting Started Step 1: Checking supplied items .............. 5 Step 2: Charging the battery pack ............6 Step 3: Turning the power on, and setting the date and time ....8 Changing the language setting ..............
  • Page 5: Getting Started

    Getting Started Step 1: Checking supplied items Make sure that you have the following Wireless Remote Commander (1) items supplied with your camcorder. The number in the parentheses indicates the number of that item supplied. AC Adaptor (1) (p. 6) A button-type lithium battery is already installed.
  • Page 6: Step 2: Charging The Battery Pack

    Step 2: Charging the battery pack POWER switch Battery pack /CHG lamp DC IN jack DC plug AC Adaptor To the wall socket Mains lead You can charge the “InfoLITHIUM” battery pack (H series) after Set the camcorder onto the attaching it to your camcorder.
  • Page 7 To charge the battery pack using only All times of image quality measured with SP recording mode when [ INDEX SET] is set the AC Adaptor to [OFF]. Slide the POWER switch to OFF (CHG), When the LCD backlight turns on. then connect the AC Adaptor directly to the When the LCD backlight turns off.
  • Page 8: Step 3: Turning The Power On, And Setting The Date And Time

    Step 3: Turning the power on, and setting the date and time Touch the button on the LCD screen. POWER switch When using the camcorder for the first time, the [CLOCK SET] screen appears on the LCD screen. While pressing the green button, slide the POWER switch repeatedly in the direction of the arrow until the respective lamp...
  • Page 9: Step 4: Preparing For Recording

    Step 4: Preparing for recording Adjusting the LCD panel Fastening the grip belt Open the LCD panel 90 degrees to the Fasten the grip belt and hold your camcorder (1), then rotate it to the best camcorder correctly. angle to record or play (2). 190 degrees to the camcorder 290 degrees...
  • Page 10: Recording/Playback

    Recording/Playback Recording START/STOP D POWER switch C START/STOP A [STBY] t [REC] (HOME) B PHOTO (p. 19) EASY F Flashing t Lights up Slide the POWER switch C until the respective lamp lights up. Press the green button only when the POWER switch C is in the OFF (CHG) position. •...
  • Page 11 • Use the supplied application software to store All numbers measured when using a “Memory recorded movies as still images. For details, see Stick Duo” made by Sony Corporation. The “Picture Motion Browser Guide” on the number of recordable images varies depending supplied CD-ROM.
  • Page 12: Playback

    Playback (VIEW IMAGES) A (Film Roll Index) B POWER switch D (VIEW IMAGES) C 1 Returns to the recording screen 6 Displays still images on the hard disk 2 Previous 6 images 7 Displays still images on a “Memory Stick Duo” 3 Next 6 images 8 Searches for images by date 4 Returns to the recording screen...
  • Page 13: Playing The Image On A Tv

    To adjust the sound volume of movies Switch the input on the TV to the When playing back a movie, touch connected jack. (OPTION) t tab t [VOLUME], Refer to the instruction manuals of the then adjust the volume with z Tips Connect your camcorder and TV •...
  • Page 14: Parts And Functions Used For The Camcorder

    Parts and functions used for the camcorder The numbers in ( ) are reference pages. Handycam Station 1 Power zoom lever • When you touch the screen during playback zoom, the point you touched will be displayed in To use the zoom, move the power zoom the center of the displayed frame.
  • Page 15 5 Viewfinder lens adjustment lever (9) wa Speaker (HDR-SR7E/SR8E) Sound comes out from the speaker while playing back. 6 ACCESS lamp (Hard disk) ws LCD screen/touch panel When the ACCESS lamp is lit or flashing, your camcorder is writing/reading data. To record in mirror mode, open the LCD screen 90 degrees to the camcorder (1), (flash) button...
  • Page 16 eg DISP/BATT INFO button rj Interface connector You can switch the screen display when (USB) jack you press while the power is set to on. Connect with the USB cable. When you press while the power is set to OFF (CHG), you can check the remaining battery.
  • Page 17: Indicators Displayed During Recording/Playback

    Indicators displayed during recording/playback A Recording quality (HD/SD) and Recording movies Recording mode (XP/HQ/SP/LP) B HOME button C Remaining battery (approx.) D Recording status ([STBY] (standby) or [REC] (recording)) E Counter (hour/minute/second) F OPTION button G Dual Rec H VIEW IMAGES button Recording still images I Face Index set J 5.1ch surround recording...
  • Page 18 X VISUAL INDEX button Upper right Indicator Meaning Indicators when you made FADER changes LCD backlight off Following indicators appear during Drop sensor off recording/playback to indicate the settings Drop sensor activated of your camcorder. Upper left Center Upper right Bottom Indicator Meaning...
  • Page 19: Performing Various Functions

    Performing various functions - “ HOME” and “ OPTION” • You cannot simultaneously select or activate the grayed items in the current recording/playback (HOME) B situation. To see the explanation of the function of each item on the HOME MENU (HELP) 1 Press (HOME) A (or B).
  • Page 20 b Notes COMPUTER • When the item you want is not on the screen, COMPUTER], [ touch another tab. If you cannot find the item COMPUTER], [DISC BURN] anywhere, the function is not available under the current situation. TV CONNECT Guide* •...
  • Page 21 SOUND/DISP SET* Items of the OPTION MENU [VOLUME]* , [BEEP]* , [LCD Items you can set only on the OPTION BRIGHT], [LCD BL LEVEL], [LCD MENU will be described below. COLOR], [VF B.LIGHT]* OUTPUT SETTINGS [TV TYPE], [DISP OUTPUT], [FOCUS], [SPOT FOCUS], [TELE [COMPONENT] MACRO], [EXPOSURE], [SPOT METER], [SCENE SELECTION],...
  • Page 22: Deleting Images

    Saving images Deleting images Due to the limited capacity of the internal Deleting the images on the hard hard disk, make sure that you save the disk image data to some type of external media such as a DVD-R or a computer. You can save the images recorded on the On the (HOME MENU), touch...
  • Page 23: Enjoying With A Computer

    Enjoying with a computer Viewing “Handycam Handbook” (PDF) For details on using your camcorder, see “Handycam Handbook” (PDF). Select the desired language and To view “Handycam Handbook” (PDF), the model name of your you need to install Adobe Reader on your Handycam, then click [Handycam computer.
  • Page 24: What You Can Do With A Windows Computer

    To use a Macintosh computer connected to your camcorder, see the Display: DirectX 7 or later-compatible following website for details. video card, Minimum 1,024 × 768 dots, http://guide.d-imaging.sony.co.jp/mac/ High Color (16 bit color) ms/us/ Others: USB port (this must be provided as standard), Hi-Speed USB (USB 2.0 compatible is recommended),...
  • Page 25 DVD burner (CD-ROM drive is necessary for installation) Place the supplied CD-ROM in the disc drive of your computer. b Notes The installation screen appears. • Even in a computer environment where the operations are guaranteed, frames may be dropped from movies with HD (high definition) image quality, resulting in uneven playback.
  • Page 26 2 Set the camcorder onto the Handycam Station, then slide the POWER switch to Follow the on-screen instructions turn on. to install the software. 3 Connect the (USB) jack of the One of the following installation screens Handycam Station to the (USB) jack of appears, depending on the computer the computer using the supplied USB...
  • Page 27 Operating “Picture Motion Connect the (USB) jack of the Browser” Handycam Station to a computer using the supplied USB cable After you install the software, shortcut (p. 25). icons for “Picture Motion Browser” and “Picture Motion Browser Guide” are The [USB SELECT] screen appears on created on the desktop.
  • Page 28 2 Click [Safely remove USB Mass Storage Device]. 3 Click [OK] (Windows 2000 only). 4 Touch [END] on the screen of your camcorder. 5 Touch [YES] on the screen of your camcorder. 6 Disconnect the USB cable from the Handycam Station and the computer. b Notes •...
  • Page 29: Troubleshooting

    • During repair, we may check a minimum amount of data stored on the hard disk in order • During Easy Handycam operation, to investigate the problem. However, your Sony available buttons/functions are limited. dealer will neither copy nor retain your data.
  • Page 30: Self-Diagnosis Display/Warning Indicators

    Delete unnecessary You can fix some symptoms by yourself. If images (p. 22). the problem persists even after you have tried a couple of times, contact your Sony The recording stops. dealer or local authorized Sony service facility.
  • Page 31 (Warning on the hard disk of the (Warning indicators pertaining to camcorder)* “Memory Stick Duo” formatting)* • The “Memory Stick Duo” is damaged. Fast flashing • The “Memory Stick Duo” is not • An error may have occurred with the formatted correctly.
  • Page 32: Additional Information

    When you use the LCD casing, unplug your camcorder and have it Cleaning Kit (optional), do not apply the checked by a Sony dealer before operating it any further. cleaning liquid directly to the LCD screen.
  • Page 33 In this case, replace the to the wall socket via the AC Adaptor or battery with a Sony CR2025 lithium battery. while the battery pack is attached. The Use of another battery may present a risk of fire rechargeable battery will be fully or explosion.
  • Page 34: Specifications

    HDR-SR7E/SR8E: information at the time of recording. 6.3 mm (1/2.9 type) CMOS sensor The unique pixel array of Sony’s ClearVid Recording pixels (still image, 4:3): CMOS sensor and image processing Max. 6.1 mega (2 848 × 2 136) pixels* system (new Enhanced Imaging Gross: Approx.
  • Page 35 Input/Output connectors including the projecting parts 75 × 81 × 140 mm Audio/Video output (3 × 3 1/4 × 5 5/8 in.) (w/h/d) 10-pin connector including the projecting parts, and the NP- Video signal: 1 Vp-p, 75 Ω (ohms) FH60 rechargeable battery pack attached Luminance signal: 1 Vp-p, 75 Ω...
  • Page 36 * See the label on the AC Adaptor for other Stick” and “MagicGate Memory Stick Duo” are specifications. trademarks of Sony Corporation. Rechargeable battery pack NP-FH60 • “InfoLITHIUM” is a trademark of Sony Corporation. Maximum output voltage • “x.v.Colour” is a trademark of Sony DC 8.4 V Corporation.
  • Page 40 Additional information on this product and answers to frequently asked questions can be found at our Customer Support Website. Printed on 70% or more recycled paper using VOC (Volatile Organic Compound)- free vegetable oil based ink. Printed in Japan...

This manual is also suitable for:

Handycam hdr-sr5eHandycam hdr-sr8e

Table of Contents