Table of Contents
Advertisement
Available languages
Available languages
Quick Links
Advertisement
Table of Contents

Related Manuals for INNOLIVING INN-858


Summary of Contents for INNOLIVING INN-858
- Page 1 SPILLATORE PER BIRRA INN-858 MANUALE D’USO USER MANUAL...
-
Page 2: Importanti Norme Di Sicurezza
SPILLATORE PER BIRRA Grazie per aver acquistato lo spillatore per birra INN-858 INNOLIVING. Leggere attentamente le istruzioni d’uso e conservare il presente manuale per future consultazioni. IMPORTANTI NORME DI SICUREZZA Questo è un dispositivo di raffreddamento domestico della birra dotato di un sistema di pressione che può... - Page 3 l’eventuale presenza di danni da trasporto e l’integrità della fornitura in base al disegno. In caso di danneggiamenti o dubbi sull’effettiva integrità, non utilizzare l’apparecchio e rivolgersi al servizio di assistenza autorizzato. 5. Se il cavo di alimentazione è danneggiato, deve essere sostituito dal produttore o dal servizio di assistenza tecnica autorizzato per evitare ogni pericolo.
- Page 4 capacità fisiche, sensoriali o mentali o senza esperienza o conoscenza del prodotto solo sotto la supervisione di una persona responsabile o nel caso in cui abbiano ricevuto informazioni specifiche sull’uso sicuro dell’apparecchio e ne abbiano compreso i rischi ad esso associati. 17.
- Page 5 raffreddamento della birra quando è in funzione. 28. L’apparecchio deve essere installato in una zona protetta dagli agenti atmosferici, come vento, pioggia, acqua nebulizzata o gocce d’acqua. 29. Non rimuovere il fusto di birra dall’apparecchio se il fusto non è completamente vuoto.
-
Page 6: Descrizione Del Prodotto
DESCRIZIONE DEL PRODOTTO INN-858 è un dispositivo di raffreddamento domestico della birra dotato di un sistema di pressione che può essere utilizzato con una cartuccia di CO2. L’apparecchio porta la birra alla temperatura ottimale per la conservazione (da 0 a 4°C) entro 19-21 ore. - Page 7 SIGILLANTE PER FUSTI I sigillanti sotto menzionati possono essere applicati a tutti i fusti di birra da 5 litri a patto che si seguano tutte le istruzioni presenti in questo manuale: * I sigillanti con il codice n° 20 e 21 possono essere forati semplicemente dal perno di perforazione dell’apparecchio.
- Page 8 Per evitare la schiuma che esce attraverso il perno o il rubinetto. Se si utilizzano fusti pressurizzati non è necessario rilasciare il gas e sostituire la guarnizione in gomma, poiché i fusti pressurizzati hanno già la loro CO2 pressata all’interno, e non c’è bisogno che venga fornita una CO2 esterna.
- Page 9 4. Attaccare la spina. Nota: Non collegare o scollegare la spina elettrica con le mani bagnate. Prima di utilizzare l’apparecchio, assicurarsi che la tensione elettrica sia conforme con la targhetta della spina. Verificare se il cavo di alimentazione sia ben collegato o meno; in caso contrario, si prega di non usarlo e chiamare il centro di assistenza.
- Page 10 3. Aprire il dispositivo di raffreddamento della birra e posizionare il fusto ben assemblato nella cavità di raffreddamento. Collegare il tubo connettore di CO2 e il tubo di scarico della birra con il connettore del tubo del solleva fusto. NOTE: Assicurarsi che tutte le connessioni del meccanismo del rubinetto siano ben collegate e senza danni.
- Page 11 5. Chiudere il coperchio superiore dell’apparecchio. Quando si versa la birra, ruotare la manopola sul coperchio superiore in posizione “+” per rilasciare la CO2, e girarla su “-” quando si sospende o si interrompe di versare la birra per chiudere la CO2. Si prega di fare riferimento all’avvertenza posta sull’etichetta del coperchio superiore.
- Page 12 9. Regolare la manopola del regolatore di pressione CO2 in posizione “+”, per versare la birra tirando verso il basso il meccanismo del rubinetto a circa 45°. È possibile regolare la manopola del regolatore di pressione per controllare la portata di birra e le bolle. Nota: Pulire il bicchiere prima di versare la birra;...
- Page 13 Adattatore per fusto pressurizzato Connettore Tubo flessibile Fusto Pressurizzato Nota: Si prega di togliere l’adattatore per i fusti pressurizzati premendolo e seguendo l’indicazione delle frecce, altrimenti potrebbe danneggiare il dispositivo di fissaggio. Fusti pressurizzati Connettore birra 3. Chiudere il coperchio superiore; operare come riportato sopra da passo 6 a12, come se fosse un fusto universale da 5 litri, solo che il passo 9 è...
- Page 14 Quando si estrae la chiusura dell’erogatore È necessario di birra è possibile muoverlo seguendo lla estrarre il direzione della freccia dispositivo di fissaggio prima a destra, poi a sinistra come indicato dalla freccia. Infine è possibile estrarre il gruppo erogatore. Quando si rimuove il connettore della birra e CO2, si prega di premere giù...
- Page 15 Volume Peso Pressione Pressione Kg/cm2 getto bar 15,5 57,0 42,0 ø 8,6 88,0 ø 21,7 16,5 58,6 42,6 ø 8,9 89,0 ø 22,0 COME SOSTITUIRE L’ACQUA ALL’INTERNO DELLA CAVITÀ DI RAFFREDDAMENTO Si consiglia di sostituire l’acqua all’interno della cavità una volta alla settimana. (Non è necessario sostituire l’acqua per ogni fusto di birra, è...
- Page 16 1. Caricare dell’acqua calda nel kit di pulizia. 2. Collegare l’estremità del perno perforante, far scorrere l’acqua nel perno per pulire il tubo del perno, e spingere l’acqua fuori dal tubo della birra all’estremità opposta. Ripetere queste operazioni di pulizia fino a quando il tubo della birra sarà pulito (saranno necessarie almeno 3 bottiglie di acqua calda), si prega di pulire il meccanismo del rubinetto della birra.
- Page 17 SOSTITUIRE IL CONNETTORE CO2 E LA RONDELLA DI TENUTA Il connettore di CO2 e la rondella di tenuta si possono danneggiare quando si utilizzano in modo errato o per altri motivi diversi da quelli previsti, in tal caso, si prega di sostituirli con dei nuovi.
-
Page 18: Manutenzione
SOSTITUIRE IL CERCHIO DI TENUTA DEL TUBO DELLA BIRRA Se il connettore presenta perdite, sostituire il cerchio di tenuta del tubo della birra con uno nuovo. 1. Ruotare il tubo della birra come indicato nella figura sotto 2. Estrarre il cerchio di tenuta del tubo della birra 3. -
Page 19: Risoluzione Dei Problemi
RISOLUZIONE DEI PROBLEMI PROBLEMA POSSIBILE CAUSA SOLUZIONE Il rubinetto non 1. Il tubo di colata è 1. Collegare bene il tubo di funziona/non si collegato scorrettamente colata e accendere il flusso di CO2 riesce a versare la o il flusso di CO2 è spento; 2. - Page 20 ETICHETTA DATI Questo prodotto è conforme a tutte le direttive europee applicabili. Leggere attentamente le istruzioni per l’uso Per contatto con alimenti Apparecchio con isolamento elettrico di classe II. INFORMAZIONI AGLI UTENTI ai sensi del Decreto Legislativo N° 49 del 14 Marzo 2014 “Attuazione della Direttiva 2012/19/UE sui rifiuti di apparecchiature elettriche ed elettroniche (RAEE)”...
-
Page 21: Safety Instructions And Warnings
BEER DISPENSER Thank you for purchasing INOLIVING Beer dispenser INN-858. Read all the instructions and warnings carefully and keep this manual safe for future references. SAFETY INSTRUCTIONS AND WARNINGS This is a home beer dispencer equipped with a pressure system that can be used with a CO2 cartridge. - Page 22 after sales service, so as to prevent all risks. 6. ATTENTION: when placing the product, make sure the power cable is not trapped or damaged. 7. Do not force the electrical connection wire. Never use the electric wire to lift up, carry or unplug the appliance. Ensure that the electric cable does not get trapped or tangled.
- Page 23 18. Cleaning and maintenance operations must not be carried out by children without supervision. 19. Do not use the appliance near flames, plates, stoves, or other heat sources. 20. It is not allowed to insert foreign objects into the appliance to avoid fires and short circuits 21.
-
Page 24: Product Description
PRODUCT DESCRIPTION: INN-858 is a home beer dispenser equipped with a pressure system that can be used with a CO2 cartridge. The appliance brings the beer to the optimal temperature for storage (from 0 to 4°... - Page 25 SEALANT FOR KEGS All 5 Liter beer keg with the below various appearance sealants can apply to the beer cooler, however, you should follow the information as below: *The sealants with code No. 20 and 21 can be pierced simply by the cooler piercing pin. *The sealants with code No.
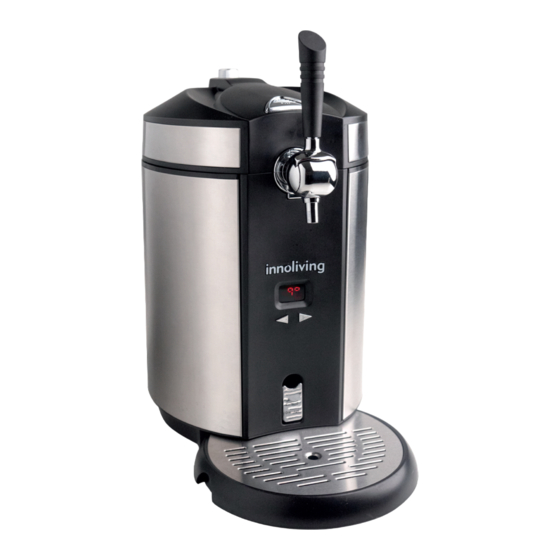
- Page 26 INSTALLATION AND OPRATIONS INSTALLATION 1. Remove the appliance from the packaging and place it on a stable and horizontal surface, and make sure it has at least 5 inches/10 cm away from other appliances or from the wall on each side in order to allow proper ventilation and achieve better performance. Handle Drip tray Faucet...
- Page 27 3. Put 800 ml of water in the cooling cavity or pour the water up to the max mark. It can also work without water but not with the best performance. NOTE: Make sure that the drain switch is in the “OFF” position and that there is no object in the cooling cavity.
- Page 28 Close Open Loosen the sheath of the CO2 bottle (as shown in Figure A), insert a 16g CO2 cartridge into the sheath (Figure B), and screw the tight sheath until you hear a “click” (Figure C), which indicates that the cartridge seal has been pierced and that the CO2 gas can flow freely into the drum.
- Page 29 NOTES: To avoid electric shock, when using the appliance, please make sure your hands are dryng. Connector Switch is on “OFF” status 7. It will take 19-21 hours to cool the beer to 2-4 ° C, when the ambient temperature is 22-24 °...
- Page 30 10. When tapping the beer, place the glass against the spout and slowly straighten as the beer advances, then fully open the tap mechanism to avoid many bubbles. It is recommended to pour half a glass, take a short break and then continue pouring. NOTES: Do not immerse the spout in the glass of beer to avoid many bubbles.
- Page 31 Pressurized keg Beer connector 3. Close the top cover; operate as described above from step 6 to 12, as if it were a 5 liter universal drum, only step 9 is an exception. HOW TO LOAD A NEW DRUM (5 L universal keg) When the beer in the keg runs out, before changing a new keg of beer it is advisable to: 1.
- Page 32 HOW TO LOAD A NEW CO2 CARTRIDGE (Not needed for pressurized kegs) Please change the CO2 cartridge if it is not possible to pour beer when the CO2 pressure knob is in the “on” position and there is still beer in the keg. 1.
- Page 33 HOW TO REPLACE THE WATER INSIDE THE COOLING CAVITY It is recommended to replace the water inside the cavity once a week. (It is not necessary to change the water for each keg of beer, it is recommended once a week) Open the drain switch water flow into the “S”...
- Page 34 beer tap mechanism. Note: Please disassemble the tap when cleaning operations are carried out. Beer connector must Beer connector must connect Dosing unit connect with the brewing with the cleaning bottle unit Open the tap when cleaning the hose Cleaning bottle WARNING: Never put parts of the faucet mechanism in a washing machine or dishwasher;...
- Page 35 REPLACE THE CO2 CONNECTOR AND SEALING WASHER The CO2 connector and sealing washer can be damaged when used incorrectly or for other reasons other than those intended, if so, please replace them with new ones. 1. First of all, choose the sealing washer with a very small metal stick (as shown in figure 31) and take out the CO2 connector (if only the sealing washer is to be replaced, this operation can be omitted).
-
Page 36: Maintenance
REPLACE THE SEALING CIRCLE OF THE BEER TUBE If the connector is leaking, replace the sealing circle of the beer tube with a new one. 1. Rotate the beer tube as shown in the figure below 2. Pull out the sealing ring of the beer tube 3. -
Page 37: Problem Solving
PROBLEM SOLVING PROBLEM CAUSES TROUBLESHOOTING The tap does not 1. The casting tube is 1. Connect the casting tube work / the beer incorrectly connected or tightly and turn on the CO2 flow cannot be poured the CO2 flow is turned off; 2. -
Page 38: Rating Label
RATING LABEL The product complies with all the applicable European regulations Read carefully the user manual Food contact Class II insulated electrical appliance INFORMATION TO USERS according to Legislative Decree No. 49 of March 14, 2014 “ 2012/19/UE Implementation of the Directive on Waste Electrical and Electronic Equipment (WEEE) “... - Page 40 Innoliving Spa Via Merloni, 2/B 60131 Ancona Italy Tel 071 2133550 www.innoliving.it MADE IN CHINA...
Need help?
Do you have a question about the INN-858 and is the answer not in the manual?
Questions and answers