Advertisement
Quick Links
Advertisement

Related Manuals for Sonim ECOM Ex-Handy 08


Summary of Contents for Sonim ECOM Ex-Handy 08
- Page 1 USER GUIDE 5560 SONIM XP BOLT IS (ECOM EX-HANDY 08 EX-HSPA 08) English...
- Page 2 Copyright © 2013 Sonim Technologies, Inc. SONIM and the Sonim logo are trademarks of Sonim Technologies, Inc. Other company and product names may be trademarks or registered trade-marks of the respective owners with whom they are associated. Disposal of Old Electrical and Electronic Equipment...
- Page 3 Power Saving Settings Auto Keypad Lock About Near Field Communication———————— 25 Firmeware Details Near Field Communication Network Selection Data Connection Your SONIM XP5560 BOLT IS (ECOM Ex-Handy 08 and Data Account Ex-HSPA 08)———————— 26 A-GPS Settings Main Menu Main Menu Icons...
- Page 4 Managing Network Settings———————— 38 Email Sent Email Draft Managing Security Settings———————— 39 Broadcast Messages Restore Factory Settings Templates Message Settings Managing Connectivity———————— 41 MMS Settings Sending Data via Bluetooth Receiving Data via Bluetooth Managing Profiles———————— 61 Java Settings Sound Settings USB Function Tools————————...
- Page 5 Direct PTT Calls Calls from PTT History Tab Calls from PTT Contacts Tab Calls from PTT Group Tab Sending Alerts Block Incoming PTT Calls Manage PTT Contact List Manage PTT Groups Manage PTT Favorite Contacts Manage PTT Favorite Groups Supervisory Override Managing Multimedia Files————————...
- Page 6 • Please register your phone within 30 days at www.sonimtech.com/register, to receive product information and updates. For more information related to the warranty, please refer to “Our Warranty” on page...
- Page 7 Congratulations on the purchase of a SONIM XP5560 your network service provider. To make the best of these BOLT IS (ECOM Ex-Handy 08 and Ex-HSPA 08) mobile services, you must subscribe to them through your phone. This phone is a GSM/GPRS/EDGE/UMTS enabled...
- Page 8 SELECT Means to either press the Left or Right Signifies a Note. Selection Key to apply the command indicated at the bottom of the screen. The Center navigation key can also be used to select options. For example, Options Commonly Used across Menu Items if this guide says Select Menu >...
- Page 9 Avoid using the phone in close proximity to personal medical devices, such as pacemakers and hearing aids. Use only SONIM XP5560 BOLT IS (ECOM Ex-Handy 08 and Ex-HSPA 08) approved charging equipment to charge your phone and avoid damage to your phone.
- Page 10 Ensure that only qualified personnel install or repair your phone. The Sonim XP5560 BOLT IS (ECOM Ex-Handy 08 and Ex-HSPA 08) is water-proof and can be submerged to 2 metres for 1 hour. • Ensure to properly close the rubber cover of the charging connector and audio connector, to avoid deposits of water drops on these connectors, when the phone is immersed in water.
- Page 11 When the talk and standby times are noticeably shorter with the skin or eyes. In the event of leak or a hazard than normal, replace the battery with an original Sonim seek medical help immediately. battery. If a replacement battery is being used for the first...
- Page 12 (10) gram of tissue. Emergency calls may not be possible in all areas, on all The highest SAR value for the Sonim XP5560 BOLT IS cellular networks, or when certain network services and/ (Ex-Handy 08 .0 –E, Ex-Handy 08 .1 –E, Ex-Handy 08 .2 or mobile phone features are in use.
- Page 13 (that is, by the ear and worn on the body) as required by the FCC for each model. The highest SAR value for the Sonim XP5560 BOLT IS (Ex-Handy 08 .0 –A, Ex-Handy 08 .1 –A, Ex-Handy 08 .2 –A, Ex-Handy 08 .3 –A, Ex-Handy 08 .4 –A, Ex-Handy...
- Page 14 This section provides information on using your Sonim Inserting the Battery XP5560 BOLT IS (ECOM Ex-Handy 08 and Ex-HSPA 08) phone. The list of items in the Sonim XP5560 phone box are: Unscrew Cover • Sonim XP5560 BOLT IS (ECOM Ex-Handy 08 and...
- Page 15 Close Cover Insert Charger Close the battery cover. Rotate the battery Insert the charger plug into a power outlet cover screws in clockwise direction. You can use the screwdriver provided to tighten the screws. Ensure not to overtighten the screws. Connect to Phone The charger port is located on the left side Removing the Battery...
- Page 16 Set Battery Alert When you set the battery alert, every time the battery Lock Cover charge is low you hear an alarm. To set the battery alert Reinsert the battery and the cover. select Menu > Settings > Profiles > any profile (currently Turn the battery cover screws activate in the phone) >...
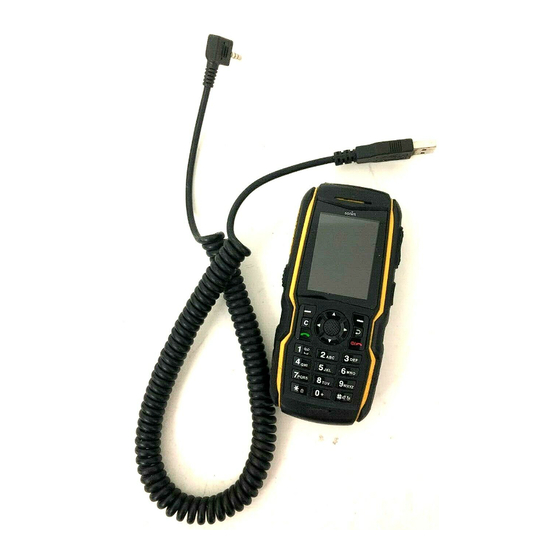
- Page 17 Parts of the SONIM BOLT IS (ECOM Ex-Handy 08 and Ex-HSPA Phone The Sonim XP5560 BOLT IS keypad has 11 function keys and 12 alphanumeric keys. The left side of the phone has one key and the right side Speaker of the phone has three keys.
- Page 18 5560 Parts of the SONIM BOLT IS (ECOM Ex-Handy 08 and Ex-HSPA Phone Volume keys Torch Headset port Loud speaker Charger/ USB port Battery cover Torch screws Push to talk (long press) Battery cover...
- Page 19 5560 SONIM BOLT IS (ECOM Ex-Handy 08 and Ex-HSPA 08) Keypad The following figure represents different keys in the phone key pad. Menu key Navigation arrow keys (Up/Down/Left/Right) Left Selection Key (LSK) Right Selection Key (RSK) Back Key Clear Key...
- Page 20 Switching On Key Shortcuts in Home Screen Press and Hold the Power ON/OFF key for 2 seconds to The following shortcuts can be accessed from the home Power ON the phone. screen. When the phone is switched on, it tries to register with the network.
- Page 21 Keypad Functions The following table displays the various keys and the corresponding functions they perform: Keypad key Operations • Press to end a call. • Press and hold to switch on or switch off the mobile phone. Press when in Menu or Edit modes to return to Standby mode. •...
- Page 22 Keypad key Operations Present at the centre of the navigation keys. Press while in standby mode to enter the main menu. • • Press when required to be used as a toggle key to select or clear a checkbox. • Press to perform similar tasks as the Left Selection Key.
- Page 23 • Press and hold in standby mode to access your Voice mail. • When entering text, press to enter space. Press and hold to set access Tone settings. Press and hold to access the Profiles. Press and hold to set the alarm. Press and hold to access the calendar.
- Page 24 The above preset functions of number keys (from 2 to 9) can also be changed to the speed dial functionality. For more information refer, “Managing Speed Dial Numbers” on page 36 Press and hold to display ‘+’ used for dialing an international number, while in standby •...
- Page 25 Near Field Communication Sonim XP5560 BOLT IS is equipped with the NFC feature. The NFC chipset is fixed to the battery cover. The NFC antenna connected to the core of the phone is located in the battery cover area where the NFC logo is printed.
- Page 26 This model is a bar type phone with a single LCD screen. Home Screen Indicators The graphic field of the screen is 240 (w) and 320 (h) The home screen indicators are visible when the phone pixels. The TFT technology used displays 262K colours. is in standby mode.
-
Page 27: Display Indicators
The following table describes the display indicators on E icon indicates that the the top bar of the home screen in the Sonim XP5560 phone is attached to 2G BOLT IS phone. These icons depend on the selected network and EDGE feature theme. - Page 28 Indicates that the Both Indicates that the phone Call call forward function is Vibration performs both vibration Forward enabled. and Ringing and ringing. Display Name Description Indicates that SD card Indicators SD Card is mounted on the phone. Indicates that there are Unread unread messages in the Message...
- Page 29 The following table describes the display indicators on the call screen in the Sonim XP5560 BOLT IS phone: Outgoing Indicates an outgoing Call call. Display Name Description Indicators Missed Call Indicates a missed call. Indicates an active Active Call call.
- Page 30 This section provides information on managing calls. Managing Call History Contacts within the call history have the following Dial a Number options: Use the numeric keys to enter the number and press • View: You can view the details of the call such as the type of call, name, number, call time, call duration and times of call.
-
Page 31: Options Function
• To reset the time of all calls, select Menu > Calls > while your phone is busy. The caller will receive a Call history > Options > Advanced > Call timers > busy signal. Reset all. To verify the call waiting status, select Menu > Calls >... - Page 32 Forward if Change Forward calls when you do not answer You can change the barring no answer barring incoming calls. password by entering a new password password. Forward if Forward calls when your phone is busy busy. Fixed Dial Forward all Forward all data calls when your data calls phone is in roaming.
- Page 33 reminder > On. Select OK and set the reminder time. You can set the reminder time between 30 to 60 seconds. Options Function Restrict • Allow all - allows all incoming calls Receive a Call incoming • Allow contacts - allows calls from To receive a call, press the Accept key numbers in the phonebook contact press Left Selection key.
- Page 34 To enable password protection for call restrictions setting, you must activate Safeguard feature and choose Restrict calls under settings. For more information refer “Safeguard” on page...
- Page 35 This section provides information on the various settings Disable to disable this feature. for the phone. To access, select Menu > Settings > Phone settings. Language Settings Time and Date Settings You can change the phone’s interaction language by selecting your preferred language. You can set and display the date and time on the phone.
- Page 36 are two themes available. Select Theme 1 or Theme When speed dial is activated, pre-defined 2. Select Options to activate the selected theme, functions set using Dedicated keys will be update the theme automatically after set time disabled. period, and set the theme display order. Power Saving Settings Customizing Dedicated Keys You can set the backlight level and duration.
- Page 37 Network Selection Data Account You can set the network account and view the data To modify the network access settings, select Menu > connection information. Settings > Network settings. The following network settings are displayed: You can add, view, edit and delete the accounts. You can You can select your network, specify the network edit the following information in the accounts: Account account, and indicate whether GPRS is required at all...
- Page 38 Select AGPS profiles and then press Select. In A-GPS profiles, select the required profile and click Options > Activate. You can also select Edit. Enter the name, address, data account, port, and TLS as provided by the service provider or operator. Select Done to save the settings.
- Page 39 To prevent unauthorized use of your phone, you can set The default password for phonelock is 1234. the PIN protection. PIN Protection If the phone lock is enabled, you will be requested to enter the password, when ever you power on the you can activate PIN protection, to prevent unauthorized phone.
-
Page 40: Certificate Manager
password for confirmation and select OK. The default password for safeguard is 1234. Certificate Manager You can view, edit key usages, and delete authorized certificates and user certificates. Restore Factory Settings Select to reset the settings to the original factory settings. Please note that this can remove changes you have made to your settings. -
Page 41: Deactivate Bluetooth
Allow this device to connect information. automatically? is displayed with options Yes and The Sonim XP5560 BOLT IS is compliant with Bluetooth specification BT 3.0 supporting the following profiles: If you select Yes, the other device can send any file SPP, SAP, HFP, HSP, A2DP, AVRCP, DUN, PBAP, OPP, and via bluetooth without your confirmation. -
Page 42: Bluetooth Settings
When the other device rejects your request the Rename Paired Device message Pairing Failed is displayed on the screen. Select Menu > Settings > Connectivity > Bluetooth > My device. Prior to pairing the devices, ensure that the visibility settings for the pairing devices are Select the paired device. - Page 43 My devices screen displays the paired My name Select this option to change the devices. To send a data to an unpaired name of your device. device, select Search new device. Select Storage the unpaired device of your choice. Enter the Select the storage location.
- Page 44 • Mass storage: Select this to use the USB cable as mass storage device to transfer and synchronize data between the Sonim XP5560 BOLT IS phone and your computer. • COM port: Select this to use the phone with...
Need help?
Do you have a question about the ECOM Ex-Handy 08 and is the answer not in the manual?
Questions and answers