Table of Contents
Advertisement
Quick Links
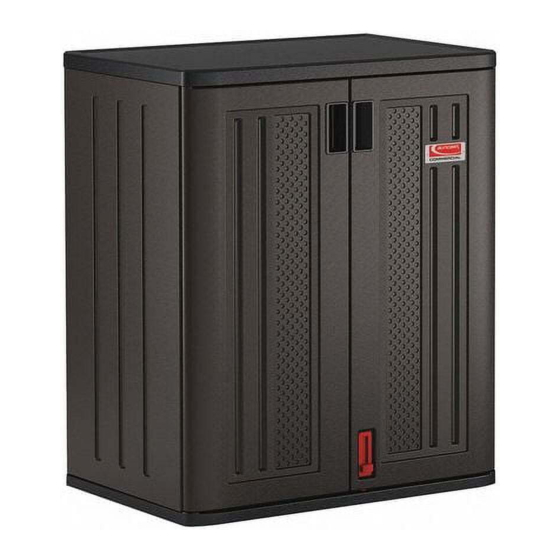
ITEM NUMBER: BMCCPD3600
PARTS
AA
0631149
#10 x .75
Pan Head Screw
x20
H
0B00273
Left Door Panel
M
010238510
Door Handle
x2
TOOLS NEEDED
© 2023 Suncast Corporation, Batavia, IL
To learn about other Suncast products, please call
1-855-477-1260 or 1-630-381-6309.
Product Feedback? Go To: Suncastcommercial.com/feedback OR
email us at: feedback@suncastcommercial.com
C
0B00275
Left Side Panel
G
0B00272
Right Door Panel
L
1MRG09010
L-Bracket
x5
F
A
0B00277
Shelf Panel
0B00279
Bottom Panel
J
0101221
0101222
Door Latch Pin
Door Latch Housing
E
0B00278
Top Panel
D
0B00274
Back Panel
B
0B00276
Right Side Panel
K
3/8"
3/16"
0361364C
Advertisement
Table of Contents

Related Manuals for Suncast BMCCPD3600


Summary of Contents for Suncast BMCCPD3600
- Page 1 To learn about other Suncast products, please call 1-855-477-1260 or 1-630-381-6309. Product Feedback? Go To: Suncastcommercial.com/feedback OR email us at: feedback@suncastcommercial.com ITEM NUMBER: BMCCPD3600 PARTS 0B00278 0631149 Top Panel #10 x .75 Pan Head Screw 1MRG09010 L-Bracket 0B00274 Back Panel...
- Page 2 This kit contains parts that can be damaged if assembled incorrectly or in the wrong sequence. • Please follow instructions. Suncast is not responsible for replacing parts lost or damaged due to incorrect assembly. • Check for all parts before you begin assembly.
- Page 3 ASSEMBLY Make sure all tabs are engaged before locking panels together. Smooth Smooth Side Up Side Up Align tabs on left side panel (C) with slots on bottom Align and engage tabs on back panel (D) with slots panel (A). Lower side panel into slots and lock in place on side panels (C/B).
- Page 4 SHELF INSTALLATION Attach two L-brackets (L) to one shelf (F) using four Insert shelf (F) on angle. Move to a level position while screws (AA) on each L-bracket. Repeat for remaining holding in hands. shelf. IMPORTANT: Tab (XX) on shelf must engage with slot (YY) on the inside of side panels for each shelf.
- Page 5 ASSEMBLY-DOORS Insert door latch housing (K) into bottom right door (G) and snap into place. Insert door latch (J) into door latch housing. Push latch pin down so it is fully seated in latch housing. Push down with force until you hear a snap.
- Page 6 ASSEMBLY-DOORS (CONTINUED) Place door on a flat hard surface. Lower (M) into left door. Insert on an angle. Hole for lock must be facing inside of cabinet. Push down hard on center of handle to snap in place. Repeat with right door. With left door (H) in the open position, place door into hinge receptacle on bottom left of cabinet.
- Page 7 With doors closed, attach a 5/16˝ lock (not provided). 5/16" (12.7 cm) Max. 1 1/2" 3/4" Max. (7.6 cm) 5/16" (12.7 cm) Max. MOUNTING CABINET TO WALL Mounting the cabinet to a wall for added stability is recommended. Note: Securing cabinet to wall is easier with shelves removed. Using a 3/16”...
- Page 8 Suncast assumes no liability for any modified product or consequences resulting from failure of a modified product. Suncast is not responsible for: loss of use of the unit; labor for repair, inspection fees or disposal costs. THIS WARRANTY IS NONTRANSFERABLE. IT EXCLUDES FLOOR MODELS, CLEARANCE AND OPEN BOX UNITS.
Need help?
Do you have a question about the BMCCPD3600 and is the answer not in the manual?
Questions and answers