
Related Manuals for Samsung VS20C85 Series


Summary of Contents for Samsung VS20C85 Series
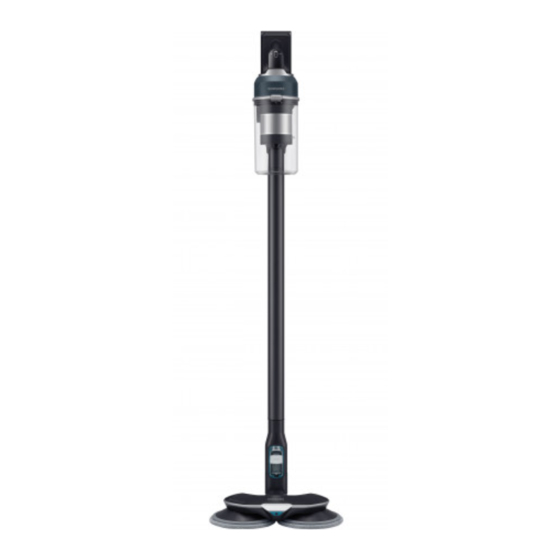
- Page 1 Vacuum cleaner User manual VS20C85**** Series • Before operating this unit, please read the instructions carefully. • For indoor use only...
-
Page 2: Table Of Contents
Contents Safety information Operation Important safety symbols Assembling the wall mount General Installing the wall mount Vacuum cleaner Using the wall mount Maintenance Charging the battery Wall mount Inserting the battery Battery Ejecting the battery Charging the additional battery Using the buttons and display Preparation Using the accessories Accessories... -
Page 3: Safety Information
Safety information • Before operating the appliance, please read this manual thoroughly and retain it for your reference. • Because the following operating instructions cover various models, the characteristics of your vacuum cleaner may differ slightly from those described in this manual. Important safety symbols WARNING Indicates that a danger of death or serious injury exists. -
Page 4: General
Safety information General For information on Samsung’s environmental commitments and product specific regulatory obligations e.g. REACH (WEEE, Batteries) visit: samsung.com/uk/aboutsamsung/samsungelectronics/ corporatecitizenship/data_corner.html Failure to meet these requirements could cause damage to the internal parts of the vacuum and void your warranty. - Page 5 – An explosion or fire may occur. • If the product makes a strange sound or emits a smell or smoke, turn off the product immediately, and then contact a Samsung service center. – Electric shock or fire may occur.
- Page 6 – If there is foreign matter on the wheel of the brush which cannot be removed easily, contact a Samsung service center. • When the spin brush inside a brush is working, do not touch the brush.
-
Page 7: Maintenance
– If water gets into the product and an error occurs, turn off the product and contact a Samsung service center. • When cleaning the washable parts, do not use alkaline detergent, acid, industrial detergent, air freshener, acetic acid, etc. -
Page 8: Wall Mount
Safety information Dustbin, Washable Micro Filter, Fine Dust Filter, Metal Mesh Washable Parts Grille Filter, dry cloth Acceptable Neutral Dish washing detergent detergent Alkaline Lox, mold cleaner, etc. Acid Paraffin oil, an emulsifier, etc. Industrial NV-I, PB-I, Opti, alcohol, acetone, benzene, thinner, etc. Prohibited cleaners detergent... -
Page 9: Battery
• When you purchase a new battery, make sure to check the model name (VCA-SBTA95) and the genuine logo. – Contact your nearest Samsung Electronics retailer or Samsung service center to purchase any consumable accessories. • Leaks from battery cells can occur under extreme usage or temperature conditions. - Page 10 Safety information • When attaching the battery to the vacuum cleaner, insert it until you hear a click. This assures that the battery is firmly attached. – Otherwise, the battery may fall and could cause product damage or injury. • If you are not going to use the vacuum cleaner for a long period of time or you are going to be away from home for a long period of time, unplug the wall mount, and then detach the battery from the vacuum cleaner.
-
Page 11: Preparation
Preparation Accessories The accessories with the ' * ' mark may differ depending on the models. Pipe Pet Tool+ Combination Tool Extension Crevice Tool Flexible Tool User manual Wall mount (2 screws / Battery charger 2 screw anchors) * Jet Dual Brush * Slim LED Brush * Spray Spinning * Disposable wet pads... -
Page 12: Parts Overview
Preparation Parts overview 10 Handle 01 Power ( ) button 11 Battery level indicator 02 Suction power control buttons 12 Battery release button 03 Washable Micro Filter 13 Pipe release button 04 Metal Mesh Grille Filter 14 Brush release button 05 Display 15 Vacuum charging part 06 Dustbin release button... -
Page 13: Operation
Operation CAUTION Install the wall mount on a hard concrete wall. • If it is installed on a wood or plaster wall, the product may fall. Assembling the wall mount To disassemble the wall mount, follow steps in reverse order. Installing the wall mount 1. -
Page 14: Using The Wall Mount
Operation Using the wall mount Charging • Make sure the back of the battery is correctly placed onto the wall mount. • Check if the battery level indicator turns on while charging. • The battery level indicator blinks while charging. When charging is complete, the blinking stops and the light level dims. - Page 15 Storing the accessories [When the wall mount is installed to a wall] [When the wall mount is not installed to a wall] • If the wall mount is not installed to a wall, fold the accessory holder as shown in the figure, and then place the wall mount on a flat and even surface (such as desk).
-
Page 16: Charging The Battery
Operation Charging the battery • When the battery level indicator turns red or the ‘Low battery’ message appears on the display, charge the battery. • You cannot use the vacuum cleaner while charging. • Make sure the back of the battery is correctly placed onto the vacuum charging part. •... -
Page 17: Charging The Additional Battery
Charging the additional battery Charge the additional battery on the battery cradle. Battery level • Firmly push the battery onto the battery cradle. indicator • Battery level indicator turns on and changes color to red, orange, and yellow as the battery charges. -
Page 18: Using The Buttons And Display
Operation Using the buttons and display 01 Display Displays the current mode (‘MIN, MID, MAX, JET, or WET’) or the alert message. 02 Power ( Press this button to turn on or off the vacuum cleaner. When you turn on the power, the vacuum cleaner starts in the ‘MID’ mode. -
Page 19: Using The Accessories
Using the accessories Detaching the accessories • To detach the accessories, press the release button on the back of each accessory. • Before detaching the accessories, operate the vacuum cleaner in the 'MAX' mode for 10 seconds to prevent any foreign matter remains inside the accessory. - Page 20 Operation Spray Spinning Sweeper Use to clean a wood and linoleum floor with a wet Reusable wet pad pad. • The Spray Spinning Sweeper does not have a Spin disk dust suction function. Using the reusable wet pad • When attaching the wet pad, make sure the pad is in the center of the spin disk.
-
Page 21: Maintenance
Maintenance Cleaning the vacuum cleaner Dustbin/Washable Micro Filter CAUTION • After cleaning the dustbin and Washable Micro Filter with water, you should dry them completely in the shade for more than 24 hours before use. When heat is applied, part deformation may occur. If the filter is not dried completely before being used, it can cause an odor. - Page 22 Maintenance Fine Dust Filter Make sure to turn off the product before cleaning the filter. • Twist and pull off the Fine Dust Filter, and tap it gently to remove the dust. • Wash the filter with running water once a month to maintain the best performance of the filter. •...
- Page 23 Slim LED Brush ‘Click’ CAUTION • Do not clean the brush with water. • When foreign matter remains on the brush, remove it with a wet tissue or a dry cloth. NOTE • If the spin brush does not work after cleaning the Slim LED Brush, the overheating prevention device of the motor may have been enabled.
- Page 24 Maintenance Slim LED Brush roller wheels Use a small screwdriver to disassemble the front and rear roller wheels. Rear roller NOTE wheel Tools required for disassembly. Flat head screwdriver (3 mm or less in width), Phillips Front roller wheel screwdriver, prying tool. CAUTION •...
- Page 25 Rear roller wheel Release lever ‘Click’ Release lever • Lift the release lever to detach the rear roller wheel. • Detach the rear roller wheel and remove the tangled foreign matter. Then, reassemble the wheel. • Insert the rear roller wheel into its place, and then press the release lever until you hear a click. CAUTION Be careful not to damage the release lever with a screwdriver.
- Page 26 Maintenance Spray Spinning Sweeper NOTE If the spin disk does not work after cleaning the Spray Spinning Sweeper, the overheating prevention device of the motor may have been enabled. Wait 30 minutes or more to cool the motor and operate again. Pet Tool+ Cut the tangled hair or fur with scissors, and then use a vacuum cleaner to suck up the pieces.
-
Page 27: Appendix
• Install the wall mount in a place where there are no objects that could break and cause damage. • If you have a problem with installing the wall mount, contact a Samsung service center. Battery usage NOTE • If the product does not work after you charge the battery, replace the battery. - Page 28 Do not boil the wet pad. • Use a genuine wet pad of Samsung Electronics for the Spray Spinning Sweeper. • If the Spray Spinning Sweeper is used without a wet pad, any product malfunction will not be covered by warranty and a service fee will be charged.
- Page 29 (VCA-SPA95). • When you purchase an additional dust bag, make sure to check the model name (VCA-ADB952). – Contact your nearest Samsung Electronics retailer or Samsung service center to purchase any consumable accessories. CAUTION • Do not leave the product leaning against a wall or a table.
- Page 30 Appendix • When not using the Spray Spinning Sweeper, empty all the water in the water tank. • Do not use without a filter in place. Maintenance NOTE • If the inner part of the Spray Spinning Sweeper is clogged with large foreign matter, spinning speed decreases or the spin disk stops.
-
Page 31: Troubleshooting
• Replacement filters are available at your local Samsung service agent. • Materials of a mat (childcare center mat, noise prevention mat for Static electricity occurs between floors, etc.) may cause the static electricity. - Page 32 Appendix Problem Solutions • As this product has the overheating prevention device of the motor, product will stop operation temporarily for the following conditions. After correcting the cause of the problem, turn the product on again. (This case Vacuum cleaner stops may differ depending on the ambient temperature.) operation during cleaning.
-
Page 33: Product Specification
Product specification Charging and cleaning time may differ depending on the brushes and the conditions of use. Model VS20C85**** Series Power consumption (Vacuum cleaner) Based on a handy vacuum cleaner: 580 W Battery specification Li-ion 25.2 V, 2200 mAh, 7 cell 2.63 kg (Jet Dual Brush) Weight (Vacuum cleaner) 2.44 kg (Slim LED Brush) - Page 34 Memo...
- Page 35 Memo...
- Page 36 DJ68-00902B-00...
Need help?
Do you have a question about the VS20C85 Series and is the answer not in the manual?
Questions and answers
What is led slim brush ,for?