Table of Contents
Advertisement
Available languages
Available languages
Quick Links
Advertisement
Table of Contents

Related Manuals for DiGiQuest DVB-T2


Summary of Contents for DiGiQuest DVB-T2
- Page 2 Audio e il simbolo della doppia D sono marchi di Dolby Laboratories Licensing Corporation. Fabbricato da DIGIQUEST SOLUTIONS s.u.r.l. Sede legale Via Privata Fratelli Gabba, 5 - 20121 Milano | Sede operativa Via Avisio, 18 - 00048 Nettuno (RM) - Italy.
-
Page 3: Sicurezza E Precauzioni
SICUREZZA E PRECAUZIONI ATTENZIONE: per ridurre i rischi di scosse elettriche, non aprire l’apparecchio. Qualunque intervento dovrà essere affidato ad un tecnico specializzato. L’apertura del ricevitore comporta la decadenza automatica della garanzia. Questo simbolo indica voltaggio pericoloso all’interno del prodotto, con rischio di scossa elettrica e danni alle persone. - Page 4 aggiuntivamente corrente. Non effettuare operazioni di collegamento o scollegamento con mani bagnate o a piedi nudi. Non utilizzare oggetti come leve per staccare la spina da una presa. In caso di odore di bruciato o fumo, staccare immediatamente la spina e contattare l’assistenza.
- Page 5 OGGETTI. Non inserire mai oggetti nelle fessure del ricevitore. Se ciò accade scollegare l’apparecchio e rivolgersi ad un tecnico. UTILIZZO RISERVATO A PERSONE ADULTE. Il bene acquistato è un congegno elettronico sofisticato per cui assolutamente non idoneo all’uso da parte di minori.
- Page 6 pioggia. Non posizionare vicino a fonti di calore. porre nessun altra apparecchiatura elettronica sul ricevitore. Non usare l’apparecchio in aree sotto pressione. Non posizionare candele o lampade sopra il ricevitore. Posizionare in orizzontale e su superfici stabili, lontano da vibrazioni. Se l'apparecchio viene spostato da un ambiente caldo ad uno freddo si possono creare problemi.
-
Page 7: Contenuto Della Confezione
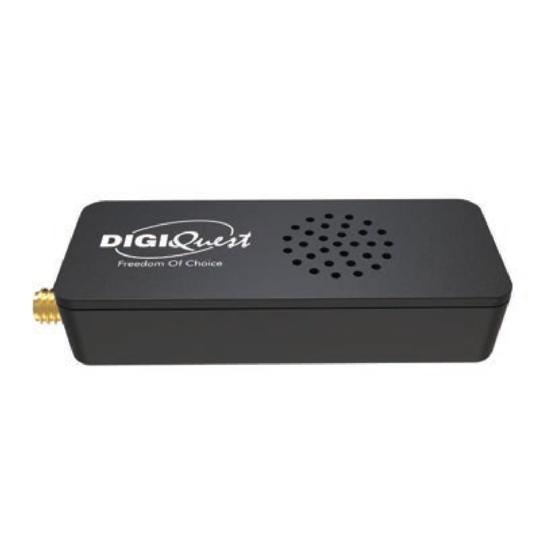
CONTENUTO DELLA CONFEZIONE Prima dell’installazione, controllare il contenuto della confezione: Ricevitore HD DVB-T2 Telecomando 2 in 1 Sensore IR telecomando con adesivo Adattatore per presa antenna IEC Cavo HDMI Cavo USB di alimentazione e per collegamento memorie USB ... - Page 8 Avvitare l’adattatore per presa antenna IEC incluso nella confezione alla presa dell’antenna RF IN (1). Connettere il cavo d’antenna con l’adattatore per presa dell’antenna IEC (1).
- Page 9 Collegare il sensore IR del telecomando alla presa IR (2) sullo stick. Posizionare sensore di fronte al televisore, esso deve essere posizionato in modo che possa ricevere il segnale dal telecomando (es. A o B). L’uscita HDMI deve essere connessa direttamente al televisore utilizzando il cavo HDMI fornito.
- Page 10 TELECOMANDO 2 in 1...
- Page 11 Il telecomando in dotazione ha la possibilità di essere programmato per poter gestire anche alcune funzioni del telecomando della TV (es. gestione del volume, dello spegnimento, sorgente). Per assegnare le funzioni della TV al telecomando del ricevitore è necessario agire sulla sezione TV CONTROL in alto a sinistra nel telecomando: seguire la procedura seguente, riportata anche sul retro del telecomando.
- Page 12 ALTRI TASTI BLU: per accendere /spegnere (standby). SUB/◄◄: per visualizzare i sottotitoli (se disponibili) ed impostarne la lingua. Premere di nuovo per eliminarli. Quando si riproduce un file per tornare indietro alla velocità di 2X, 4X, 8X, 16X e 32X. TTX/►►: per aprire il televideo.
- Page 13 (0~9) TASTI NUMERICI: per inserire il numero di un canale. Nel menu per inserire valori. PVR: tasto non attivo. FAV: per visualizzare la lista favoriti (se create). INFO: per visualizzare la barra informazioni in basso nello schermo. Se si clicca di nuovo si visualizza l’EPG, di nuovo ancora le info sul canale.
- Page 14 Utilizzo del telecomando Il telecomando va direzionato verso il sensore IR collegato al ricevitore. Rimuovere qualsiasi oggetto che si trovi sulla traiettoria dal telecomando al sensore. ALCUNI TASTI e FUNZIONI Riconfigurazione veloce Premendo questo tasto sul telecomando si avvia l'aggiornamento della lista canali che inserirà nuovi canali o sposterà...
-
Page 15: Prima Accensione
- Tasto OK per visualizzare il canale selezionato. La Guida elettronica ai programmi visualizza la programmazione per ogni canale (se l'emittente la prevede). È possibile entrare nell'EPG premendo il tasto telecomando. Apparirà programmazione del canale selezionato. Per cambiare canale usare i tasti e , nella finestra a destra comparirà... - Page 16 Requisito necessario per l’utilizzo di diverse funzioni supportate dal ricevitore è inserire il PIN di accesso ad esse. Con il tasto ▼ scendere su Nuova password e inserire il PIN desiderato, composto da 4 cifre (es. 0000 o 1234, ecc.), usando i tasti numerici del telecomando: abbiate cura di annotarlo negli spazi seguenti, in caso di smarrimento...
- Page 17 Favoriti: il ricevitore dispone di 8 gruppi favoriti. I canali possono essere salvati in qualsiasi gruppo, un canale può essere assegnato a diversi gruppi. Selezionare con i tasti e un canale da aggiungere alla lista dei gruppi favoriti. ...
- Page 18 Sposta: selezionare con i tasti e il canale da spostare. Premere il tasto INFO. Immettere il nuovo numero di canale con i tasti numerici 0-9. Premere il tasto OK. Il canale verrà spostato. Elimina: selezionare con i tasti e il canale da cancellare.
- Page 19 Menu Ricerca canali Ricerca automatica. Avvia scansione automatica dei canali. - Ricerca manuale. È possibile ricercare solo un pacchetto di canali alla volta. Per avviare questa procedura occorre conoscere il numero del canale corrispondente alla frequenza del canale TV che si vuole ricercare: ogni...
- Page 20 per visualizzare un programma quando inizia. Il decoder si posizionerà sul canale impostato poco prima dell’evento. Impostazioni OSD: impostare visualizzazione delle informazioni sullo schermo. - Aggiornamento USB: è necessario usare dispositivi USB, si raccomanda di usare pennette USB non di elevata dimensione, dato che il ricevitore è...
-
Page 21: Specifiche Tecniche
SPECIFICHE TECNICHE SECTION COMMENTS ITEM Frequency Range VHF:7M, 174 – 230MHz; UHF 8M, DVB-T2 TUNER 470 MHz - 866 MHz Band 7MHz,8MHz Input impedance 75 Ω Standard DVB-T2 Demodulation COFDM CHANNEL Constellation QPSK,16-QAM,64-QAM, Combinations DECODING hierarchical 16-QAM, hierarchical 64-QAM 1/2, 2/3, 3/4, 5/6, 7/8... - Page 22 (aggiornamenti disponibili, form per richiesta assistenza). Registrati ora sul sito ufficiale all'indirizzo: www.digiquest.it sezione LINK > per essere informati su UTILI REGISTRAZIONE PRODOTTO aggiornamenti disponibili e per ottenere il massimo delle prestazioni.
- Page 23 Verificare che l'impianto di ricezione (antenna) funzioni correttamente. Il segnale è troppo debole a causa, ad esempio, di cattive condizioni atmosferiche: aspettare che il segnale si ristabilisca. Il telecomando non aziona il ricevitore Assicurarsi che il ricevitore sia acceso. Assicurarsi di aver puntato il telecomando in direzione del sensore IR e che non vi siano ostacoli sulla traiettoria.
- Page 24 Verificare se la funzione Muto è attivata. Usare il telecomando del ricevitore o del televisore per disattivarla. Verificare che il volume del ricevitore o del televisore sia abbastanza alto. Premere i tasti del volume del telecomando del ricevitore o del televisore per la regolazione. Controllare che il ricevitore sia correttamente connesso al televisore.
- Page 25 Manufactured under license from Dolby Laboratories. Dolby, Dolby Audio, and the double-D symbol are trademarks of Dolby Laboratories Licensing Corporation. Information for Users on Disposal of Old Equipment and Batteries [European Union only] These symbols indicate that equipment with these symbols should not be disposed of as general household waste.
-
Page 26: Safety And Precautions
SAFETY AND PRECAUTIONS CAUTION CAUTION: to reduce the risk of fire and electric shock, do not open the unit. All work must be carried out by a specialized technician. Opening the receiver will automatically void the warranty. This symbol indicates dangerous voltage inside the product, which may cause electric shock and personal injury. - Page 27 such as levers to disconnect the plug from an outlet. If you smell burnt or smoke, unplug the power cord immediately and contact your service representative. LIQUIDS. Do not expose this product to dripping or splashing, and do not place any objects with liquid inside, such as vases, etc.
- Page 28 damage to persons or property resulting from the use of the goods by minors. Keep the appliance out of the reach of children. Plastic bags in packaging can be dangerous. To avoid suffocation, keep the bags out of the reach of children. Batteries and other small parts can be swallowed by children.
- Page 29 Manufactured by DIGIQUEST SOLUTIONS s.u.r.l. Head- quarter Via Avisio, 18 - 00048 Nettuno (RM) – Italy Made in China DIGIQUEST SOLUTIONS s.u.r.l. declares that this product complies with Directive 2014/53 / EU.
-
Page 30: Contents Of The Package
CONTENTS OF THE PACKAGE Before installation, please check the contents of the package: HD DVB-T2 receiver 2-in-1 remote control IR remote control sensor with adhesive IEC antenna socket adapter HDMI cable USB cable for power supply and USB memory connection ... - Page 31 HDMI CABLE TO CONNECT TO THE TV HDMI USB FOR USB MEMORY UNIT POWER SUPPLY IR REMOTE CONTROL SENSOR TO BE PLACED ON THE TV FRONT PANEL IEC ANTENNA SOCKET ADAPTER TERRESTRIAL ANTENNA CABLE Screw the IEC antenna socket adapter included in the package to the RF IN antenna socket (1).
- Page 32 Connect the IR remote control sensor to the IR socket (2) on the stick. Place the sensor in front of the TV, it should be positioned so that it can receive the signal from the remote control (e.g. A or B). The HDMI output (3) should be connected directly to the TV using the HDMI cable supplied.
- Page 33 2-in-1 REMOTE CONTROL...
- Page 34 The supplied remote control can be programmed to also manage some functions of the TV remote control (e.g. volume management, switch-off, channel change). To assign TV functions to the receiver remote control, it is necessary to use the TV CONTROL section at the top of the remote control, follow the procedure below: TV CONTROL TV remote control...
-
Page 35: Other Keys
OTHER KEYS BLUE: switch the STB on and standby mode. SUB/◄◄: switch on subtitles, if current channel has this option, and set their language. Press again to delete them. When playing back a file to rewind at the speed of 2X, 4X, 8X, 16X and 32X. TTX/►►: switch on teletext, if current channel has this option. - Page 36 PVR: key not active. FAV: show favorite list create). INFO: to display the info bar at the bottom of the screen. Press again to display the EPG and another time to show channel info. EPG (Electronic Program Guide): to open the program guide.
- Page 37 the channel list update that will insert new channels or will move channels that have changed numbering. In this period of signal changeover to HD resolution, channels often undergo changes and it is therefore necessary to update often the channels quickly easily.
-
Page 38: Getting Started
on the right. Use the button to enter the column on the right and the / buttons to select the desired event. Press the INFO button to open the program description. Use the YELLOW button to switch between the columns. Press the OK key (timer) to book the display of the selected event. - Page 39 “Installation Guide”, any changes can be made later in the menu. TV System / Video Resolution / Picture format. Move to Next and press OK to move to the next screen. FTA / LCN. Move to Next and press OK to move to the next screen.
- Page 40 Press the and buttons to select the channel to be locked. Press the GREEN button, enter the password, the lock symbol (padlock) will appear next to the channel. Press the GREEN button again to cancel the lock.
- Page 41 completely (RED button) or restore them (GREEN button, restore symbol appears, press EXIT to save). - Parental control. Allows various functions to be blocked with a password: - the viewing of channels (if the broadcaster provides this) according to the set age; - the menu lock, also called Hotel function, prevents unwanted changes to the decoder settings;...
- Page 42 Local Time Setting menu - Time. Not adjustable. - Time Zone Setting. Adjustable. System menu - System Information - Factory Setting. To reset the decoder. You need to enter the PIN. Use this function with caution, all stored data will be lost! It will be necessary to repeat the channel search.
-
Page 43: Technical Specifications
TECHNICAL SPECIFICATIONS SECTION COMMENTS ITEM Frequency Range VHF:7M, 174 – 230MHz; UHF 8M, DVB-T2 TUNER 470 MHz - 866 MHz Band 7MHz,8MHz Input impedance 75 Ω Standard DVB-T2 Demodulation COFDM CHANNEL Constellation QPSK,16-QAM,64-QAM, Combinations DECODING hierarchical 16-QAM, hierarchical 64-QAM 1/2, 2/3, 3/4, 5/6, 7/8... -
Page 44: Troubleshooting
If none of the actions listed in the table help you solve the problem, log on to www.digiquest.it and you will be guided quickly to solve the problem, thanks to the different possibilities that will be offered to you (available updates, online chat, form for assistance request). - Page 45 conditions: wait for the signal to recover. Remote control does not operate the decoder Make sure the decoder is turned on. Make sure that the remote control is pointing toward the IR sensor and that there are no obstructions on the path. Check the remote control batteries: they may have been inserted in the wrong direction or discharged.
- Page 46 Check that the decoder is properly connected to your TV or audio system. Some connections to the decoder may have been “loose”. The inserted USB memory is not recognized Not all USB devices are compatible. Compatibility with large-capacity USB devices is not guaranteed. The standard USB port in the TV can provide a power supply of about 500 mA.
Need help?
Do you have a question about the DVB-T2 and is the answer not in the manual?
Questions and answers