Advertisement
Quick Links
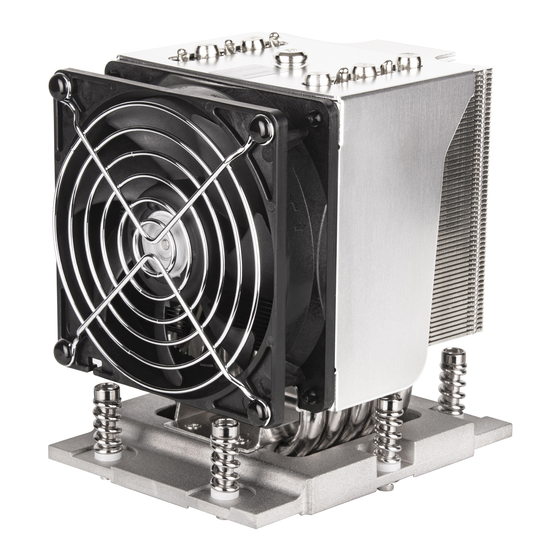
XENON (XE) SERIES – Assembly Guide for
1.
Take out the heatsink from its packing box. Before installing the heat sink, please check that heat sink must be properly
oriented to the system cooling air flow direction (Figure 1 & Figure 2).
SYSTEM COOLING
AIR FLOW
DIRECTION
2.
Remove the protection cover of thermal interface material (TIM) or thermal grease. The required amount of TIM has
been pre-applied on the bottom of the heat sink. Inspect pre-applied TIM for any damage.
3.
Place the heat sink directly on top of the CPU (Figure 3) so that the six heat sink mounting screws are aligned with and
seated on the six heat sink mounting studs or nut standoffs on the socket stiffener frame. The heat sink must be
properly oriented to the system cooling air flow direction. Please note that the heat sink cooling fan should not be
attached to the heat sink body when tightening the six heat sink mounting screws.
4.
Use a screwdriver with Torx T20 bit and adjust the screwdriver torque setting to 12.5~15.0 kgf-cm (10.8~13.0 lbf-in).
Before turning on the screwdriver, make sure that the screwdriver bit is fully engaged in the cavity of the heat sink
mounting screw head. Keep heat sink mounting screw vertical during installations.
5.
Tighten the two diagonal heat sink mounting screws, i.e. the #1 and #2 screws (Figure 4) completely tighten screws
one-at-a-time Then do the same with the remaining four diagonal heat sink mounting screws.
AMD Socket SP5 Coolers
Figure 1
Figure 3
SYSTEM COOLING
AIR FLOW
DIRECTION
Figure 2
Figure 4
Advertisement

Subscribe to Our Youtube Channel
Related Manuals for SilverStone XENON XE Series


Summary of Contents for SilverStone XENON XE Series
- Page 1 XENON (XE) SERIES – Assembly Guide for AMD Socket SP5 Coolers Take out the heatsink from its packing box. Before installing the heat sink, please check that heat sink must be properly oriented to the system cooling air flow direction (Figure 1 & Figure 2). SYSTEM COOLING AIR FLOW DIRECTION...
- Page 2 Please refer to above “Warranty terms & conditions” for further warranty details. 2. Under warranty, SilverStone Technology’s maximum liability is limited to the current market value for the product (depreciated value, excluding shipping, handling, and other fees). SilverStone Technology is not SilverStone Technology Co., Ltd.
Need help?
Do you have a question about the XENON XE Series and is the answer not in the manual?
Questions and answers