Table of Contents
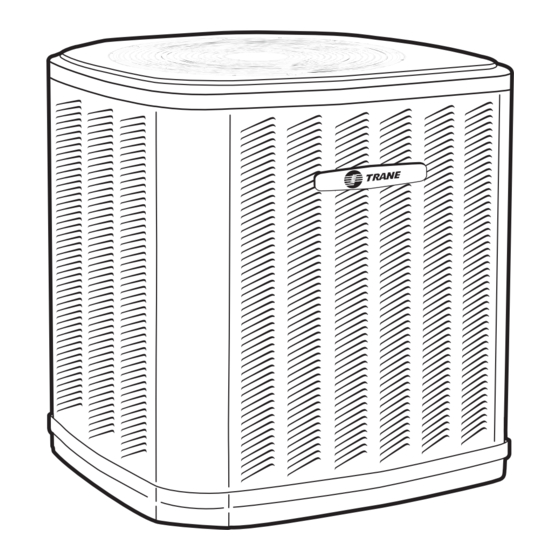
Advertisement
Available languages
Available languages
Quick Links
ALL phases of this installation must comply with NATIONAL, STATE AND LOCAL CODES
IMPORTANT — This Document is customer property and is to remain with this unit. Please return to service information
pack upon completion of work.
These instructions do not cover all variations in
systems nor provide for every possible contingency to
be met in connection with installation. All phases of
this installation must comply with NATIONAL, STATE
AND LOCAL CODES. Should further information be
desired or should particular problems arise which are not
covered sufficiently for the purchaser's purposes, the matter
should be referred to your installing dealer or local distributor.
A. GENERAL
The following instructions cover 2TWA0030,40,50, & 60AD
Heat Pump Units.
NOTE:
These outdoor units may be used with indoor units
equipped with Thermostatic Expansion Valve or Accutron™
Flow Control Check Valve (F.C.C.V.) assembly for refrigerant
flow control only.
Check for transportation damage after unit is uncrated.
Report promptly, to the carrier, any damage found to the unit.
To determine the electrical power requirements of the unit,
refer to the nameplate of the unit. The electrical power
available must agree with that listed on the nameplate.
The Weathertron
®
Heat Pump has been designed and
manufactured to withstand and operate in severe winter
conditions. However, there are precautionary steps which
should be taken at the time of installation which will help
assure the efficient operation of the unit. It is recom-
mended that these precautions be taken for units
being installed in areas where snow accumulation and
prolonged below freezing temperatures occur.
1. Units should be elevated 3 to 12 inches above the pad or
rooftop, depending on local weather. This additional
height will allow better drainage of snow and ice (melted
during defrost cycle) prior to its refreezing. This should
prevent a build-up of ice around the unit which occurs
when unit is not elevated. Insure that drain holes in
unit base pan are not obstructed preventing
draining of defrost water.
2. If possible, avoid locations that are likely to accumulate
snow drifts. If not possible, a snow drift barrier should be
installed around the unit to prevent a build-up of snow
on the sides of the unit and should be of sufficient
distance from the unit to prevent restriction of airflow to
and from the unit. Also allow for proper maintenance
space. The barrier should be constructed of materials
which will blend in with the building design.
Installer's Guide
Heat Pumps
2TWA0030,40,50, & 60AD
1
3. Avoid locating the unit where condensation and freezing
of defrost vapor may annoy the customer. For instance,
installing the unit under a bedroom, kitchen, or picture
window may be annoying to the customer since conden-
sate and fog will occur during the defrost cycle.
4. Avoid locating the unit under the eaves or other overhead
structures as sizeable icicles may form and the unit may
be damaged by these falling icicles.
B. LOCATION AND PREPARATION
OF THE UNIT
1. When removing unit from the pallet, notice the tabs on
the basepan. Remove tabs by cutting with a sharp tool as
shown on page 2, Figure 2, and slide unit off of pallet.
2. The unit should be set on a level support pad at least as
large as the unit base pan, such as a concrete slab. If this
is not the application used please refer to application
bulletin SSC-APG002-EN.
3. The support pad must NOT be in direct contact with any
structure. Unit must be positioned a minimum of 12"
from any wall or surrounding shrubbery to insure
adequate airflow. Clearance must be provided in front of
control box (access panels) and any other side requiring
service access to meet National Electrical Code. Also, the
unit location must be far enough away from any struc-
18-BC51D5-5
5 FT. ABOVE UNIT-UNRESTRICTED
Advertisement
Table of Contents

Related Manuals for Trane 2TWA0030AD


Summary of Contents for Trane 2TWA0030AD
- Page 1 18-BC51D5-5 Installer’s Guide Heat Pumps 2TWA0030,40,50, & 60AD ALL phases of this installation must comply with NATIONAL, STATE AND LOCAL CODES IMPORTANT — This Document is customer property and is to remain with this unit. Please return to service information pack upon completion of work.
-
Page 2: Installer's Guide
BRAZE TYPE INDOOR END SEALING CAP LIQUID LINE SERVICE VALVE ACCUTRON COMPONENTS ADAPTER FLOW CONTROL CHECK VALVE (F.C.C.V.) ORIFICE BODY AS SHIPPED FIELD SUPPLIED LIQUID LINE 18-BC51D5-5 © 2009 Trane... - Page 3 Installer’s Guide GAS LINE SERVICE VALVE GAS LINE BALL SERVICE VALVE 1/4 TURN ONLY COUNTERCLOCKWISE FOR FULL OPEN POSITION VALVE STEM UNIT SIDE OF VALVE PRESSURE TAP PORT GAS LINE CONNECTION 6. Precautions should be taken to avoid heat damage to the pressure tap valve core during brazing.
-
Page 4: Defrost Control
Installer’s Guide 3. Attach center hose of manifold gauges to vacuum pump. 4. Install a separate disconnect switch at the outdoor unit. 4. Evacuate until the micron gauge reads no higher than 5. Ground the outdoor unit per local code requirements. 350 microns. - Page 5 Installer’s Guide Leaving this pin open results in the normal mode of COMPRESSOR WILL NOT RUN, and apply power by closing operation.) the system main disconnect switch. This will activate the compressor sump heat (where used). Do not change the 2.
- Page 6 Installer’s Guide 2TWA0030,40,50, & 60AD OUTLINE DRAWING Note: All dimensions are in MM (Inches). MODELS BASE FIG. 2TWA0030AD 730 (28-3/4) 724 (28-1/2) 651(25-5/8) 3/8 137 (5-3/8) 65 (2-5/8) 210 (8-1/4) 57 (2-1/4) 457 (18) 2TWA0040AD 832 (32-3/4) 829 (32-5/8) 756 (29-3/4) 1-1/8 3/8 137 (5-3/8) 86 (3-3/8) 210 (8-1/4) 79 (3-1/8) 508 (20)
-
Page 7: Mounting Hole Location
Installer’s Guide MOUNTING HOLE LOCATION Note: All dimensions are in MM (Inches). NOTE: For model base size, see table on page 6. From Dwg. 21D152989 Rev. 0 18-BC51D5-5... -
Page 8: Checkout Procedure
H - Heating P - Primary Causes S - Secondary Causes - 3 Phase Only 12/09 Trane www.trane.com Trane has a policy of continuous product and product data improvement and it reserves the right to change design and specifications without notice. - Page 9 Instrucciones de Instalación Unidad Condensadora Bomba de Calor 2TWA0030, 40, 50 y 60AD 18-BC51D5-5-ES...
- Page 10 © 2009 Trane...
- Page 11 C o n t e n i d o Información General ................4 Instalación de Líneas de Refrigerante ..........5 Evacuación del Sistema ..……............8 Conexiones Eléctricas ................ 9 Diagramas de Cableado en Campo ..........11 Dibujo Esquemático ................12 Datos Dimensionales ................
-
Page 12: Información General
Información General La Bomba de Calor Weathertron ha 3. Evite ubicar la unidad en lugares IMPORTANTE sido diseñada y fabricada para sopor tar y en donde la condensación y el Este documento es propiedad del operar en condiciones severas de congelamiento de los vapores de cliente y debe permanecer junto con invierno. - Page 13 Información General Si la unidad interior se envía de 7. Si la unidad exterior se monta por fábrica con un tamaño de orificio arriba de la manejadora de aire, diferente, el orificio deberá la elevación máxima no debe RETIRAR cambiarse para lograr el exceder los sesenta (60) pies PESTAÑAS funcionamiento esperado del...
- Page 14 Instalación de Líneas de Refrigerante Las unidades condensadoras están preparadas para recibir conexiones soldables. En las válvulas de servicio de la unidad exterior se suministran tapones de presión para las presiones de succión y de líquido del compresor. El extremo interior de los juegos de líneas refrigerantes recomendadas puede ser recto o con un doblez de 90 grados, dependiendo de los...
- Page 15 Instalación de Líneas de Refrigerante 6. Evite daños por calor al núcleo de la válvula de la tapa de presión durante la soldadura. Se recomienda retirar el núcleo de la válvula del puerto de la tapa de presión y se enrolle un trapo húmedo alrededor del cuerpo de SOLDADURA DE LAS LINEAS DE ¡ADVERTENCIA!
- Page 16 Evacuación del Sistema REVISION DE FUGAS NOTA: Se requiere una llave Allen NOTA: Puede evitarse el de 3/16" para abrir la válvula de intercambio innecesario de IMPORTANTE: Coloque servicio de la tubería para líquidos. mangueras y lograr la completa nuevamente en su lugar el núcleo Se requiere una llave de tuercas de evacuación de las líneas que van al de la válvula del puerto de la tapa...
-
Page 17: Conexiones Eléctricas
Conexiones Eléctricas Vuelva a colocar las tapas del 7. Se recomienda el uso de cables G. CONTROL DE vástago de la válvula y del tapón de bajo voltaje con código de DESESCARCHE de presión utilizando los dedos y colores para simplificar las El control de demanda de aplicando después una vuelta conexiones entre la unidad... - Page 18 Conexiones Eléctricas IDENTIFICACION DE LAS PUNTAS DE H. ARRANQUE DEL J. CALEFACTORES CONTACTO (Ver Figura 6) COMPRESOR ELECTRICOS 1. TEST_COMMON (Puenteando Después de terminar las conexiones Si se utilizan calefactores eléctricos, cualesquiera de las otras puntas eléctricas, COLOQUE EL éstos deben instalarse en el provoca la ejecución de la función INTERRUPTOR DEL SISTEMA DE dispositivo de la manejadora de aire...
- Page 19 Diagramas de Cableado en Campo 18-BC51D5-5-ES...
- Page 21 Datos Dimensionales 18-BC51D5-5-ES...
- Page 22 Procedimientos de Verificación Después de completar la instalación, se recomienda revisar todo el sistema siguiendo la siguiente lista: 1. Línea de refrigerante; revisión de fugas....................( ) 2. Líneas de succión y conexiones perfectamente aislados ..............( ) 3. ¿Se aseguraron y aislaron adecuadamente las líneas de refrigerante? ..........( ) 4.
- Page 23 Trane www.trane.com En virtud de que Trane mantiene una política de contínuo mejoramiento de sus productos y datos técnicos, se reserva el derecho de cambiar sus diseños y especificaciones sin previo aviso. La instalación y labores de servicio al equipo referido en esta publicación, deberá realizarse únicamente...
- Page 24 Date / Fecha December 2009 / Diciembre 2009 Trane has a policy of continuous product and product data improvement and it reserves the right to change design and specifications without notice. En virtud de que Trane mantiene una política de contínuo mejoramiento de sus productos Trane y datos técnicos, se reserva el derecho de cambiar sus diseños y especificaciones sin previo aviso.
Need help?
Do you have a question about the 2TWA0030AD and is the answer not in the manual?
Questions and answers