Download Print this page
Creda C60CDOW Instruction Manual

Creda C60CDOW Instruction Manual

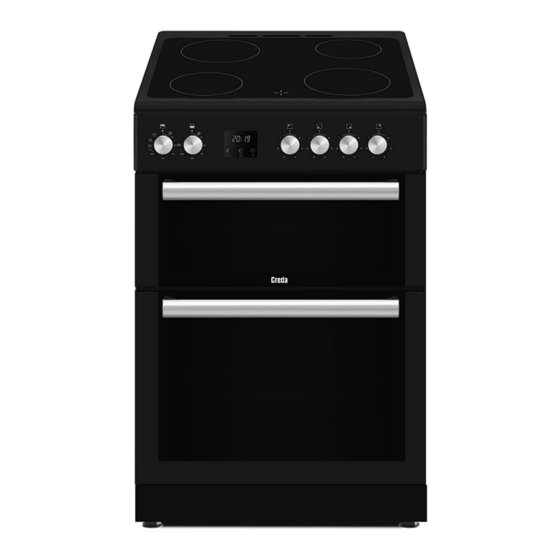
60cm ceramic double oven

Advertisement

60CM CERAMIC DOUBLE
OVEN
V 1.0
INSTRUCTION
MANUAL
MODEL/S
C60CDOW
C60CDOBL
C60CDOX
C60CDOA
C60CDOS

Advertisement

loading
Need help?

Need help?

Do you have a question about the C60CDOW and is the answer not in the manual?

Questions and answers

Summary of Contents for Creda C60CDOW

  • Page 1 60CM CERAMIC DOUBLE INSTRUCTION OVEN MANUAL MODEL/S C60CDOW C60CDOBL C60CDOX C60CDOA V 1.0 C60CDOS...
  • Page 2 INSTRUCTION MANUAL You’ll soon be enjoying your new Creda Freestanding Cooker! It all begins here, with your instructions. Don’t worry, there’s nothing too technical coming up. Just simple, step-by-step guidance to get you up and running quickly. Sound good? Then let’s get started.
  • Page 3: Table Of Contents

    INSTRUCTION MANUAL Contents — PAGE Safety Information Getting to Know Your Appliance Installation Advice Using Your Appliance General Oven and Cooking Tips Care and Maintenance Product Support...
  • Page 4: Safety Information

    IMPORTANT: Carefully unpack and examine the appliance for any damage. If you think there is a defect, do not use the appliance and contact Creda Product Support on 01759 487836. Packaging materials should be collected together and disposed of immediately as they may be harmful to children.
  • Page 5 INSTRUCTION MANUAL WARNING: The appliance and its accessible parts become hot during use. Care should be taken to avoid touching heating elements. Children less than 8 years of age shall be kept away unless continuously supervised. WARNING: NEVER try to extinguish a cooking fire with water. Instead switch off the appliance and cover flame e.g with a lid or a fire blanket.
  • Page 6 TO MAINTAIN THE EFFICIENCY AND SAFETY OF YOUR APPLIANCE, WE RECOMMEND YOU ALWAYS USE OUR AUTHORISED SERVICE AGENTS AND ORIGINAL SPARE PARTS. FOR ASSISTANCE CALL CREDA PRODUCT SUPPORT 01759 487836.
  • Page 7: Getting To Know Your Appliance

    INSTRUCTION MANUAL Getting to Know Your Appliance You’ll be up and running in no time! Ready? Let’s begin... Please read these instructions carefully. They contain important information which will help you get the best from your freestanding cooker and ensure safe and correct installation and operation. If you require any further assistance, our technical experts are happy to help.
  • Page 8 INSTRUCTION MANUAL OVERVIEW...
  • Page 9 INSTRUCTION MANUAL Accessories * Not all accessories are included with your purchase...
  • Page 10 INSTRUCTION MANUAL Installing your Freestanding Cooker Bringing it all together Installation requirements THIS COOKER MUST BE INSTALLED BY A QUALIFIED INSTALLER IN ACCORDANCE WITH LOCAL REGULATIONS IMPORTANT: CONTACT AN AUTHORISED SERVICE AGENT FOR INSTALLATION OF YOUR OVEN! First Use IMPORTANT: When using your oven for the first time your cooker may give off an unusual odour from the heating elements and insulation materials.
  • Page 11 INSTRUCTION MANUAL Levelling Feet The height and level of the appliance can be adjusted by rotating the feet located underneath the appliance at each corner. Rotate the feet to decrease or increase the height. Safety Chain The appliance must be secured against overbalancing by using the supplied two safety chains on your oven. Fasten hook (1) by using a proper peg to the kitchen wall (5) and connect safety chain (3) to the hook via the locking mechanism (2).
  • Page 12 INSTRUCTION MANUAL Electrical Connection IMPORTANT: Electrical connections must be carried out by a suitably qualified person and in accordance with all relevant local building and installation regulations. Fitting on a Power Supply Cable Connecting appropriate power supply ` terminal board/ connector block: Using a screwdriver, prize open tabs of the Terminal board cover.
  • Page 13: Using Your Appliance

    INSTRUCTION MANUAL Using Your Appliance Control panel 4.Front left hob zone 1. Upper section option switch 5. Front right hob zone 2. Main section options switch 6. Rear right hob zone 3. Rear left hob zone Warning: The control panel above is only for illustration purposes. Consider the control panel on your appliance. Thermostat Used for determining the cooking temperature of the dish to be cooked in the oven.
  • Page 14 INSTRUCTION MANUAL Oven Functions Grill Top & Bottom Element Bottom Element Fan Oven Oven Light Grill: The top central heating elements comes on. The extremely high and direct temperature of the grill makes it possible to brown the surface of meats and roasts while locking the juices in to keep them tender. The grill is also highly recommended for dishes that require a high temperature on the surface: beef steaks, veal, rib steak, fillets, hamburgers etc.
  • Page 15 INSTRUCTION MANUAL Using your Ovens When your oven is operated first time, an odor will be spread out which will be sourced from using the heating elements. To get rid of this, operate it at 240 °C for 45-60 minutes while it is empty.
  • Page 16 Minus button Plus button Time of day adjustment button SCREEN SYMBOLS Oven status indication • On: Cooking or ready for cooking. • Off: No cooking. Minute minder status indication • On: Minute minder alarm active. • Flashing: Minute minder adjustment mode, adjustment possible by buttons or current minute minder alarm completed.
  • Page 17 It is also possible to use a minute-programmed alarm clock independent from the oven. The case where the time clock is behind or ahead is not a malfunction. The oven time clock may be put back or ahead according to mains frequency as it runs directly with mains voltage.
  • Page 18 buttons, adjust the desired cooking duration. 3. After 6 seconds of the last button press or by pressing twice, the adjustment is completed. will be steady on the screen and the display shows the current time of day. FULL AUTOMATIC COOKING This cooking program is intented to perform a delayed cooking by programming the time of day, when the food should be ready.
  • Page 19: General Oven And Cooking Tips

    INSTRUCTION MANUAL General Oven and Cooking Tips General Oven Tips The wire shelves should always be pushed firmly to the back of the oven. Baking trays with food cooking on them should be placed level with the front edge of the oven’s wire shelves. Other containers should be placed centrally.
  • Page 20 INSTRUCTION MANUAL In general… Pastry is too dry Increase the temperature by 10℃and reduce the cooking time. Pastry dropped Use less liquid or lower the temperature by 10℃. Pastry is too dark on top Place it on a lower rack, lower the temperature, and increase the cooking time. Cooked well on the inside but sticky on the outside Use less liquid, lower the temperature, and increase the cooking time.
  • Page 21 INSTRUCTION MANUAL COOKING TABLE Cooking Temperature Rack Cooking Foods Function (°C) Position Duration (min.) Cake (Tray / Mold) Static / Static+fan 170-180 35-45 Small cakes Static / Turbo+fan 170-180 25-30 Patty Static / Static+fan 180-200 35-45 Pastry Static 180-190 25-30 Cookie Static 170-180...
  • Page 22 INSTRUCTION MANUAL Using the Ceramic Hob 1. You operate the hob with the ring switches on the control panel of oven. This switch regulates the energy in order to reach desired temperature set by you. 2. In order to have a good cooking result from the hob, the pans bottom should be as thick and flat as possible. 3.
  • Page 23 INSTRUCTION MANUAL SAFETY ADVICE IN THE CASE OF A COOKING PAN FIRE In the event of a cooking pan fire: Turn off the cooker at the wall switch. Cover the pan with a fire blanket damp cloth. This will smother the flames and extinguish the fire. Leave the pan to cool for at least hour before attempting to move it.
  • Page 24: Care And Maintenance

    INSTRUCTION MANUAL Care and Maintenance Cleaning WARNING! Isolate the power supply to the appliance and make sure that the cooker is cool. Before cleaning your cooker or performing maintenance, make sure that the cooking mode selection knob and the cooking temperature selection knob is set to ‘OFF’. To extend the life of your cooker, it must be cleaned frequently. The inside of the cooker should preferable be cleaned immediately after use, when it is still warm (but not hot), with warm water and soap.
  • Page 25 INSTRUCTION MANUAL Replacing the oven lamps Disconnect the oven from the power supply at the fuse-box by means of the switch used to connect the ⚫ appliance to the electrical mains; or unplug the appliance (gas) Remove the glass cover of the lamp-holder by rotating anti-clockwise ⚫...
  • Page 26 INSTRUCTION MANUAL Technical Specification Specification C60CDOW/BL/X/A/S Outer width 500 mm 600 mm Outer depth 630 mm Outer height 900 mm Lamp Power 15-25 W Upper heater 1000 W 600 W 1200 W 700 W Lower heater 800 W 500 W...
  • Page 27: Product Support

    INSTRUCTION MANUAL Product Support Troubleshooting If you have a problem with your appliance, check the table below before calling service. You may be able to avoid a service call by and avoid unnecessary inconvenience and expense. For cooking problems, refer to Handling Baking Problems. Problem Causes What to Do...
  • Page 28 Local call rates apply* Lines open 9am-5:30pm Monday to Friday *Calls to Creda enquiry lines may attract a charge and set up fee from residential lines depending on your call plan/tariff. Mobile and other providers costs may vary, see www.bt.com/pricing for details.
  • Page 29 Specifications are subject to change without notice. • • Creda disclaim any liability for loss or damage arising from the breakdown of the product. This guarantee is in addition to and does not diminish your statutory or legal rights. •...
  • Page 30 Declaration of conformance to product standards This appliance conforms to all relevant standards applicable to domestic appliances sold in the UK. Disposal This appliance/fitting is marked according to the European directive 2012/19/EU on Waste Electrical and Electronic Equipment (WEEE). By ensuring this product is disposed of correctly, you will help prevent potential negative consequences for the environment and human health, which could otherwise be caused by inappropriate waste handling of this product.
  • Page 31 This page is intentionally blank.

This manual is also suitable for:

C60cdoblC60cdoxC60cdoaC60cdos