Advertisement
Quick Links
Advertisement

Related Manuals for Kenroy Home SWEEP 20950


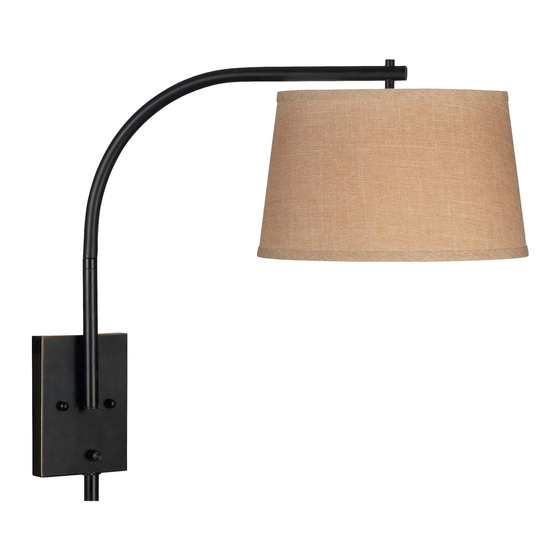
Summary of Contents for Kenroy Home SWEEP 20950
- Page 2 8 a.m.-6 p.m., EST, Monday-Friday 904-642-4340 THANK YOU We appreciate the trust and confidence you have placed in Kenroy Home through the purchase of this lamp. We strive to continually create quality products designed to enhance your home. Thank you for choosing us!
-
Page 3: Table Of Contents
Table of Contents Safety Information ............................2 Warranty ..............................2 Pre-Installation ............................3 Planning Installation ..........................3 Package Contents ..........................4 Using power cord instructions .......................5 , 6, 7 Outlet box installation instructions....................... 8, 9, 10 Care and Cleaning ............................11 Troubleshooting ............................ -
Page 4: Pre-Installation
Pre-Installation PLANNING INSTALLATION Read all instructions before assembly. To avoid damaging this product, assemble it on a soft, non-abrasive surface such as carpet or cardboard. Inspect each part for defects that may have occurred during shipping. Keep your receipt and these instructions for proof of purchase. NOTE: The lamp requires the use of one 120V, 60HZ, 150-Watt max, medium-base type A bulb (not included). -
Page 5: Package Contents
Pre-Installation (continued) PACKAGE CONTENTS Description Quantity Part Socket ring Shade Arm assembly Lamp body... -
Page 6: Using Power Cord Instructions
Assembly instructions Unpack the lamp and assemble arm assembly □ Carefully organize and place all parts on a smooth, flat surface. line up all of the parts according to the installation diagram. □ Remove the mounting plate (BB) from back of the backplate by unscrewing two ball finials (KK). □... - Page 7 Using power cord instructions (continued) Hanging the lamp body □ Raise the lamp body (D) to wall, align the mounting screws (DD) with the holes in backplate, and then secure the backplate to the wall with two ball finials (KK). Assembling the cord cover □...
- Page 8 Using power cord instructions (continued) Assembling shade and installing the bulb □ Remove the socket ring (A) from the socket by unscrewing the socket ring (A) . □ Place the shade (B) over socket and secure with socket ring (A). □...
-
Page 9: Outlet Box Installation Instructions
Outlet box installation instructions Removing the power cord and cord covers The power cord is the wire that enters through the bottom of the backplate. □ Remove the two wire nuts that connect to power cord by twisting counter clockwise. (see diagram) □... - Page 10 Outlet box installation instructions (continued) Connecting the wires □ Install the fixture bare copper wire (1) under the green ground screw (EE) on the mounting plate (BB). □ Connect the fixture bare copper wire (1) to the green (or bare, or green & yellow) supply ground wire (2) in the outlet box using a wire nut (AA).
- Page 11 Outlet box installation instructions (continued) Assembling shade and installing the bulb □ Remove the socket ring (A) from the socket by unscrewing the socket ring (A) . □ Place the shade (B) over socket and secure with socket ring (A). □...
-
Page 12: Care And Cleaning
Important safety instructions □ This portable lamp has a polarized plug (one blade is wider than the other) as a feature to reduce the risk of electric shock. This plug will fit in a polarized outlet only one way. If the plug does not fit fully in the outlet, reverse the plug. - Page 13 www.kenroyhome.com CUSTOMER SUPPORT TEAM For any additional questions or concerns please contact our Customer Support Team: 904-642-4340 @KenroyHome customerorders@kenroyhome.com...
Need help?
Do you have a question about the SWEEP 20950 and is the answer not in the manual?
Questions and answers