Advertisement
Quick Links
KEY LOCK
OPENING THE SAFE
Please insert one of the two keys supplied into the key hole and turn
clockwise. Then turn handle and pull the door to open. Note: We recom-
mend that the spare key is not kept in the safe.
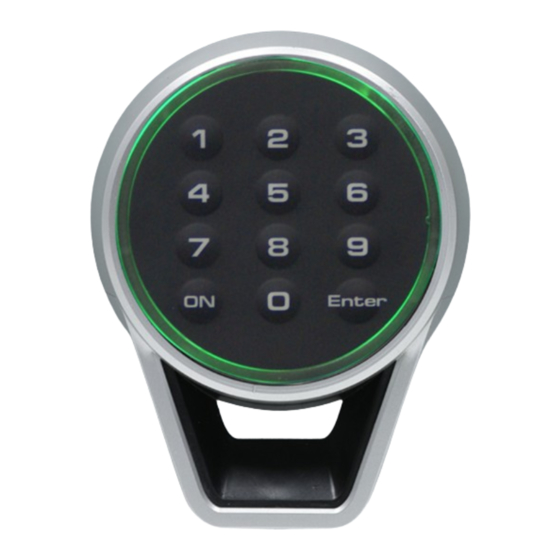
PS210 ELECTRONIC LOCK
1. Main Components
2. Servicing
2.1 Changing the Battery
•
Slide the locking catch (4) towards the door of the safe to access the
battery compartment (Fig.2.1a)
Fig. 2.1
a.
•
Squeeze the black release handle (5) (Fig.2.1b) and turn the handle
(2) anti-clockwise until the markers are aligned, and remove the
handle (2) (Fig.2.2a)
•
Replace the battery with a new alkaline battery (9V, type 6LF22)
(Fig.2.2b)
Fig. 2.2
a.
•
Reinstall the handle (2) and engage the lock button (4) in the reverse
order. To do this, make sure the tongue of the drive plate is in the 3
o'clock position of the keypad (Fig.2.3), and the locking catch is still
in the down position.
Fig. 1.1
1. Keypad
2. Handle
3. LED Ring Indicator - Green
LED [G] and Red LED [R]
4. Locking Catch
5. Black realease handle
b.
b.
Phoenix Safe Company
Where peace of mind is guaranteed
PS210 ELECTRONIC LOCK
Fig.2.3
•
Squeeze and hold the black release handle (5), and place it onto
the keypad aligning the markers on the handle and the keypad
(Fig.2.2.a). Keeping the black release handle depressed, turn the
handle (2) clockwise until it stops. Let go of the release handle, and
turn the handle anti clockwise until it clicks.
•
Slide the locking catch (4) back up, to lock the handle onto the
keypad.
OPERATING INSTRUCTIONS
1. Definitions
1.1 Master Code
A set of numbers (6 to 8 digits) which opens the lock and is used for the
set up of all lock features.
Before using the safe, please change the factory Master code
(see par.3.1). It is strongly
recommended to keep the master code safe from unauthorized
people. Do not use easily
guessed sequences (birthdays, house and phone numbers, etc.)
Factory Master Code:
1–2–3–4–5–6
1.2 User Codes
A set of numbers (6 to 8 digits) which opens the lock and has limited func-
tions to change the settings.
A maximum of 9 user codes can be set up.
The lock does not have a Factory User Code set up. Please see
par.3.2 to set the User codes.
1.3 Signals
Short single acoustic signal with single green LED flash (3) –
[G]1
confirmation of the button
pressing on the keypad.
Short double acoustic signal with double green LED flash (3) –
[G]2
confirmation of successfully finished operation.
Long single acoustic signal with single red LED flash (4) – er-
[R]--
ror message on the user's actions.
Short acoustic signal sounds 5 times with 5 red LED flashes
[R]5
(4) – low battery message. Please see Servicing par 2.1 how
to change the battery.
2. Main Functions
2.1 Opening the Lock
2.1.1 Opening with the Factory Master code
[ON] [1] [2] [3] [4] [5] [6] [Enter]
2.1.2 Opening with the Master or User Code
[ON] [Master or User Code] [Enter]
If the code is correct, the green LED will flash twice and the door can be
opened within 5 seconds by turning the handle (2) clockwise.
INSTRUCTIONS
V1 06 2022
Advertisement

Related Manuals for Phoenix PS210


Summary of Contents for Phoenix PS210
- Page 1 PS210 ELECTRONIC LOCK INSTRUCTIONS KEY LOCK OPENING THE SAFE Please insert one of the two keys supplied into the key hole and turn clockwise. Then turn handle and pull the door to open. Note: We recom- mend that the spare key is not kept in the safe.
- Page 2 PS210 ELECTRONIC LOCK INSTRUCTIONS If you enter a wrong code three times in a row, the keypad will be 5.2 Opening with the Dual Code function locked for 5 minutes. This will be indicated with intermittent red code:- [ON] [0-9 (user code position)] [Enter] [User / Master Code] LED flashes.
Need help?
Do you have a question about the PS210 and is the answer not in the manual?
Questions and answers