Advertisement
- 1 product safety
- 2 features
-
3
using your device
- 3.1 Learning About Your device
- 3.2 Did You Know?
- 3.3 HeatSoft Button
- 3.4 Boost Button
- 3.5 Beater Eject Button
- 3.6 Power Cord Management
- 3.7 Beaters
- 3.8 Dough Hooks
- 3.9 Whisk
- 3.10 Storage Case
- 3.11 Magnetic Nozzle
- 3.12 Prepping your Unit
- 3.13 Softening Butter/Creaming
- 3.14 Mixing
- 3.15 Ejecting Beaters, Dough Hooks, or Whisk
- 3.16 How To Adjust the Speed
- 3.17 Speed Guide for the Unit
- 4 caring for your device
- 5 Troubleshoot
- 6 connection to the mains supply
- 7 after sales service
- 8 Documents / Resources
product safety
READ CAREFULLY AND KEEP FOR FUTURE REFERENCE
Children shall not use this appliance. Appliances can be used by persons with reduced physical, sensory or mental capabilities or lack of experience and knowledge if they have been given supervision or instruction concerning use of the appliance in a safe way and understand the hazards involved. Children shall not play with the appliance.
Keep the appliance and its cord out of the reach of children.
Never use this appliance for anything other than its intended use. This appliance is for household use only. Do not use this appliance outdoors.
If the supply cord is damaged, it must be replaced by the manufacturer, its service agent or similarly qualified persons in order to avoid a hazard.

This appliance generates heat during use. Adequate precautions must be taken to prevent the risk of burns, scalds, fires or other damage to persons or property caused by touching hot surfaces whilst in use or during cooling.
Always switch off and disconnect from the mains supply socket if it is left unattended and before assembling, disassembling or cleaning or approaching parts that move during use.
Always allow the appliance to cool before assembling, disassembling, cleaning or before storage.
Do not immerse the main body of the appliance, power cord and plug in water or any other liquid. The dough hooks, beaters and whisk should be washed in hot soapy water or in a dishwasher. See cleaning section for full details.
All accessories (beaters, dough hooks, whisk) should not be used for longer than 4 minutes 30 seconds. When mixing extremely heavy loads the appliance should not be operated for more than 1 minute 30 seconds or use the HeatSoft feature for longer than 5 minutes continuously.

In the case of the mixer overheating due to excessive load, the safety cutout will activate, preventing the mixer from operating. Should this occur, switch the mixer off at the power outlet and allow the mixer to cool for 10 minutes before switching back on.
 Always ensure that hands are dry before handling the plug or switching on the appliance.
Always use the appliance on a stable, secure, dry and level surface.
This appliance must not be placed on or near any potentially hot surfaces (such as a gas or electric hob).
Never let the power cord hang over the edge of a worktop, touch hot surfaces or become knotted, trapped or pinched.
Do not use the appliance if it has been dropped or if there are any visible signs of damage.
Never use any accessory or attachment not recommended by the manufacturer.
Remove attachments from the appliance before washing or cleaning them.
Keep fingers, hair and clothing away from the moving parts of the appliance when it is in use.
HEAT CAUTIONS
- Do not turn on the HeatSoft feature while the mixer is on the storage container.
- Do not put anything else in the storage container except the contents of this box.
- Do not touch or hold your hands beneath the heat nozzle while the HeatSoft feature is on.
- Do not have the HeatSoft feature on while unit is sitting on the counter on its base.
- Do not use without the heater vent cover and filter in place.
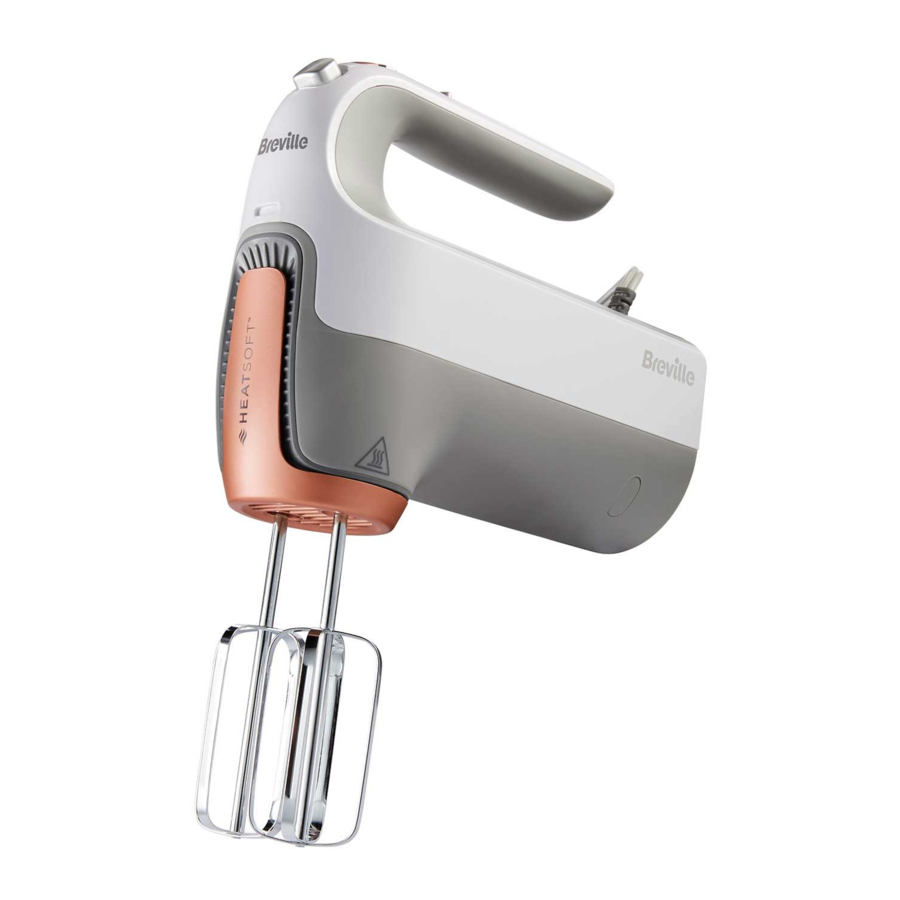
features

- Magnetic Nozzle
- Beater Eject Button
- HeatSoft Button
- Boost Button
- 7-Speed Control
- Ergonomic Handle
- Power Cord
- Heater Vent Cover
- Heater Vent Filter
- Storage Case
- Power Cord Strap
- Dough Hooks
- Whisk
- Beaters
using your device
Learning About Your device
The Breville Hand Mixer with HeatSoft Technology has been designed to allow you to bake when inspired. No more waiting for ingredients like butter to reach room temperature! Now you can soften and mix in one step!
Did You Know?
Many recipes require ingredients like butter to be at room temperature. Butter will only reach room temperature after hours of sitting on the counter. If you use butter that's cold, straight from the refrigerator, it will result in heavy and dense baked goods. Butter that is microwaved or melted can create an oily batter resulting in soggy, flat cookies. Using room temperature ingredients creates fluffier results and better baked goods.
HeatSoft Button
The HeatSoft  button allows for butter to be softened while mixing. HeatSoft Technology uses gentle heat to bring cold ingredients to room temperature while mixing eliminating the need to plan ahead.
Boost Button
The boost button features allows for an added boost to the selected speed setting at the press of the button.
Beater Eject Button
The beater eject button design allows for a separate push of the thumb to release the beaters, dough hooks or whisk.

Make sure hand mixer is unplugged before removing or inserting any attachments.
Power Cord Management
The power cord strap that comes attached to the power cord keeps it organised when wrapped.
Beaters
The beater design allows for thorough, fast mixing results for all types of mixtures. The beaters are dishwasher safe.
Dough Hooks
Use these hooks to knead bread dough, pizza dough or other heavy mixtures and doughs. Use at lower speeds for best results.

Whisk
The whisk is used to beat air into mixtures such as egg whites, yolks or cream.

Storage Case
Lets you store your hand mixer, accessories, and power cord conveniently together for easy access and travel.

Magnetic Nozzle
The magnetic nozzle is removable for easy cleaning.

Prepping your Unit
Before using your mixer for the first time, wash the beaters, dough hooks and whisk. Rinse and dry.
To place the beaters in the unit first ensure speed control is "0 (OFF)" and unit is unplugged. Then ensure magnetic nozzle is in place. Insert beaters one at a time, by placing the stem end of beaters into the opening drive holes on the bottom of the mixer. Turn beater slightly and push in until beater clicks into position.
Note that the beaters are interchangeable but dough hooks are not. When using dough hooks, the dough hook with the collar on the stem fits into the large drive hole on the mixer. If dough hooks do not click into the drive holes, reverse and try again.
Plug cord into an appropriate outlet.

Softening Butter/Creaming
- Cut of cold butter into approximately 2.5cm cubes and place them into the mixing bowl with sugar.
- Press the HeatSoft button once, and then turn on the beaters. Start mixing at speed setting 1 for approximately 45 seconds or until there are no more large chunks of butter. Then turn to speed 5-7 for the remainder of time recommended in the chart.
NOTE: When the HeatSoft button is functioning, a white light will illuminate and the heat fan will turn on.
| Sugar Amount (grams) | Butter Amount (grams) | Softening Time (minutes) |
| 100g | 100g | 1 to 1 ½ minutes |
| 200g | 200g | 2 to 2 ½ minutes |
Do not touch or hold your hand beneath the heat nozzle while the HeatSoft feature is ON.
NOTE: Turn off the HeatSoft feature after the amount of time listed in the chart above to avoid over creaming.
- Once the creaming is completed press the HeatSoft button again to turn off the heat and the white light will fade out and the fan will turn off.
- Continue mixing with the rest of the ingredients following the recipe. For more details continue to the mixing section.
Mixing
- Add in the rest of the ingredients into the mixing bowl.
NOTE: To avoid splatters start unit on lowest speed and slowly increase to the desired speed setting. - Slowly guide mixer around sides and through centre of bowl, going in the same direction. Be careful not to overbeat the mixture. Overbeating tends to make some mixtures tough.
NOTE: Whenever scraping of the bowl is required, stop the mixer and scrape sides and bottom of bowl with a rubber spatula as needed. Turn speed control to "0 (OFF)" while adding ingredients. Be sure to position beaters over the mixing bowl so any excess mixture will fall back into the mixing bowl. - When mixing is complete, set speed control to "1" and raise beaters slowly from the mixing bowl clean off the excess mixture. Be sure to turn unit to "0 (OFF)" before raising beaters completely out of the mixing bowl.
Ejecting Beaters, Dough Hooks, or Whisk
Turn off and unplug the appliance before ejecting any accessories.
Be sure speed control is at the "0 (OFF)" position and cord is removed from electrical outlet. Press the beater eject button and accessories will release.
How To Adjust the Speed
- Move the speed selector from 1 to 7 and to turn off set to "0 (OFF)".
- To engage a higher speed immediately press and hold the boost button. The speed will go to 7 until released and will return to orginal setting.
NOTE: This feature is intended to be used for short bursts. For long mixing use speed 7.
Speed Guide for the Unit
| Speed | Mixing Tasks |
| 1 Stir | Use to start softening butter with the HeatSoft button. Also use when stirring liquid ingredients or when mixing dry and liquid ingredients together alternately in a recipe. Use when preparing any of the ready-prepared or packaged instant puddings. |
| 2 Mix | Use when a recipe calls for combining ingredients together. Use for quick breads or muffins that require a brisk action, just enough to blend. |
| 3 Blend | Use when preparing cake mixes or for directions calling for medium speed. Use to cream butter and sugar together. NOTE: This is the maximum recommended speed for dough hook usage. |
| 4-5 Beat | Use when preparing a frosting from a recipe or package. Use when whipping cream for desserts. |
| 6-7 Whip | Use to mash potatoes to develop a light and fluffy texture. Use when whipping egg whites. |
| Boost Button | During especially heavy mixing tasks, press the button to drive through the mixture with ease. |
caring for your device
Care and Cleaning
Turn off and unplug appliance and eject any accessories before cleaning.
- Before cleaning any part of the mixer, set the speed control to the "0 (OFF)" position to turn off. Then unplug the cord from the outlet and eject the beaters.
- The beaters, dough hooks and whisk may be washed in hot, soapy water or in a dishwasher.
This appliance features a magnetic nozzle designed to be removed for cleaning (always allow to cool). It is dishwasher safe or it can be washed in soapy water. Do not use scouring pad to avoid scratching. - For easy cleaning, press down the extended tab to pull off the heater vent cover. Then remove the heater vent filter. Wash with soapy water and dry before placing it back into the unit. The filter should be cleaned every 3-6 months depending on usage. Do not use without the heater vent cover and filter in place.

![]()
Do not immerse mixer, power cord and plug in water while cleaning. This may cause electric shock, injury, or damage to the product. - To remove stubborn spots on the hand mixer, wipe surfaces with a piece of cloth, slightly dampened in soapy water or a mild, non-abrasive cleaner.
- Do not use any abrasive cleaner or material to clean any part of the hand mixer or storage case as it can scratch the product.


Storage
- Do not store any materials, other than the mixer, its accessories, power cord and the user manual in the storage case.
- Do not turn on the HeatSoft feature or power ON the appliance while stored in the storage case.
Using the Storage Case
The storage case is designed to help you store all accessories and unit in the same place.
To remove the hand mixer from the storage case, push front tab away from the mixer and pull out the mixer.
To place it back on the storage case, have the magnetic nozzle facing the tab on the storage case. Push the mixer on and the tab will click onto the mixer.
NOTE: Allow for 8-10 inches of uncoiled cord from the back of the unit in order to fit into the storage case.

Replacing Heater Vent Filter
The heater vent filter should be replaced when it's worn out or damaged.
Maintenance
This appliance has no user serviceable parts. Any servicing beyond that described in the cleaning and the replacing heater vent filter sections should be performed by an Authorised Service Representative only.
Troubleshoot
-
The unit stops working
- Unplug the power cord from outlet and wait 30 minutes before the next use.
-
Inserting beaters and other accessories into the unit
- Rotate beaters or other accessories slightly clockwise until they snap into the unit.
-
Removing beaters or other accessories from the device
- Unplug the mixer and then press down the beater eject button and gently pull accessories out.
-
If the device continues to operate
- Press the HeatSoft button once to turn off or unplug the power cord from the outlet.
-
If the heater fan cover cannot be reinstalled
- Check that heater fan cover locking tab is not broken, if so call Consumer Service for replacement part.
-
Missing any components
- Call Consumer Service to obtain replacement parts.
connection to the mains supply
This appliance is fitted with either a moulded or rewirable BS1363, 13 amp plug. The fuse should be rated at 5 amps and be ASTA approved to BS1362.
If the fuse in a moulded plug needs to be changed, the fuse cover must be refitted. The appliance must not be used without the fuse cover fitted.
If the plug is unsuitable, it should be dismantled and removed from the supply cord and an appropriate plug fitted as detailed below. If you remove the plug it must not be connected to a 13 amp socket and the plug must be disposed of immediately.
The wires of the mains lead are coloured in accordance with the following code:
BLUE – NEUTRAL
BROWN – LIVE
The wire which is coloured Blue, must be connected to the terminal which is marked with the letter N or coloured Black.
The wire which is coloured Brown, must be connected to the terminal which is marked with the letter L or coloured Red.
If any other plug is used, a 5 amp fuse must be fitted either in the plug or adaptor or at the distribution board.
DO NOT CONNECT EITHER WIRE TO THE EARTH TERMINAL IN THE PLUG WHICH IS MARKED E OR WITH THE EARTH SYMBOL ( ![]() ) OR COLOURED GREEN OR GREEN AND YELLOW.
) OR COLOURED GREEN OR GREEN AND YELLOW.

This symbol indicates that this unit is a Class II appliance and therefore an earth connection is not required.
Plug should be BS1363/A approved
Fit a 5 Amp Fuse

Ensure that the outer sheath of the cable is firmly held by the clamp
after sales service
These appliances are built to the very highest of standards. There are no user serviceable parts. Follow these steps if the unit fails to operate:
- Check the instructions have been followed correctly.
- Check that the fuse has not blown.
- Check that the mains supply is functional.
If the appliance will still not operate, return the appliance to the place it was purchased for a replacement. To return the appliance to the Customer Service Department, follow the steps below:
- Pack it carefully (preferably in the original carton). Ensure the unit is clean.
- Enclose your name and address and quote the model number on all correspondence.
- Give the reason why you are returning it.
- If within the guarantee period, state when and where it was purchased and include proof of purchase (e.g. till receipt).
- Send it to our Customer Service Department at the address below:
Customer Service Department
Jarden Consumer Solutions (Europe) Limited
Middleton Road, Royton, Oldham
OL2 5LN, UK.
Telephone: 0161 621 6900 Fax: 0161 626 0391
e-mail: enquiriesEurope@jardencs.com

Documents / ResourcesDownload manual
Here you can download full pdf version of manual, it may contain additional safety instructions, warranty information, FCC rules, etc.
Advertisement


Need help?
Do you have a question about the HeatSoft VFM021 and is the answer not in the manual?
Questions and answers