Breville Halo, VDF127 - Rotisserie Air Fryer Oven Manual
- Instruction booklet (45 pages) ,
- User manual (9 pages) ,
- User manual
Advertisement
- 1 Product safety
- 2 Parts
- 3 Control Panel
- 4 Parts & Accessories
- 5 USAGE INSTRUCTIONS
- 6 Using the Rotisserie Handling Fork
- 7 Cleaning & Maintenance For Your Air Fryer Oven
- 8 Air Fryer Oven Cooking Chart
- 9 Recipes
- 10 Helpful Tips / Troubleshooting
- 11 Fitting of a plug - for U.K. and Ireland only
- 12 After sales service & replacement parts
- 13 Waste Disposal
- 14 Documents / Resources
Product safety
READ CAREFULLY AND KEEP FOR FUTURE REFERENCE
This appliance can be used by children aged from 8 years and above and persons with reduced physical, sensory or mental capabilities or lack of experience and knowledge if they have been given supervision or instruction concerning use of the appliance in a safe way and understand the hazards involved.
Children shall not play with the appliance.
Cleaning and user maintenance shall not be made by children unless they are older than 8 and supervised.
Keep the appliance and its cord out of reach of children less than 8 years.
This product must be positioned on a stable surface with the handles positioned to avoid the spillage of hot liquids.
 Surfaces of the product are liable to get hot during use.
Never operate the product by means of an external timer or separate remotecontrol system.
Never immerse any part of the appliance or power cord and plug in water or any other liquid.
If the supply cord is damaged, it must be replaced by the manufacturer, its service agent or similarly qualified persons in order to avoid a hazard.
Ensure the appliance is kept clean after use. For details see the Care and Cleaning section. Pay particular care regarding items that can be immersed in water and/or a dishwasher.
 Never use this appliance for anything other than its intended use. This appliance is for household use only. Do not use this appliance outdoors.
Always ensure that hands are dry before handling the plug or switching on the appliance.
Always use the appliance on a stable, secure, dry and level surface.
Ensure the appliance is switched off and unplugged from the supply socket if it is left unattended, when it is not in use or before cleaning. Never leave the appliance unattended when it is in use.
Never use this appliance with an external timer or separate remote-control system.
Always allow the appliance to fully cool down before cleaning or storing.
Do not use the appliance if it has been dropped, if there are any visible signs of damage or if it is leaking.
Never let the power cord hang over the edge of a work top, touch hot surfaces or become knotted, trapped or pinched.
Do not touch the external surfaces of the appliance during use as they may become very hot.
Only use spares or accessories that are recommended by the manufacturer.
Allow adequate space above and on all sides for air circulation.
Do not allow the appliance to touch any flammable material during use (such as curtains or wall coverings).
Care is required when using the appliance on surfaces that may be damaged by heat. The use of an insulated pad is recommended.
Parts

- Left Rotisserie Holder
- Three Air Flow Rack Positions
- Air Flow Vent
- Air Flow Rack
- Removable Drip Tray
- Removable Door
- Light
- Right Rotisserie Holder
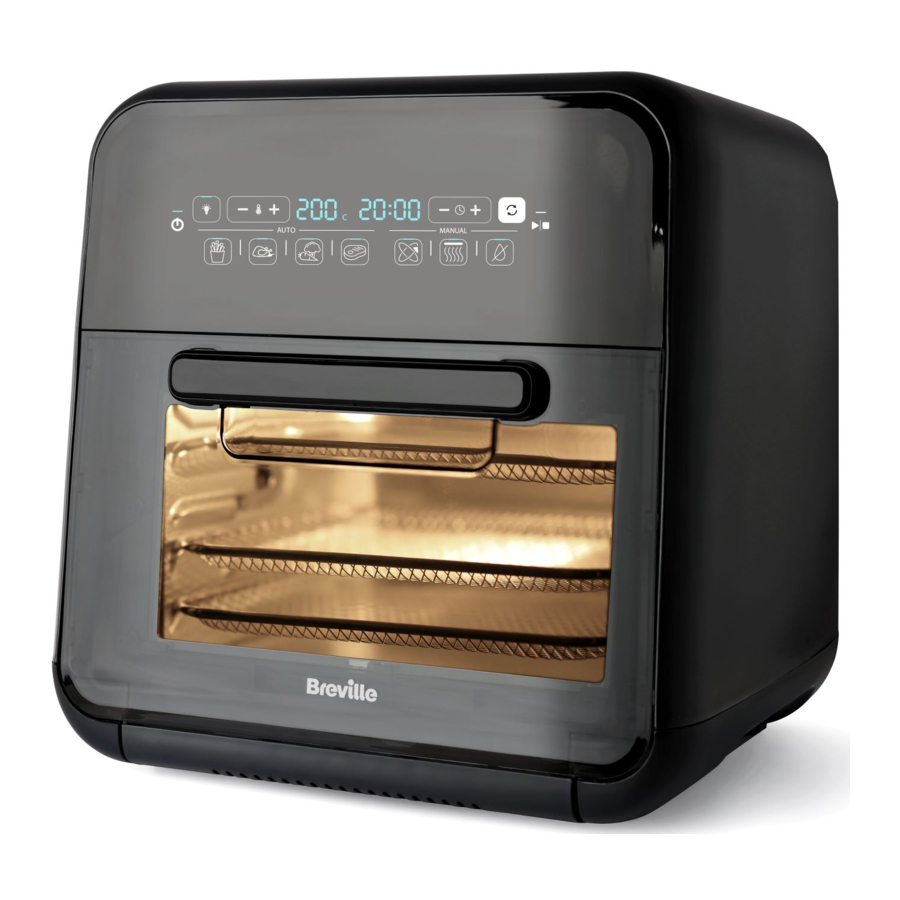
Control Panel

- Optional Light
- Temperature Setting
- Timer Setting
- Rotate
- Start/Stop
- Power
- Presets: Fries, Chicken, Vegetables and Steak
- Manual Modes: Air Fry, Bake and Dehydrate
Parts & Accessories

Part & Accessories
- Air Flow Racks (3)
- Ideal for cooking a variety of foods, such as chicken breast, fish or steak
- Best accessory to use for dehydrating
- If using one Air Flow Rack place it on the top slot for more crisp results
- If using more than one Air Flow Rack switch the position of the racks throughout the cooking cycle for a more even crisp.
- When using the Air Flow racks with high sugar content food, you may find that lining each rack with a sheet of baking parchment helpful.
- Rotisserie Handling Fork
Use the Rotisserie Handling Fork to place and remove the Rotating Mesh Basket and the Rotisserie Spit into the Rotisserie Holders. - Rotisserie Spit
- Ideal for cooking rotisserie chicken.
- It is advisable to secure the whole chicken with cooking string.
- To use the Rotisserie Spit, put the rod (3a) through the chicken then slide the forks (3b) down the sides of the rod and into the meat. Next, lock the forks into place using the screw set (3c) provided. Using the Rotisserie Handling Fork, place the chicken into the rotisserie holder in the unit.
- Rotating Mesh Basket
- Ideal for cooking fries, vegetables and chicken wings, as well as roasting nuts and other snacks.
- To use the Rotating Mesh Basket, place food in the Rotating Mesh Basket then lock it. Using the Rotisserie Handling Fork, place the Rotating Mesh Basket into the Rotisserie Holders.
![]()
DO NOT ATTEMPT TO REMOVE BASKET WITHOUT ROTISSERIE HANDLING FORK. Please use caution while handling the basket.
- Drip Tray (not shown)
- Used to catch oil and crumbs throughout the cooking cycle.
- Place drip tray at the bottom of the unit before beginning the cooking cycle.
- Be sure to wash the Drip Tray after every use.

USAGE INSTRUCTIONS
Preparing Your Air Fryer Oven For First Use
- Remove all packaging materials, stickers and labels in and on the unit.
- Wash all accessories and wipe the inside of the unit with a damp cloth.
- Place unit on a flat surface.
- Plug the air fryer oven into an electrical outlet.
- Press and hold the Power button
![]() until the unit turns on.
until the unit turns on. - Heat Air Fryer Oven to 200ºC for appromixmately 15 minutes to eliminate any manufacturing residue that may remain.
 until the unit turns on.
Manual Mode
- Place unit on a flat surface.
- Plug the air fryer oven into an electrical outlet.
- Press and hold the Power button until the unit turns on.
- Choose the desired manual mode – Air Fry, Bake or Dehydrate.
- To set temperature and time use the plus and minus signs next to the temperature (
![]() ) and time (
) and time (![]() ) symbol then press Start (
) symbol then press Start (![]() ) for the air fryer oven to preheat.
) for the air fryer oven to preheat.
NOTE: Due to the heat up speed of the Breville Air Fryer Oven, food can be placed in the air fryer oven from the beginning of the preheat cycle. The cooking cycle will then automatically start when the unit has reached the desired temperature. - Once preheat is complete an audible alert will sound and the Ready Icon will appear on the display. If food was not placed in the Air Fryer Oven at the start of the preheat cycle open the oven door and place food inside using desired accessories then close the door to begin cooking cycle.
NOTE: When using Air Fry mode, Rotate (![]() ) automatically turns on. Be sure to turn it off when cooking with the Air Flow Racks. When using Bake mode, Rotate (
) automatically turns on. Be sure to turn it off when cooking with the Air Flow Racks. When using Bake mode, Rotate (![]() ) will need to be turned on if using the Mesh Basket or Rotisserie Spit.
) will need to be turned on if using the Mesh Basket or Rotisserie Spit. - Audible alert will sound once timer is done. Carefully remove the food with a heat safe cooking utensil or the Rotisserie Handling Fork.
NOTE: To pause cooking cycle open the door. To stop cooking cycle press Start/Stop (![]() ).
).
 ) and time (
 ) symbol then press Start (
 ) automatically turns on. Be sure to turn it off when cooking with the Air Flow Racks. When using Bake mode, Rotate (
Preset Mode
- Place unit on a flat surface.
- Plug the air fryer oven into an electrical outlet.
- Press and hold the Power button until the unit turns on.
- Choose the desired Preset – Fries, Wings, Veggies or Steak. Temperature and time will automatically appear.
NOTE: Rotate automatically turns on for the Fries preset. To turn off simply press the Rotate (![]() ) button.
) button. - Press Start (
![]() ) for Air Fryer Oven to preheat.
) for Air Fryer Oven to preheat.
NOTE: Due to the heat up speed of the Breville Air Fryer Oven, food can be placed in the air fryer oven from the beginning of the preheat cycle. The cooking cycle will then automatically start when the unit has reached the desired temperature. - Once preheat is complete an audible alert will sound and the Ready Icon will appear on the display. If food was not placed in the Air Fryer Oven at the start of the preheat cycle open the oven door and place food inside using desired accessories then close the door to begin cooking cycle.
- Audible alert will sound once timer is done. Carefully remove the food with a heat safe cooking utensil or the Rotisserie Handling Fork.
NOTE: To pause cooking cycle open the door. To stop cooking cycle press Start/Stop (![]() ).
).
Presets
Fries
Ideal for cooking frozen and fresh fries.
Chicken
Ideal for cooking fresh and frozen chicken pieces/drumsticks, wings etc.
Vegetables
Ideal for roasting fresh vegetables or crumbed and battered vegetables.
Steak
This preset cooks steak to medium - light pink middle. Best for steaks 1/2-1 inch thick.
Using the Rotisserie Handling Fork
To Insert the Rotating Mesh Basket or Rotisserie Spit:
- Place the desired accessory on the Rotisserie Handling Fork.
![]()
- Insert the left side of the accessory rod into the Rotisserie Holder. Be sure the rod is engaged and in place for rotation.

- Place the right side of the rod onto the right Rotisserie Holder.

NOTE: Basket should not be able to freely rotate when it is fully engaged.


To Remove the Rotating Mesh Basket or Rotisserie Spit:
- Insert the Rotisserie Handling Fork beneath the rod of the accessory.

- Lift the right side of the Rotisserie Handling Fork at an angle to remove it from the right Rotisserie Holder.
![]()
- Then shift the Rotisserie Handling Fork to the right to allow the left side of the rod to slide out of the left Rotisserie Holder.
![]()


Cleaning & Maintenance For Your Air Fryer Oven
- Clean the Air Fryer Oven and accessories after each use.
- Before cleaning your Breville ® Air Fryer Oven, unplug it and allow it to cool.
- To clean interior of the Air Fryer Oven wipe with a damp cloth using only mild, soapy water. DO NOT IMMERSE IN WATER. Abrasive cleaners, scrubbing brushes and chemical cleaners will damage the unit.
- Empty Drip Tray frequently to avoid accumulation of crumbs.
- Air Flow Racks, Rotating Mesh Basket, Rotisserie Spit, Drip Tray and Rotisserie Handling Fork are dishwasher safe.
- The Breville® Air Fryer Oven door is removable for easy cleaning. Do not immerse the door in water. Wipe clean only with mild, soapy water.
To Remove Door:
- Open the door then push the tabs at the inner bottom of the door to release.


To Reassemble Door:
- Keep door at an angle while aligning the bottom of door to the unit then push the door in for it to lock in place.


- Store the air fryer in a dry location such as on a table or countertop or cabinet shelf.
Air Fryer Oven Cooking Chart
| FOOD | WEIGHT | FUNCTION | ACCESSORY | TIME | TEMPERATURE | OIL |
| POTATOES | ||||||
| Hand-Cut Chunky Fries | 500 - 700g | Fries | Basket | 35-40 mins | 200ºC | 1 tbsp |
| Hand-Cut Sweet Potato Fries | 500 - 600g | Fries | Air Flow Racks | 30-35 mins | 200ºC | 1 tbsp |
| Frozen Fries, (Thick Cut) | 500 – 700g | Fries | Basket | 25-30 mins | 200ºC | No |
| Frozen Fries, (Thin Cut) | 500 – 700g | Fries | Basket | 20 -25 mins | 200ºC | No |
| Frozen Hash Browns | 600g | Fries | Air Flow Racks | 18-20 mins | 200ºC | No |
| MEAT/POULTRY/FISH | ||||||
| Chicken Wings | 1kg | Chicken | Air Flow Racks | 35 mins | 180ºC | No |
| Steak | 250g (1) | Steak | Air Flow Racks | 10 -15 mins | 200ºC | No |
| Pork Chops | 600g (3) | Steak | Air Flow Racks | 15-20 mins | 180ºC | 1 tbsp |
| Beef Burgers | 340g (2) | Steak | Air Flow Racks | 16-18 mins | 180ºC | No |
| Whole Rotisserie Chicken | 1 – 1.3kg | Air Fry | Rotisserie Spit | 60 minutes | 200ºC | 1 tbsp |
| Breaded Chicken Breast | 340g (2) | Air Fry | Air Flow Racks | 30 - 35 mins | 200ºC | No |
| Breaded Fish | 350g (2) | Bake | Air Flow Racks | 20 – 25 mins | 180ºC | No |
| Bacon | 225g | Air Fry | Air Flow Racks | 10 - 12 mins | 200ºC | No |
| Frozen Chicken Nuggets | 400g | Air Fry | Air Flow Racks | 12-15 mins | 180ºC | No |
| VEGETABLES | ||||||
| Frozen Onion Rings | 400g | Air Fry | Air Flow racks | 12-15 mins | 200ºC | No |
| Fresh Roasting Vegetables | 400g | Vegetables | Air Flow Racks | 15-20 mins | 180ºC | No |
| DEHYDRATE | ||||||
| Apples | 150g | Dehydrate | Air Flow Racks | 4 - 5 hours | 50ºC | No |
| Strawberries | 350g | Dehydrate | Air Flow Racks | 5 hours | 50ºC | No |
| Beetroots | 200g | Dehydrate | Air Flow Racks | 8 – 12 hours | 65ºC | 1 tbsp |
| Beef Jerky | 350g | Dehydrate | Air Flow Racks | 4 hours | 80ºC | No |
Recipes
Lemon and Herb Rotisserie Chicken
Serves 4
Prep time 10 minutes
Cook time 60 minutes
1-1.3kg whole chicken
1 lemon, cut into ¼'s
1 tbsp olive oil
1 tbsp dried oregano
Salt and pepper
Place the chicken onto a dinner size plate. Cut 2 lengths of kitchen string to pass underneath the bottom of the chicken widthways at one end, securing on top in a knot. Repeat at the other end of the chicken so that the legs and wings are secure. Insert the rod lengthways through the carcass of the chicken and secure at both ends with the forks.
Push the lemon pieces into the cavity of the chicken, brush all over with the oil. Dust with the oregano and seasoning.
Select Air Fry on the oven and adjust the temperature to 200ºC with a time of 60 minutes. Ensure the Rotisserie icon is illuminated and allow the oven to heat.
Ensure the drip tray is inserted on the bottom of the oven to catch any fatty residue from the chicken.
Carefully place the rotisserie spit into the hot oven.
Once the cooking time has finished, allow the chicken to rest in the hot oven for a further 5 minutes before carefully removing.
Remove the Rotisserie spit and string from the chicken before carving.
Takeaway Style Salt and Pepper Chicken Wings
Serves 3-4
Prep Time 20 minutes
Cook Time 35 minutes
1 kg fresh Chicken Wings
1 tsp Chinese 5 spice
1 tbsp vegetable oil
1 medium onion, diced
1 green pepper, thinly sliced
2 red chillies, thinly sliced
2 green chillies, thinly sliced
1 tsp dried chilli flakes
1 bunch spring onions, trimmed and sliced
4 garlic cloves, finely chopped
1 tbsp sesame oil
For the salt and pepper seasoning
2 tbsp salt
¼ tsp freshly ground pepper
1 tbsp sugar
½ tbsp Chinese 5 spice
Place the chicken wings in a large bowl, sprinkle over 1 generous tsp of Chinese 5 spice and rub well in, coating each wing with some of the seasoning.
Turn on the oven and select the chicken icon, adjust the temperature to 200c, time 35 minutes and allow the oven to preheat.
Spread the chicken wings out, on 2 of the Air Flow racks, inserting these into the hot oven in the top and middle position (swap over 15 minutes into the cooking time).
Ensure the drip tray is in position in the bottom of the oven to catch any drips.
Whist these are cooking combine the salt and pepper seasoning ingredients into small bowl.
Heat a suitable sized frying pan over a medium heat, add the oil, onion and green pepper and stir fry for approx. 3-5 minutes until softened.
Add the chillies, chilli flakes, spring onions and garlic and continue cooking for a further minute, remove from the heat.
Once the chicken wings have cooked for 30 minutes, remove the trays from the oven and sprinkle the hot wings generously with the salt and pepper seasoning.
Spoon over the cooked onion and pepper mixture and return to the hot oven to finish cooking for the remaining 5 minutes.
If like your wings and spice to be extra crispy and charred, continue cooking for a further 5 minutes.
Remove the wings from the trays and drizzle with a little sesame oil.
Serve immediately with a bowl of prawn crackers.
Moroccan Cous Cous with Roasted Vegetables
Serves 4-6
Prep Time 25 minutes
Cook Time 15-20 minutes
1 red pepper, deseeded and cut into quarters
1 yellow pepper, deseeded and cut into quarters
1 large courgette, sliced
1 red onion, cut into chunks
4 tbsp olive oil
Zest and juice of 1 large lemon
1 large clove of garlic, finely chopped
1 tsp cumin
1 tsp ground coriander
½ tsp ground cinnamon
250g dried cous cous
400ml boiling water
1 tsp turmeric
400g tin chickpeas, drained and rinsed
75g raisins
15g roughly chopped coriander leaves
Small handful of mint leaves, shredded
Line one of the Air Flow racks with some foil. Place the peppers, courgette and red onion onto the foil and drizzle with 1 tbsp of olive oil. Using your hands, mix the vegetables and oil together ensuring all the pieces are coated.
Preheat the oven on the Vegetable setting, temp 200ºC, time 15 minutes. Place the vegetables into the hot oven, turning half way through cooking to ensure even browning.
Whilst the vegetables are cooking, mix the remaining olive oil, lemon zest and juice, garlic, cumin, coriander and cinnamon in a small bowl and set aside.
Place the cous cous into a heatproof bowl, add the boiling water and turmeric, mix well and cover for approx. 5 minutes.
Remove the vegetables from the oven and allow to cool.
Once cool enough to handle cut into bite sized pieces.
Stir the lemony oil into the cous cous, along with the remaining ingredients, add the cooked vegetables, mix well and adjust the seasoning.
Will keep for approx. 2 days in a refrigerator in a covered container.
Steak with Chimichurri Dressing
Serves 2
Prep Time 15 minutes
Cook Time 10 minutes, medium rare.
For this recipe you will need a small food processor or mini chopper to prepare the chimichurri.
2 sirloin steaks approx. 225-250g weight per steak
1 tsp vegetable oil
Freshly ground black pepper
Dressing
Small bunch parsley leaves picked
2 garlic cloves, peeled
1 shallot, quartered
½ tsp chilli flakes
2½ tbsp extra virgin olive oil
Juice of ½ lemon
2 tsp red wine vinegar
Remove your steak from its packaging and allow to sit at room temperature for approx. 30 minutes to 1 hour before cooking.
Preheat your oven on the Steak setting, 200ºC, time 10 minutes.
Brush the steak both sides with the oil and add a dusting of freshly ground black pepper.
Place both steaks onto one of the Air Flow racks, ensuring the drip tray at the bottom of the oven is in place to catch any drips.
Insert the tray into the top position of the oven and allow to cook for 10 minutes.
Place all the dressing ingredients into your mini food processor and blend until the parsley is chopped.
Remove the steak from the oven, place onto a warm plate and allow to rest for approx. 5 minutes.
Carve the steak on the diagonal, serving the chimichurri on the side.
Helpful Tips / Troubleshooting
| PROBLEM | POTENTIAL CAUSE | SOLUTION |
| Overcooked / Undercooked Foods |
|
|
| ||
|
| |
| Burning Smell |
|
|
| Heating elements do not stay ON |
|
|
| Touch panel interface is non-responsive |
|
|
| Small water drips from door during cooking |
|
|
Fitting of a plug - for U.K. and Ireland only
This appliance must be earthed.
If the plug is not suitable for the socket outlets in your home, it can be removed and replaced by a plug of the correct type.
If the fuse in a moulded plug needs to be changed, the fuse cover must be refitted. The appliance must not be used without the fuse cover fitted.
If the plug fuse requires replacement, a fuse of the same rating as that fitted by the manufacturer must be used. In order to prevent a hazard do not fit a fuse of a lower or higher rating.
If the terminals in the plug are not marked or if you are unsure about the installation of the plug please contact a qualified electrician.
Plug should be ASTA approved to BS1363
Fuse should be ASTA approved to BS1362

Ensure that the outer sheath of the cable is firmly held by the cord grip
After sales service & replacement parts
In the case the appliance does not operate but is under warranty, return the product to the place it was purchased for a replacement. Please be aware that a valid form of proof of purchase will be required. For additional support, please contact our Consumer Service Department at 0800 028 7154 or email: BrevilleEurope@newellco.com.
Waste Disposal
Waste electrical products should not be disposed of with household waste. Please recycle where facilities exist. E-mail us at BrevilleEurope@newellco.com for further recycling and WEEE information.


Documents / ResourcesDownload manual
Here you can download full pdf version of manual, it may contain additional safety instructions, warranty information, FCC rules, etc.
Download Breville Halo, VDF127 - Rotisserie Air Fryer Oven Manual
Advertisement


Need help?
Do you have a question about the Halo and is the answer not in the manual?
Questions and answers