Table of Contents
Advertisement
Available languages
Available languages
Quick Links
Advertisement
Chapters
Table of Contents

Subscribe to Our Youtube Channel
Related Manuals for Elenberg MS-5420

Summary of Contents for Elenberg MS-5420
- Page 1 СИНТЕЗАТОР MS-5420 РУКОВОДСТВО ПОЛЬЗОВАТЕЛЯ...
- Page 2 МЕРЫ ПРЕДОСТОРОЖНОСТИ ПЕРЕД ИСПОЛЬЗОВАНИЕМ ПОЛНОСТЬЮ ПРОЧТИТЕ ИНСТРУКЦИЮ. СОХРАНИТЕ ЭТУ ИНСТРУКЦИЮ ДЛЯ ПОСЛЕДУЮЩЕГО ИСПОЛЬЗОВАНИЯ! Данное руководство поможет Вам избежать травм и сохранить работоспособность прибора и оборудования, которое можно подключить к нему. • Не разбирайте и не модифицируйте данный прибор. При первых признаках...
-
Page 3: Table Of Contents
СОДЕРЖАНИЕ I. ОПИСАНИЕ ПРИБОРА ................ 4 II. ПОДГОТОВКА К РАБОТЕ ..............4 1. УСТАНОВКА БАТАРЕЙ ..............4 2. ПОДКЛЮЧЕНИЕ К ЭЛЕКТРОСЕТИ ........... 5 3. ПОДКЛЮЧЕНИЕ МИКРОФОНА И КОЛОНОК ........5 III. ИСПОЛЬЗОВАНИЕ ПРИБОРА .............. 5 1. ПРОСЛУШИВАНИЕ ДЕМО-ПЕСЕН ..........5 2. -
Page 4: Описание Прибора
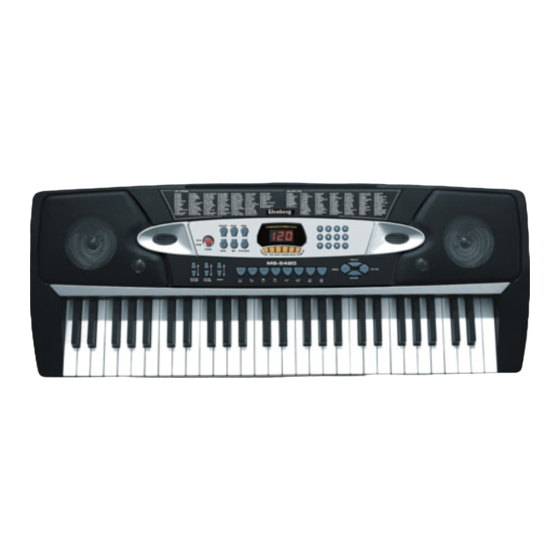
I. ОПИСАНИЕ ПРИБОРА 1. ДИНАМИК 14. ОТКЛЮЧЕНИЕ АККОРДОВ 2. ПИТАНИЕ ВКЛ./ВЫКЛ. (CHORD OFF) 3. БЫСТРЫЙ ВЫЗОВ (ONE KEY) 15. ЭКРАН 4. ОБУЧЕНИЕ (GUIDE) 16. КНОПКИ С ЦИФРАМИ 5. ДЕМО-ПЕСНИ (DEMO) 17. ОСНОВНАЯ ГРОМКОСТЬ 6. ПРОГРАММА (PROG) 18. ГРОМКОСТЬ АККОМПАНЕМЕНТА 7. ЗАПИСЬ (REC) 19. -
Page 5: Подключение К Электросети
2. Подключение к электросети Подключите стандартный выпрямитель к разъему, расположенному на задней панели синтезатора. Убедитесь, что подаваемое выпрями- телем напряжение соответствует напряжению, указанному на разъе- ме для подключения. После использования, отключите прибор от сети. 3. Подключение микрофона и колонок 1) На задней... -
Page 6: Ритмичный Аккомпанемент
“08” тембр. 2) Вы также можете изменить тембр, нажимая кнопки “+” и “-”. Если кноп- ки с цифрами в данный момент от- вечают за другую функцию, нажмите кнопку [TIMBRE], чтобы настроить тембр. 3) Функция “Сустейн” (Послезвучие) Нажмите [SUSTAIN], на экране появится... -
Page 7: Аккорд
текущий ритм. 3) Вставка Нажмите кнопку [INSERT], если ритм не задан, будет воспроизве- ден проигрыш, а за ним последует соответствующий ритм. Если нажать эту кнопку при воспроизведении ритма, в него будет встав- лен проигрыш, а за ним последует соответствующий ему ритм. -
Page 8: Ударные Инструменты И Программирование
Пример для ключа С, существуют следующие варианты: C, C7, CM, CM7, CDIM, CSUS4, C9, CM9. 3) Ручной аккорд Если не активирован режим “Ритм” и не выбраны методы “Одного пальца” и “Нескольких пальцев”, то каждой кнопке а к к о м п а н е м е н т н о й области... -
Page 9: Функция Обучения
надпись “1CH” и система выйдет из функции записи. Нажмите кнопку [PLAYBACK] для воспроизведения записанного отрывка. На экране появится надпись [PLY]. 7. Функция обучения 1) Функция “One-key” Нажмите кнопку [ONE KEY] на экране появится номер текущей демо-песни. Нажмите любую клавишу, чтобы начать воспроизведение. - Page 11 По истечении срока службы товара, необходимо обратиться в сервисный центр за консультацией по дальнейшей эксплуатации товара. В противном случае дальнейшая эксплуатация может повлечь невозможность нормального использования товара. Срок службы данного изделия - 3 года с момента продажи Изготовитель “ЭЛЕНБЕРГ ЛИМИТЕД”, Великобритания Адрес: 35 Бромптон...
- Page 12 DIGITAL ELECTRONIC KEYBOARD MS-5420 USER MANUAL...
- Page 13 PRECAUTIONS READ THE FOLLOWING PRECAUTIONS CAREFULLY BEFORE YOU BEGIN. KEEP THIS PRECAUTIONS SECURELY FOR FUTURE REFERENCE! Please obey the announcements, before you use the organ, it can help you avoid hurting yourselves or others, and avoid damaging the electronic or- gan or other exterior equipments.
- Page 14 CONTENTS I. NAME AND DISTRIBUTION OF FUNCTION KEYS ........15 II. PREPARATION FOR PERFORMANCE ............ 15 1. INSTALLATION OF BATTERIES ............15 2. EXTERNAL POWER ................ 16 3. MICROPHONE / EXTERNAL SPEAKER ..........16 III. BASIC METHOD OF PERFORMANCE ........... 16 1.
-
Page 15: Name And Distribution Of Function Keys
I. NAME AND DISTRIBUTION OF FUNCTION KEYS 1. SPEAKER 14. CHORD OFF 2. POWER SWITCH KEY 15. DIGITAL DISPLAY 3. ONE KEY 16. NUMBER BUTTONS 4. GUIDE 17. MASTER VOLUME 5. DEMO 18. ACCOM VOLUME 6. PROGRAM 19. TEMPO 7. RECORD 20. -
Page 16: External Power
2. External Power Insert the plug of the standard converter into on the rear panel of the keyboard Pay attention to the voltage which must be as same as the rated voltage and the pole of plug. When you do not play the keyboard, be sure to disconnect the plug from the power outlet 3. -
Page 17: Rhythmic Accompaniment
and now you can perform the timbre “08” which you have selected. 2) Press the button [ + ] or [ — ] , you also can choose the timbre that you need. If the number keys are controlled by the rhythm, you should press the timbre key to choose the timbre. -
Page 18: Chord
board area (1-19 from the left), the automatic accompaniment will start immediately. 3) Inserted Function Press button [INSERT], if it is no rhythm, the unit will play a period of intermezzo first, and then turn to the homologous normal rhythm. If the rhythm is on, the unit will insert a period of intermez-... -
Page 19: Percussion Performing And Programming
Make key C for the ex- ample, the method of the multi-fingered in- cludes C, C7, CM, CM7, CDIM, CSUS4, C9, CM9. 3) Manual Chord If it is no rhythm and press the single-finger of multi-fingered key, the timbres of the accompany keyboard area are the homologous chord, and now you can perform manual... -
Page 20: Teaching Function
“1CH”, and the system quit the record function. Press the button [PLAY- BACK] , the digital screen display [PLY], and broadcast the pitch which is recorded. 7. Teaching Function 1) One-key Function Press button [ONE KEY] , the digital screen will display the number of demo songs at the moment. - Page 22 Address to service center for consultation, when the service life of prod- uct has expired. Otherwise the further operation can entail impossibility of normal use of the product. Service life of the given product - 3 years from the moment of sale...
Need help?
Do you have a question about the MS-5420 and is the answer not in the manual?
Questions and answers