Table of Contents
Advertisement
Advertisement
Table of Contents

Subscribe to Our Youtube Channel
Related Manuals for Dettson Atmos MHD-18


Summary of Contents for Dettson Atmos MHD-18
- Page 1 MHD-18 / MHD-24 & MHD-18U / MHD-24U 2023-05-23 X62434 Rev.B...
- Page 2 INSTALLER / SERVICE TECHNICIAN: Use the information in this manual for the installation / servicing and keep the document near the furnace for future reference. Communication wire connected between the indoor and outdoor units must be properly rated for 240VAC, they are protected by the outdoor unit breaker and must be sized appropriately.
-
Page 3: Table Of Contents
Table of Contents List of Figures Figure 1: Dimensions ....SAFETY Figure 2: Capacity vs Outdoor Temperature . 1.1 Warning ......Figure 3: Installation and Clearances . -
Page 4: Safety
• Have all wiring connected tightly. Loose con- nections may lead to overheating and a possible fire hazard. All installation or repair work shall SAFETY be performed by your dealer or a specialized subcontractor as there is the risk of fire, electric shock, explosion or injury. -
Page 5: Specifications
2 Specifications Table 1: Outdoor Unit Specifications MHD-18 / MHD-18U MHD-24 / MHD-24U Outdoor unit Indoor coil MHD-CC2.0-17.5-M MHD-CC2.0-17.5-M Power Supply 208/230 VAC, 60 Hz, 1 phase Cooling Capacity (min-max) BTU/h 18000 (8870-19400) 24000 (6850-27000) Heating Capacity (min-max) BTU/h 18000 (15100-19500) 29000 (11900-31000) Cooling Input (min-max) 1440 (230-1760) 1845 (310-2400) -
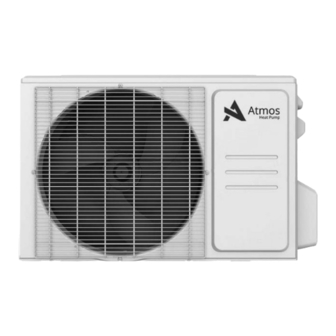
Page 6: Figure 1: Dimensions
Figure 1: Dimensions Outdoor unit MHD-18 35 1/16 890 26 1/2 673 13 7/16 342 26 1/8 663 13 11/16 MHD-24 37 1/4 31 7/8 16 1/8 26 1/2 673 17 15/16 Figure 2: Capacity vs Outdoor Temperature (a) MHD-18 Cooling (b) MHD-18 Heating (c) MHD-24 Cooling (d) MHD-24 Heating... -
Page 7: Installation
• Select a dry place, and do not expose the unit to direct sunlight nor strong winds; • Make sure that the outdoor unit is installed in 3 Installation accordance with the installation instructions, and is convenient for maintenance and repair; 3.1 Notices •... -
Page 8: Clearances
3.4 Clearances Figure 3: Installation and Clearances 3.5 Drain Joint For an installation with a Chinook, position the coil on the supply outlet of the furnace using sheet metal screws. Before the outdoor unit is bolted in place, the drain joint Drain pans are made of a polymer that can withstand must be installed. -
Page 9: Interface Board (K03085)
3.7 Interface Board (K03085) Installation of the interface card is made easy on the Dettson’s Chinook and Supreme furnaces. Installation port has been designed on these furnaces. Refer to the installation instructions provided with the interface board for installation location and thermostat wiring. -
Page 10: Air Purging And Leakage Test
3.10 Air Purging and Leakage Test 2. Completely remove burrs using a reamer or deburring tool. Hold the pipe down to prevent burrs Air and foreign matter in the refrigerant circuit can from falling into the pipe. damage the unit. Use a vacuum pump and manifold gauge to purge the refrigerant circuit, removing any moisture and non-condensable gas from the system. -
Page 11: Operation Test
12. Using hexagonal wrench, fully open both the high pressure and low pressure valves. 13. Tighten valve caps on all three valves (service port, high pressure, low pressure) by hand. You may tighten it further using a torque wrench if needed. 3.11 Operation Test Before operation test 1. -
Page 12: Troubleshooting
• Doors and windows are open. Make sure that all doors and windows are closed while operating the unit. • Excessive heat is generated by sunlight. Close www.dettson.com/x62435_atmos_troubleshooting windows and curtains during periods of high heat Unit Disassembly Manual or bright sunshine. - Page 13 5 Commissioning Checklist Indoor Unit: ______________ s/n#: ______________ Outdoor Unit: ______________ s/n#: ______________ Filter is clean Line length: ________ Line height: ________ Temp sensor position at mid-height on A-coil Error code: ________ Temp rise through the coil: T before: ________ °F T after: ________...
-
Page 14: Figure 7: Exploded View
6 Replacement Parts Figure 7: Exploded View... -
Page 15: Table 4: Part List
Table 4: Part List MDH-18 / MHD-18U MDH-24 / MHD-24U Description Front panel 12222000A06282 12222000A01431 Air grille 12222000014845 Front right panel 12222500A00135 Axial flow fan 12100105000841 12100105000084 Brushless DC motor 11002015000366 11002015000247 Fan motor support 12222000012371 12222000005162 Condenser assembly 15822000009796 15822000011096 Left panel 12222000013472...
Need help?
Do you have a question about the Atmos MHD-18 and is the answer not in the manual?
Questions and answers