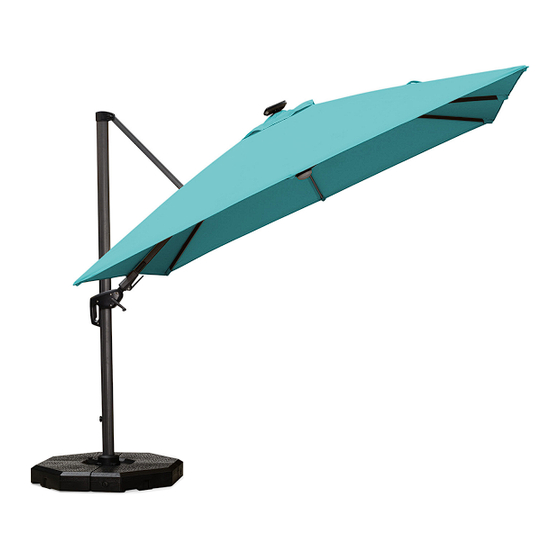
Summary of Contents for PURPLE LEAF E Series
- Page 1 PURPLE LEAF Cantilever Umbrella Assembly and Operation Manual Series 10'×10' ©Copyright 2016-2022 Purple Leaf Inc.
- Page 2 CHECK LIST ×4 ×1 (M8×14) *black bolts ×1 ×4 (M8×20) ×1 ×8 (Ø8) ×1 ×1...
- Page 3 ×1 ×1 ×1 ×1 ×1 (T6) ×1...
- Page 4 Base Tube Assembly Option 1 Adding something heavy on Cross Base crossbase like water tank Notice:Make sure you have enough space to operate the pedal before installation.
- Page 5 Base Tube Assembly *black bolts...
- Page 6 Base Tube Assembly Option 2 Inground Base (Sold Separately) filling the bottom of the hole with gravel 28‘’ 24‘’ Horizontal Concrete >700lbs...
- Page 7 Base Tube Assembly *black bolts...
- Page 8 Base Tube Assembly Option 3 Baseplate (Sold Separately) 4.44 in 4.44 in Ø1/2 in Ø1/2 in...
- Page 9 Base Tube Assembly *black bolts ×16 Use lag screws with washers t o m o u n t t h e u m b r e l l a ( included in package) .
- Page 10 Base Tube Assembly Important Important Prior to assembly it is important to decide on the location of the umbrella. •Allow ample height to avoid damage to your umbrella during assembly and usage. •Choose a location that is level and sturdy. •Consider a location that will maximize the umbrella’s rotating swivel function.Placing the umbrella between two entertaining areas is ideal.
- Page 11 Solar panel Assembly 1.Insert the plug into the socket under the solar panel as shown below. 2.Put the solar panel on the top of umbrella and hide the plug and wire inside the groove at the top of umbrella. Then turn the solar panel clockwise. Do not over tighten.
- Page 12 Solar panel Assembly CAUTION: YOU MUST CHARGE BATTERY BEFORE FIRST USE. Please note that battery can discharge if they are left unused or uncharged for a long period of time. Since there can be a six-month period between p r o d u c t i o n a n d f i n a l c u s t o m e r p u r c h a s e , w e recommend you charge your solar umbrella for at least 8 hours in direct sunlight before the first use.
- Page 13 Umbrella Assembly Two-persons recommended for team lift and to complete assembly. Insert the main pole onto the base tube(D) with the cover plate(H) installed. Please Remove all of foam material from the frame before opening umbrella.
-
Page 14: Operation
Operation CAUTION: Stop turning the crank handle as soon as the umbrella cover is completely open and the sleeve on the umbrella pole has reached its maximum height. IMPORTANT: PRIOR TO USING THE TILT FEATURE. To avoid personal injury or damage to the umbrella, make sure the area behind you is clear and free from any furniture or structure. - Page 15 Operation To Open Canopy 1. Slide the umbrella handle to the top of the pole by squeezing the trigger. 2 . Insert the hand crank(L) into the small hole of the handle on the post. be sure to remove all the protective material inside Note: be sure to remove all tape, form or cardboard...
- Page 16 Operation...
- Page 17 Operation To Tilt Canopy Press on the handle button and move the trigger handle up and down to adjust the angle of the umbrella canopy. IMPORTANT: PRIOR TO USING THE TILT FEATURE. To avoid personal injury or damage to the umbrella, make sure the area behind you is clear and free from any furniture or structure.
- Page 18 Operation...
- Page 19 Operation...
- Page 20 Operation Use the switch to turn on/off the LED light...
-
Page 21: Warranty
Notification WARRANTY Frame Frames are warranted to be free from defects in materials and workmanship for a period of one year. Damage to frames or welds due to improper assembly or exposure to water and sub- freezing temperatures is not covered. Fabric Fabric is warranted for a period of three years (For sunbrella fabric, the warranty for 5 years). -
Page 22: Safety Precautions
Notification SAFETY PRECAUTIONS Close the umbrella in windy conditions or when a storm approach. Never allow the umbrella to flap in the wind; this could damage the canopy. Properly store umbrella when not in use. Close umbrella, and cover umbrella with provided protective cover. Do not leave open umbrella unattended. - Page 23 Attention Umbrealla base tube have 2.5° backward to the vertical for engineering purpose. 2.5° Part C won't be rotatable before the installation of umbrella. If the umbrella is hard to be rotated, close and operate it like this may be helpful.
- Page 24 Purple Leaf Inc. 1820 E Locust St, Ontario CA, 91761, US umbrella5@purpleleafgarden.com © Copyright 2016-2022 Purple Leaf Inc. All Rights Reserved...


Need help?
Do you have a question about the E Series and is the answer not in the manual?
Questions and answers
i would like to see a digram of the purple leaf umbrella crank mechinism