Advertisement
Quick Links
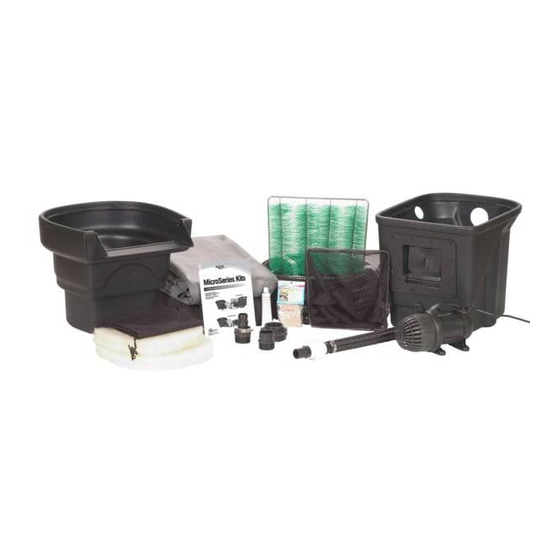
MicroSeries
Installation Instructions & Owner's Manual
• Step-by-step installation
instructions for MicroPond
MicroPondless
Waterfall Kits,
®
MicroSkim
and MicroFalls
®
• Helpful Guide for Maintenance
and Seasonal Care
WANT MORE
POND INFO?
SIGN-UP FOR OUR
MONTHL Y E-NEWSLETTER AT
WWW.AQUASCAPEINC.COM
Made in U.S.A.
Aquascape, Inc.
St. Charles, IL 60174 • Brampton, ON L6T 5V7
www.aquascapeinc.com
Kits,
®
®
FREE
Check Our Website for Videos on These
Products or Look Us Up on
MicroPond
MicroPondless
Kit
®
Kit
®
Advertisement

Related Manuals for AquaScape Micro Series


Summary of Contents for AquaScape Micro Series
- Page 1 • Helpful Guide for Maintenance MicroPond ® and Seasonal Care WANT MORE POND INFO? FREE SIGN-UP FOR OUR MONTHL Y E-NEWSLETTER AT WWW.AQUASCAPEINC.COM MicroPondless ® Made in U.S.A. Aquascape, Inc. St. Charles, IL 60174 • Brampton, ON L6T 5V7 www.aquascapeinc.com...
- Page 2 MicroSeries Installation & Maintenance Instructions Congratulations on the purchase of Aquascape’s MicroSeries Pond Filtration system. We’ve scaled down the professional experience because Mother Nature MicroPondless system is designed experience as easy as possible, ® version of these filters in order to...
- Page 3 Only: In order to ® cally the main waterfalls, it should nect up to the MicroFalls filter local Aquascape supplier can ® maximize circulation, the Micro- be positioned so it’s facing the – unless you’re adding a stream. help you determine the additional...
- Page 4 STEP 4 PD/PL Hook up and level the MicroFalls ® • The first step is to install the bulk- are using flexible PVC pipe. Use • Be sure to compact the area The connection is designed to be head fitting in the hole provided some of the silicone sealant to coat beneath the MicroFalls box using...
- Page 5 STEP 5 Excavate your MicroPondless basin ® The shape and depth Leveling the edges • All of the soil removed from the transit or sight level on larger excavation can be spread and projects. Check your progress • Digging is very labor-intensive, •...
- Page 6 Excavate your MicroPond cont... ® Leveling the edges • All of the soil removed from the excavation can be spread and • One of the most important parts compacted around the Micro- of the excavation is getting the Falls , creating a berm. The filter ®...
- Page 7 STEP 6 PD/PL Install underlayment and liner • Remove any sharp objects from • Try to get the large folds out, but the excavated hole that may dam- the main goal is to make sure age the liner. that it’s lying flat and going into all corners.
- Page 8 Installing the MicroSkim cont... ® • Cut the inner box using a pair of begin threading one of the • Replace the skimmer faceplate scissors, and insert the skimmer screws into filter. Repeat this and the two corner screws, and faceplate into the hole.
- Page 9 Talk to your Aquascape from ultraviolet rays, and giving dealer for help choosing the bacteria a place to colonize, not quantity and sizes of stone to mention it just looks better.
-
Page 10: Add Water
STEP 10 PD/PL Hooking up the pump and plumbing Overflow Exit Hole The MicroPondless and MicroPond you are hooking up the pump in a ® ® utilize the same style pump and MicroSnorkel Vault. ™ plumbing fittings. Connect the • The MicroSkim has two holes on ei- ®... - Page 11 MicroFalls . (See fig. 36). Pre-installing the two screws ® and debris. stone or Aquascape BioBalls (not ™ 33 & 34) Be careful not to dam- in the earlier steps will make it • Have someone hold the liner included) into the media net.
- Page 12 The black foam can be purchased (See fig. 42) from your local Aquascape supplier and will come in handy when filling Fig. 41 If a thick rock along with a larger flow pump is used, the water flow may be so great that it will flow over the sides of the MicroFalls ®...
- Page 13 STEP 15 PD/PL Plug in and tweak the waterfalls • As soon as the MicroPondless ® or MicroPond is filled and all ® of the black waterfall foam is dry (if used on project), you may plug the pump in and test the waterfall.
- Page 14 PD/PL Owner’s manual • Refer to the following pages in this instruction booklet for care and maintenance of your new water feature. • Contact your local Aquascape supplier for more information on routine maintenance using EcoSystems Products, as well ®...
- Page 15 Kits is designed supplier for information on the ® around the foundation of a balanced complete line of Aquascape water ecosystem. The ultimate goal is treatment products. to have nature do the work ... not you! It won’t happen overnight, but it will happen.
- Page 16 Water Treatments PD/PL The Aquascape line of water treatment products will help you maintain healthy, crystal clear water in your water feature. See your Aquascape supplier for more...
- Page 17 Leaks PD/PL If you notice you have to add water fall. Leaks such as these can be • Check to make sure any slow mov- being diverted over the side of on a daily basis, you may have a easily fixed. ing sections of the stream/water- the liner.
- Page 18 If See your Aquascape supplier for you make the extra effort to keep products to help your pond during your falls running throughout the the winter.
- Page 19 Spring Maintenance PD/PL Spring is simply the most exciting Reinstall the waterfall pump in the time of year. In all climates, there’s MicroSnorkel Vault or MicroSkim ™ ® fresh new growth all over the land- and reconnect the plumbing. Fill scape, and everything is just burst- it back up to the proper level.
- Page 20 98104.052009 Join Today! A Communi t y of www.watergardening.com Water Garden Lovers For more information on care and maintenance, please refer to Aquascape’s Ecosystem Pond book or visit www.aquascapeinc.com ©2010 Aquascape, Inc. • All Worldwide Rights Reserved...
Need help?
Do you have a question about the Micro Series and is the answer not in the manual?
Questions and answers