Subscribe to Our Youtube Channel
Summary of Contents for AquaScape AquaBasin 98134
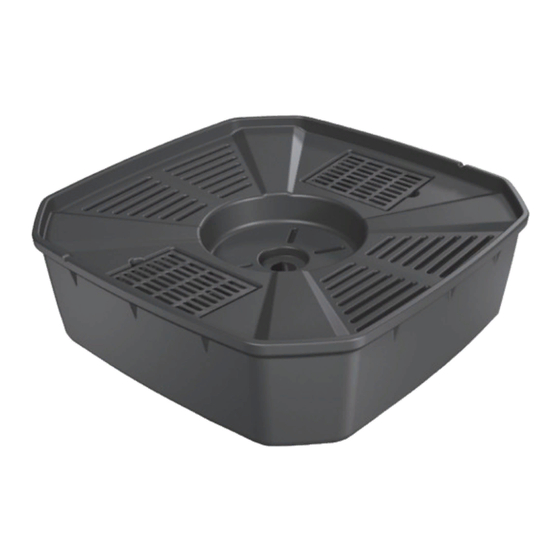
- Page 1 AquaBasin ™ System (Item #98134) Installation & Maintenance Instructions One AquaBasin ™ (Item #98135) Two 9” x 12” removable grates (Item #41113) Made in U.S.A. for: Aquascape, Inc. www.aquascapeinc.com...
- Page 2 AquaBasin ™ System Installation & Maintenance Instructions Instructions 1) Set the AquaBasin in the desired location and ™ trace out the area that will be dug out. (Fig. 1) 2) Using the marked out area as your guide, dig your hole for the AquaBasin 15”...
- Page 3 How to Assemble the AquaBasin Ultra Pump Kit ™ ™ 90° Barbed Ultra Pump Elbow Threaded Adapter Ball Valve Assemble the pump as show in photo above. FPT x Barb Fitting Attach the tubing to the fittings with the supplied hose clamps. How to Hook Up a Stone Fountain 1) The AquaBasin is designed with two...
- Page 4 5) Now that everything is in place, you can finish covering the top of the AquaBasin with gravel. ™ (Fig. 10) Fig. 9 Fig. 10 How to Hook Up a Decorative Spitter 1) The AquaBasin is designed with two removable ™...
- Page 5 How to Assemble the AquaBasin ™ Ceramic Bubbler PVC Extension Tube MPT x Slip Fitting Bulkhead MPT x Barb Fitting 90° Barbed Tubing Elbow Fig. 14 How to Hook Up a Ceramic Bubbler 1) The AquaBasin is designed with two removable grates for ™...
-
Page 6: Warranty
It is recommended that a ball valve be installed on every decorative feature. This will allow you to adjust the flow of water coming out of the decorative feature so that you can get the desired effect. Make sure the decorative feature is level from side to side and front to back. If the decorative feature is not level, the water may not flow out of the fountain evenly. - Page 7 Système AquaBasin (Article #98134) Directives d’installation & d’entretien Un AquaBasin (Article #98135) Deux grilles amovibles de 9 x 12 po. (Article #41113) Fabriqué aux États-Unis pour: Aquascape, Inc. www.aquascapeinc.com...
- Page 8 Système AquaBasin Directives d’installation & d’entretien Directives 1) Placer l’AquaBasin à l’endroit voulu et marquer la surface qui sera creusée. (Fig. 1) 2) En utilisant la surface marquée comme guide, creuser un trou de 15 po. de profondeur pour l’AquaBasin .
- Page 9 pour l’AquaBasin Coude à 90° Adaptateur fileté pour cannelé la pompe Ultra Soupape à bille Assembler la pompe comme illustré sur la photo ci-dessus. FPT x raccord cannelé Fixer le tuyau aux raccords avec les colliers fournis. Comment raccorder une fontaine en pierre 1) L’AquaBasin est conçu avec deux grilles amovibles pour faciliter l’accès à...
- Page 10 5) Maintenant que tout est en place, vous pouvez recouvrir la partie su- périeure de l’AquaBasin de gravier. (Fig. 10) Fig. 9 Fig. 10 Comment raccorder un cracheur décoratif 1) L’AquaBasin est conçu avec deux grilles amovibles pour faciliter l’accès à la pompe. Connecter le tuyau avec la pompe Ultra et la soupape à...
- Page 11 Comment assembler la plomberie du Tuyau de rallonge en PVC bouillonneur en Raccord céramique de coulissant x MPT Raccord l’AquaBasin étanche Raccord cannelé x MPT Coude à 90° Tuyau cannelé Comment raccorder un bouillonneur en céramique Fig. 14 1) L’AquaBasin est conçu avec deux grilles amovibles pour faciliter l’accès à...
- Page 12 Il est recommandé qu’une soupape à bille soit installée à chaque fontaine décorative. Ceci vous permettra d’ajuster le débit d’eau sortant de la fontaine décorative de manière à obtenir l’effet voulu. S’assurer que la fontaine décorative est de niveau, d’un côté à l’autre et de l’avant vers l’arrière.


Need help?
Do you have a question about the AquaBasin 98134 and is the answer not in the manual?
Questions and answers