
Related Manuals for Yadea C1S


Summary of Contents for Yadea C1S
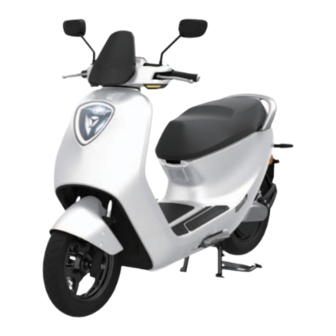
- Page 1 YD1800D-02 C1S ELECTRIC MOTOR SERVICE MANUAL General Information Motor Frame & Chassis Electrical System...
-
Page 3: Table Of Contents
General Information A Few Words About Safety ……………………………………… 2 How To Use This Manual ………………………………………… 4 Vehicle Information ……………………………………………… 5 SPECIFICATIONS ………………………………………………… 6 CABLE & HARNESS ROUTING ………………………………… 9 MAINTENANCE SCHEDULE …………………………………… 14... -
Page 4: A Few Words About Safety
Yadea, must determine the risks to their personal safety and the safe operation of the vehicle. If you need to replace a part, use Yadea genuine parts with the correct part code or an equivalent part. We strongly recommend that you do not use replacement parts of inferior quality. - Page 5 General Information For Handling This Vehicle: • Be sure to turn the main switch OFF and remove the battery before checking or servicing of parts removal/ installation. • To prevent electric shock, always wear safety protective gears and use insulation tools when checking or servicing of parts removal/installation.
-
Page 6: How To Use This Manual
How To Use This Manual This manual is Specific Service Manual for C1S. In order to better meet the needs of customers and service providers for the maintenance and repair of two-wheel electric vehicles, as well as the needs of service providers, after-sales maintenance technicians and the marketing and training departments, we have specially prepared a version maintenance manual. -
Page 7: Vehicle Information
General Information Vehicle Information Product number:YD1800D-02 VIN Number LR4************** Color: interstellar gray, aurora white, deep water blue, liquid silver, electro-optic bright red, interstellar brown Configuration category Braking method Battery capacity Power-off switch Basic configuration All disc brake 60V30AH All disc brake, equipped with Option I 60V30AH Sidestand switch... -
Page 8: Specifications
General Information SPECIFICATIONS GENERAL SPECIFICATIONS ITEM SPECIFICATIONS(3C) SPECIFICATIONS(E13) Length, width and height (mm) 1790x735x1220 1790x720x1210 Wheelbase(mm) 1270 1260 Seat height(mm) DIMENSIONS Ground clearance(mm) Curb weight(Kg) Maximum weight capacity(Kg) Frame type Low-profile steel tube Low-profile steel tube Front suspension Telescopic fork Telescopic fork Front axle travel(m) Rear suspension... - Page 9 General Information FRAME & CHASSIS SPECIFICATIONS FRONT WHEEL/SUSPENSION/STEERING ITEM STANDARD LIMIT Front fork free length(mm) 409±2 Front fork stroke (mm) Chuan Nan Shock Absorption Recommended oil Oil CN3# Elastic coefficient K1 (N/mm) K1=2 Elastic coefficient K2 (N/mm) K2=3.9 Front fork Elastic coefficient K3 (N/mm) K3=9.8 Travel(K1)
- Page 10 General Information ELECTRICAL SYSTEM SPECIFICATIONS BATTERY/CHARGING SYSTEM ITEM SPECIFICATIONS BATTERY Cell configuration 60V30Ah Main circuit Air switch 63A Short circuit protection Secondary circuit Fuse 20A device Charging circuit Torque Each fastener should be tightened to the standard torque value except the fasteners specified torque value. Standard tightening torque Tightening torque (N·m) Fastener name...
-
Page 11: Cable & Harness Routing
General Information CABLE & HARNESS ROUTING Harness technical requirements: 1. The wiring harness is straight and beautiful without shaking; 2. There should be no damage to the outer skin of the wiring harness. Wrap the damaged parts with insulating tape; 3. - Page 12 General Information Four holes (throttle grip) Six-hole black (right combination switch) Two holes (right brake handle) Right brake disconnect wire Six-hole white (left combination switch) Left combination switch wire Fix the L/R combination switch and brake switch to the stay on the handle pipe Left brake disconnect wire Right combination switch cable Two holes (left brake handle)
- Page 13 General Information Cable tie fixing Wire clamping fixing Wire hook fixing Side stand switch wire Seat Zipper Cable...
- Page 14 General Information Rear brake oil pipe Motor line Motor line Motor line...
- Page 15 General Information License plate light wire Right turn signal wire Left turn signal wire Wire hook fixing Main electrical cable License plate light wire Left turn signal wire Rigth turn signal wire...
-
Page 16: Maintenance Schedule
General Information MAINTENANCE SCHEDULE Please perform the pre-ride inspection in accordance with the maintenance schedule described in the maintenance schedule table of the user manual. ■ ♦ ● Check ▲ Adjustment Replace Lubricating EVERY ITEMS 60 DAYS 180 DAYS 360 DAYS 1. - Page 17 Motor Installation and disassembly …………………………………… 16 Fault diagnosis and maintenance ……………………………… 17 Tools for reparing ………………………………………………… 18...
- Page 18 Motor Installation and disassembly Hexagon flange bolt (big head) Cross recessed pan head screw Combination with spring washer and M4x12 flat washerM8x35 Hexagon flange bolt M8x35 Hexagon flange nut 75 N·m TT-type hexagon socket platform step screw M8x20 • Seat → Page 26 •...
- Page 19 Motor Fault diagnosis and maintenance Motor abnormal noise When troubleshooting the abnormal noise of the motor, please idle the motor first and confirm the source of the abnormal noise again. After confirming the abnormal noise is from motor, proceed with the following procedure. 1.
- Page 20 Motor Tools for reparing Tool name Number Application Wear the motor and motor controller Gloves A pair during operation Wrench One set Disassembly and use of nuts and bolts Torque wrench One set Pre-tightening of nuts and bolts...
- Page 21 Frame & Chassis Body Walls ………………………………………………………… 20 Frame Body Stay ………………………………………………… 31 Front Wheel ………………………………………………………… 32 Front Shock Absorber …………………………………………… 34 Steering Stem ……………………………………………………… 36 Rear Shock Absorber …………………………………………… 37 Steering Assembly ………………………………………………… 38 Braking System …………………………………………………… 39 CBS ………………………………………………………………… 43 The steps described in this chapter are all disassembly steps, and the installation steps can be performed in the reverse direction of the disassembly steps.
-
Page 22: Body Walls
Frame & Chassis Body Walls 1. Front Fender → Page 21 8. Luggage Box/Seat → Page 26 2. Front Wall → Page 21 9. Rear Side Strip(L/R) → Page 27 3. Front Inner Cover/Frame Chassis 10. Center Cover → Page 27 →... - Page 23 Frame & Chassis 1. Front Fender Pan head hexagon step bolt Φ10x4+M6x10 2. Front Wall Cross recessed pan head tapping screw ST4.8x16 Tapping clip ST4.8 Cross recessed pan head tapping screw ST4.8x16...
- Page 24 Frame & Chassis 3. Front Inner Cover/Frame Chassis Cross recessed flat head slotted tapping screw ST4.2X13 Hexagon flange bolt combined with flat washer M6x12 Hexagon flange bolt combined with flat washer M6x12 Cross recessed flat head slotted tapping screw ST4.2X13 •...
- Page 25 Frame & Chassis 4. Toolbox Cross recessed flat head slotted tapping screw ST4.2X13 Hexagon flange bolt combined with flat washer M6x20 Front Wall → Page 21 Cross recessed flat head slotted tapping screw ST4.2X13 Cross recessed flat head slotted Cross recessed pan head tapping screw tapping screw ST4.2X13 ST4.2X13...
- Page 26 Frame & Chassis Operation Order Operation Name/Parts name Quantity Note Front Bucket Front Bucket Components Charging Port Cover Hook 5. Front Cover Cross recessed pan head screw ST4.8x16 Cross recessed pan head tapping screw ST4.2x13 Operation Order Operation Name/parts Name Quantity Note Dome stay, Dome...
- Page 27 Frame & Chassis 6. Battery Cover Cross recessed pan head screw M6x12 Operation Operation Name/parts Name Quantity Note Order Check: open the seat, the key opens the Foot pedal installation with plug battery compartment cover, as is shown Foot pedal installation bolt M6*16 When installing, please proceed in the Foot pedal assembly (including flip hinge, reverse order of disassembly, the cover is...
- Page 28 Frame & Chassis • Front Wall → Page 21 • Seat → Page 26 • Foot Pedal → Page 25 • Rear Handrail → Page 28 • Toolbox → Page 23 8. Luggage Box/Seat Hexagon flange bolt combined with flat waher M6x12 Operation Operation Name/parts Name Quantity...
- Page 29 Frame & Chassis 9. Rear Side Strip(L/R) Tapping clip ST4.2x16 Cross recessed pan head tapping screw ST4.8x16 10. Center Cover Cross recessed pan head T-type hexagon socket flat plate tapping screw ST4.2×13 step screw M8x20-5 Cross recessed pan head tapping screw ST4.2×13 Other Cross recessed pan head tapping screw ST4.8x16...
- Page 30 Frame & Chassis Cross recessed flat head slotted tapping screw ST4.2x13 Cross recessed pan head tapping screw ST4.8x13 Cross recessed flat head slotted tapping screw ST4.2X13 11. Rear Handrail Hexagon flange bolt M8x25 • Seat → Page 26 • Rear Backrest → Page 27 •...
- Page 31 Frame & Chassis 12. Rear Inner Cover Hexagon flange bolt combined with flat washer M6x16 Cross recessed pan head tapping screw ST4.8x13...
- Page 32 Frame & Chassis 13. Rear Fender Hexagon socket flat round head flange screw M8x12 Hexagon flange bolt (big head) M6x12 Hexagon flange bolt combined with flat washer M6x12 14. Rear View Mirror...
-
Page 33: Frame Body Stay
Frame & Chassis Frame Body Stay 1. Side Stay 2. Main Stay Hexagon flange locking nut M10×1.25 Hexagon flange bolt M10×1.25×30 Align the spring up and down with the corresponding groove of the main stay. -
Page 34: Front Wheel
Frame & Chassis Front Wheel Composition of Front Wheel Front wheel shaft M12x1.25x225 Environmental color-Zinc Front wheel shaft sleeve left 20× 12×23 Full-metal hexagon flange locking nut M12×1.25 Front wheel shaft sleeve right 20× 12×34 Operation Operation Name/parts Name Quantity Note Order Oil seal 20x32x5... - Page 35 Frame & Chassis Operation Operation Name/parts Name Quantity Note Order T-shaped hexagonal flat plate step screws Separate the front disc and front wheel hub. (with anaerobic adhesive) M8×20 This is a non-standard part Oil Seal Bearing Spacer Sleeve Use a normal bearing extraction tool to remove the bearing. Use lithium grease for lubrication.
-
Page 36: Front Shock Absorber
Frame & Chassis Front Shock Absorber Composition of Front Shock Absorber Hexagon socket bolt M8x40 Hexagon flange bolt (big head) Combined with wash and flat washer M8x35 • Front Fender → Page 22 • Front Wall → Page 21 Loosen the lower side bottom bridge pinch bolts. - Page 37 Front shock absorber stuck, not working Damaged piston assembly possible, Silt in the working chamber please go to the Yadea dealer for inspection or replacement. Damaged main spring Front shock absorber softens Damaged oil seal...
-
Page 38: Steering Stem
Frame & Chassis Steering Stem • Handle → Page 38 • Front shock Absorber → Page 34 • Remove the lock nut 1 • Remove the check washer 2 • Remove the upper gear 3 • Inspection: Whether the upper steering bearing 4 and the lower steering bearing 7 are damaged, (falling steel balls or rust and damage to the support base, etc.) →... -
Page 39: Rear Shock Absorber
Silt in the working chamber possible, Rear shock absorber softens Damaged main spring please go to the Yadea dealer for Rear shock absorber hardens Damaged main spring inspection or replacement. b.Maintenance 1. Open the seat cushion flip. -
Page 40: Steering Assembly
Frame & Chassis Steering Assembly Align Align When installing the brake pump, make sure that the “UP” mark is facing upward. Align the edge of the brake pump with the engraved mark on the handlebar. -
Page 41: Braking System
Frame & Chassis Braking System Replacement of Brake Fluid Operation Operation Name/parts Name Quantity Note Order Main Pump Main Pump Fixing Base Main Pump Fixing Base Bolt Brake Handle Brake Handle Mounting Bolt Switch Mounting Screw Brake Switch Oil Pipe Bolt Copper Washer Brake Oil Pipe Oil Cup Cover... - Page 42 Frame & Chassis Disassembly of the brake pump Operation Operation Name/parts Name Quantity Note Order Main Pump Body Dust-proof Robber Ring E-shaped Retaining Ring Main Pump Thruster Components Spring Oil Level Sight Glass O-shaped Rubber Ring When installing, please proceed in the reverse order of disassembly. When installing the brake master cylinder, the small diameter end of the spring should face the master cylinder piston.
- Page 43 Frame & Chassis Disassembly of brake components-caliper body part Abrasion warning slot...
- Page 44 Frame & Chassis Operation Operation Name/parts Name Quantity Note Order Brake Pad Guide Pin Bolt Brake Pad Dust-proof Cover Brake Pad Brake Pad Reed L/R Pump Body Bolts Oil Channel Sealing Ring Left Pump Body Right Pump Body Exhaust Screw Piston Piston Dust -proof Seal Piston Oil Seal...
-
Page 45: Cbs
Frame & Chassis Front brake oil pipe Rear brake oil pipe CBS Distribution valve Front calipers oil pipe Rear calipers oil pipe The CBS includes: front brake oil pipe, rear brake oil pipe, front caliper oil pipe, rear caliper oil pipe and CBS distribution valve. - Page 46 Frame & Chassis Rear calipers oil pipe Rear fork (right) Front calipers oil pipe Rear calipers oil pipe The rear caliper oil pipe needs to pass from the left side of the steering stem through the line hook on the right side of the riser, down, from the right side of the vehicle to the rear caliper Judgment method for maintenance of brake handle failure When the meter fault light is on, if the brake handle is not reset when power is turned on, confirm whether the brake handle is...
- Page 47 Frame & Chassis Wiring diagram of front and rear brake oil pipe of vehicles without CBS Front brake oil pipe Rear brake oil pipe...
- Page 48 MEMO...
- Page 49 Electrical System System Overview ………………………………………………… 48 Meter ………………………………………………………………… 50 Lighting System …………………………………………………… 52 Combination Switch Handle …………………………………… 59 Battery ……………………………………………………………… 61 Charger ……………………………………………………………… 63 Converter …………………………………………………………… 65 Controller …………………………………………………………… 67 Central Controller ………………………………………………… 70 Electrical components …………………………………………… 73 Power Lock ………………………………………………………… 76 Remote Control Key ………………………………………………...
-
Page 50: System Overview
Electrical System System Overview Location of Electrical Components Instrument Handle Central controller Converter Charge fuse Controller Air switch Horn Battery... - Page 51 Electrical System Troubleshooting Vehicle does not move 1. Battery Inspection Check the battery → Page 61 Faulty battery Is the battery normal? 2. Controller inspection Check the controller → Page 67 Faulty controller Is the controller normal? 3. Brakelight switch Inspection Check the brakelight switch.
-
Page 52: Meter
Electrical System Meter Power battery charging status indicator Automatic headlight indicator Right turn indicator Left turn indicator smart Key indicator High beam light Fault indicator Ready indicator Motor and controller overheat indicator Charging connection indicator When the meter fault indicator lights up, please combine the following fault phenomena to determine the body failure parts Phenomenon Body faulty parts No power output when turning the handle... - Page 53 Electrical System The right front turn signal is off, the meter’s right turn indicator Faulty right front turn signal flashes quickly The right rear turn signal is off, the meter’s right turn indicator Faulty right rear turn signal flashes quickly Low beam lights are off Faulty low beam lights High beam light is off...
-
Page 54: Lighting System
Electrical System Lighting System Headlight Cross recessed pan head tapping screws ST4.8x16 High beam( ) Low beam( ) Blue White Front position Positive electrode light( ) 12V(+) Brown Black Diagram of external wire harness of the headlight shell Low beam light area Position light light area High beam light area •... - Page 55 Electrical System Rear taillight Cross recessed large flat head slotted tapping screws ST4.2x13 Brake light( ) Rear position light( ) Positive12V(+) Highlight: Brake light Normal light: Rear position light Rear left/right turn signal, License light Right blue Left orange (Negative electrode) (Negative electrode) Black(+12V) Black(+12V)
- Page 56 Electrical System Judgement method for maintenance of lighting system failure Light failure analysis Faulty body Phenomenon confirmation Cause Analysis Troubleshooting 1. Press the left turn signal button, the left front turn signal does not light, the meter's left turn indicator does not flash, the central control has no turn prompt sound, the meter has no fault reminder, and...
- Page 57 Electrical System Failure Phenomenon confirmation Cause Analysis Troubleshooting phenomenon 1. Press the right turn signal button, the right front turn signal does not light, the meter's right turn indicator does not flash, the central control has no turn prompt sound, the meter has no fault reminder, and the right front turn signal can flash during light self- 1.
- Page 58 Yadea APP, and the 2. The central control judges that 2. Replace the headlight, check fault detection shows that the low the low beam light is faulty.
- Page 59 Yadea APP, and the 2. The central control judges that central control. Faulty high fault detection shows that the high the high beam light is faulty.
- Page 60 Yadea APP, and the fault 2. The central control judges that 2. Replace the horn, check Faulty horn detection shows the horn is faulty.
-
Page 61: Combination Switch Handle
Electrical System Combination Switch Handle Right combination switch White (Cruise control) Green (Ground) Black/Yellow Yellow/White (P gear) (Double flash) Brown(MODE) Connector:DJ7061-2.3-21 Left combination switch Light green (Horn) Blue (High and low beam) Green (Ground) Light blue (Right turn) Orange (Left turn) White/Brown(SET) Connector:DJ7061-2.3-21 Handle... - Page 62 Electrical System Judgement method for fault maintenance of Handle failure Before performing the handle fault detection, confirm whether the handle is stuck. If so, remove the foreign objects and then power on again to solve the failure. Failure phenomenon: The failure light of meter lights up, and there is no power output when turning the handle. 1.
-
Page 63: Battery
Electrical System Battery Steps to remove the battery: Before removing the battery, you need to rotate the door lock to the seat cushion open position, open the seat cushion, and turn off the air switch. 1. Rotate the electric door lock to the open position of the battery box cover and open the battery box cover. - Page 64 Electrical System Judgement method for fault maintenance of Battery failure Battery failure analysis Faulty body Phenomenon confirmation Cause Analysis Troubleshooting 1. All battery power is used up 1. Insert the charger to charge, the Battery 1. The vehicle is powered off 2.
-
Page 65: Charger
Electrical System Charger Overview The charger is a device that supplements the energy of the vehicle battery. The charger of this vehicle is a smart charger with multiple protections set, such as: overcurrent, short circuit, anti-backflow, input overvoltage, output open circuit, internal temperature protection, and minimum charging Restrictions and other protections. - Page 66 Electrical System Steps for troubleshooting: 1. The power indicator is off (green indicator) Check when power is off: Appearance of the plug at the input end: The blade is not oxidized or broken. 1. If the input plug is damaged, stop using it Wire appearance: no damage or breakage.
-
Page 67: Converter
Electrical System Converter The converter is installed in the front part of the electric vehicle. It mainly converts the high-voltage DC power of the power battery into a stable low-voltage DC power. It is used to provide 12V light power supply for the entire vehicle and float charging for auxiliary batteries. - Page 68 Electrical System 1. The power indicator is off (green indicator) Disconnect the converter plug, open the electric door lock, and use a multimeter DC voltage file to check whether the input terminal plug No input Check the input line has a 48-72V voltage input. Input Check the converter output voltage 2.
-
Page 69: Controller
Electrical System Controller Overview The controller mainly plays the role of driving the motor, anti-theft lock motor and providing corresponding information. The vehicle controller is located under the vehicle and can be seen under the protective cover after the bucket is removed. The parts connected to it are motor, battery, anti-theft device, handle and brake. - Page 70 Electrical System Before performing controller fault detection, it is necessary to confirm whether the under-voltage protection of the vehicle is caused by the low battery power (no power output when the handle is turned after the vehicle is powered on). Failure phenomenon: Hall failure ●...
- Page 71 Electrical System Handle signal • Test method: open the electric door lock and measure 0.8-3.6V according to the picture. The voltage is 0.8V without Multimeter is placed turning the handle; the greater the turning angle of the in DC voltage range handle, the higher the voltage.
-
Page 72: Central Controller
Electrical System Central Controller Overview The central controller is installed in the vehicle, and is connected to the battery, controller, meter, lights and electric vehicle combination switch. As the vehicle's central control unit (referred to as central control), it integrates lighting control, power supply module, and serial communication module. - Page 73 Electrical System J3 connector definition J4 connector definition High beam light P gear signal Low beam light Horn switch Reserved Reserved Reserved Right turn light switch signal ACC power output Left turn light switch signal Ground High and low beam light switch signal AUTO switch and headlight switch Battery power 84V multiplexing...
- Page 74 3. The central control judges that central control. changed after the P gear is the vehicle has fault. 3. Connect Yadea APP, click the released. fault detection, and replace the 3. The indicator lights up, the device according to the displayed display interface is normal, and fault.
-
Page 75: Electrical Components
Electrical System Electrical components Side stand switch (not included in any configuration) Use a normal bearing extraction tool to remove the bearing. Horn Function definition: It is to convert the 12V electric signal into sound to warn pedestrians and other vehicles to draw attention and ensure driving safety. - Page 76 Electrical System Judgement method for fault maintenance of Horn failure Common failure: hoarse sound, no sound. 1. Check the installation location After removing the peripheral plastic parts of the vehicle, check the installation position of the horn, and Check the horn separately should not touch the surrounding objects.
- Page 77 Electrical System • Front Wall → Page 21...
-
Page 78: Power Lock
Electrical System Power Lock Function definition: The components that realize the switch and anti-theft function of electric vehicles. Hexagon flange bolt (small head) M6x16 • Front Wall → Page 21 Align the pin with the hole. - Page 79 Electrical System Judgement method for fault maintenance of Power Lock failure Common failures: the key cannot be inserted, no electricity after power on, and poor contact 1. Key inspection The key has bending deformation and tooth wear. Replace the spare key Judge that the key is normal and check the lock cylinder.
-
Page 80: Remote Control Key
Electrical System Remote Control Key Judgement method for fault maintenance of Remote Control Key failure 1. Check the remote control battery Remote control battery: Press the button to observe 1. Replace with the spare remote control No indication the remote control LED indicator. 2. - Page 81 Appendix List of Special Maintenance Tools and Meters Tool name Specification Unit Quantity Illustration Phillips screwdriver 5mm×100mm Slotted screwdriver 6.5mm×100mm 8×10 12×14 13×16 Open-end wrench 14×17 17×19 22×24 8×10 12×14 13×16 Double offset ring spanner 14×17 17×19 22×24 10 inches Adjustable spanner 15 inches Allen wrench...
- Page 82 Appendix Tool name Specification Unit Quantity Illustration Wire stripper 6 inches Crescent wrench 55-62 Front shock absorber lengthened octagonal 32# 45# sleeve 45mm 32mm Socket ratchet wrench and 1/2-260mm (with various socket specifications sleeve) Electric iron Meter 1 Digital multimeter Brushless motor controller Meter 2 tester...
- Page 83 Appendix List of Spare Parts Name: Front cover Name: Rear cover Name: Front wind board Name: Front wall Name: Front lining board Code: C1059748000 Code: C1059749000 Code: C2016704000 Code: C1059750000 Code: C2016705000 Name: Storage box Name: Storage box Name: Inner box Name: Storage box Name: Shaft inner cover cover...
- Page 84 Appendix Name: Seat bucket Name: Nameplate cover Name: Frame body assy Name: Handle pipe Name: Main stay Code: C2016716000 Code: C2015179000 Code: L3010082703 Code: L4030001325 Code: L3050001173 Name: Rear wheel Name: Rear swing arm Name: Rear swing arm Name: Battery fixing mudguard mounting Name: VIN mark cover assy...
- Page 85 Appendix Name: Front left turn Name: Front right turn Name: Intelligent central Name: Left combination Name: Rear licence light signal signal control (with GPS) switch Code: L7110000134 Code: L7030000571 Code: L7040000567 Code: L1360100015 Code: L1060150338 Name: Right Name: Left grip Name: Name: Name:...
- Page 86 60V strong electricity Instrument ground line Communication line Communication lineB LCD EN Instrument positive 60V strong electrode electricity Green yellow Brake switch SET button switch Left turn button switch Right turn button switch P gear button switch Front left turn signal Horn button switch Rear left turn signal Front right turn signal...
- Page 88 2020/06/29 The first revision...
Need help?
Do you have a question about the C1S and is the answer not in the manual?
Questions and answers