Table of Contents
Advertisement
Quick Links
Advertisement
Table of Contents

Related Manuals for Woodland Mills TF810 PRO


Summary of Contents for Woodland Mills TF810 PRO
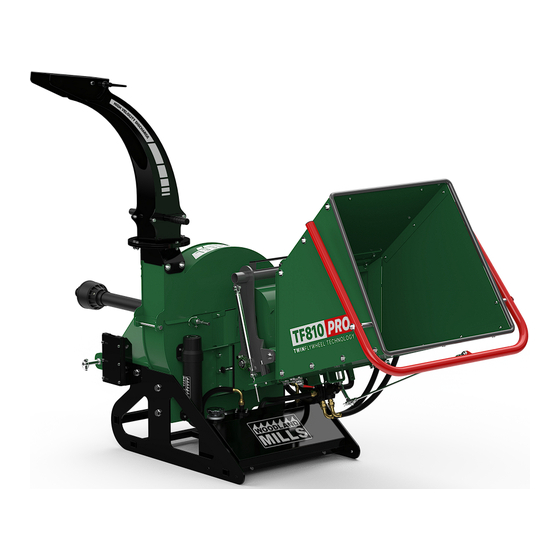
- Page 1 TF810 PRO PTO WOOD CHIPPER OPERATOR’S MANUAL...
- Page 2 This page intentionally left blank.
-
Page 3: Table Of Contents
TF810 PRO Operator’s Manual TABLE OF CONTENTS TABLE OF CONTENTS __________________________________________________1 INTRODUCTION ________________________________________________________3 INTENDED USE ________________________________________________________3 SAFETY GUIDELINES ___________________________________________________4 ROTATING DRIVELINES_______________________________________________5 PERSONAL SAFETY__________________________________________________6 WORK AREA ________________________________________________________7 TOOL USE AND CARE ________________________________________________8 TECHNICAL SPECIFICATIONS ____________________________________________9 OVERALL DIMENSIONS—OPERATING STATE ________________________10 ii. OVERALL DIMENSIONS—STORED STATE____________________________11 iii. - Page 4 TF810 PRO Operator’s Manual OPERATION __________________________________________________________37 1. PRE-START UP CHECKLIST _______________________________________37 2. START UP ______________________________________________________38 3. INFEED ROLLER CONTROL _______________________________________39 4. DISCHARGE CHUTE______________________________________________40 5. CHIPPING ______________________________________________________41 6. STOPPING______________________________________________________41 MAINTENANCE _______________________________________________________42 REPLACING BLADES ________________________________________________42 BLADE SHARPENING________________________________________________44 SETTING THE BED PLATE GAP _______________________________________45...
-
Page 5: Introduction
For technical questions and replacement parts, please contact Woodland Mills Inc. INTENDED USE Woodland Mills twin flywheel wood chippers are designed for acreage owners to aid in chipping natural, untreated wood only. Materials that are processed may contain chemicals or by- products that could corrode the machine or damage it, resulting in safety concerns. -
Page 6: Safety Guidelines
TF810 PRO Operator’s Manual SAFETY GUIDELINES **SAVE THESE INSTRUCTIONS** • Do not operate this machine until this manual has been read and fully understood; serious injury or severe machine damage could occur if these safety warnings are ignored. • Never allow more than one person to operate this machine at one time. If two people are working together it will increase the chance of your workmate engaging the machine or causing you to fall into the machine. -
Page 7: Rotating Drivelines
TF810 PRO Operator’s Manual ROTATING DRIVELINES **STAY CLEAR OF ROTATING DRIVELINES** • Entanglement in rotating driveline can cause serious injury or death. • Keep tractor master shield and driveline shields in place at all times. Make sure rotating shields spin freely. -
Page 8: Personal Safety
TF810 PRO Operator’s Manual PERSONAL SAFETY • Stay alert, watch what you are doing and use common sense when operating a power tool. Do not use a power tool when you are tired or under the influence of drugs, alcohol, or medication. -
Page 9: Work Area
TF810 PRO Operator’s Manual WORK AREA • Keep work area clean, free of clutter and well lit. Cluttered and dark work areas can cause accidents. • Do not use your wood chipper where there is a risk of causing a fire or an explosion;... -
Page 10: Tool Use And Care
TF810 PRO Operator’s Manual TOOL USE AND CARE • Always be sure the operator is familiar with proper safety precautions and operation techniques before using machine. • Do not force the tool. Tools do a better and safer job when used in the manner for which they are designed. -
Page 11: Technical Specifications
TF810 PRO Operator’s Manual TECHNICAL SPECIFICATIONS Component TF810 PRO Specification Drive System PTO Transport 3-Point Hitch Minimum HP Required (at PTO) 35 hp In-Feed System Hydraulic Hydraulic Oil ISO 32 (ISO 46 for warmer climates) Hydraulic Tank Volume 5 gal [19 L] Hydraulic Requirement (Tractor) None. -
Page 12: Overall Dimensions-Operating State
TF810 PRO Operator’s Manual OVERALL DIMENSIONS—OPERATING STATE 60" 1524mm 80-3/16" 2037mm 71-1/4" 1810mm 0007030-M-EN: Rev D Page 27-Jun-2023... -
Page 13: Overall Dimensions-Stored State
TF810 PRO Operator’s Manual ii. OVERALL DIMENSIONS—STORED STATE The discharge chute deflector must be pointing down in order to clear the control arm on the infeed chute when it is flipped upward for storage. See section STORAGE for more information. -
Page 14: 3-Point Hitch Dimensions
TF810 PRO Operator’s Manual iii. 3-POINT HITCH DIMENSIONS The wood chipper 3-point hitch is a Category 1 system design to work with tractors in the horsepower range of 35-100+ hp. Top link pin is ¾” [19 mm] diameter and the lift arm pins are ⅞”... -
Page 15: Component Lists
TF810 PRO Operator’s Manual COMPONENT LISTS Verify all component and hardware quantities are correct prior to assembling the wood chipper. Control Arm Connecting Rod Spacer [0006728] [0008193] Lower Hitch Pin Linkage Rod [0007118] Assembly Upper Hitch Clevis Pin 42.67 Plate... -
Page 16: To-Scale Hardware
TF810 PRO Operator’s Manual TO-SCALE HARDWARE BOLTS & SCREWS Hardware graphics are printed at 1:1 scale for ease of identification. Simply place the hardware over the image in the tables to verify it is the correct size. HHB-MBJ080FCJ M8 X 1.25 X 25 mm HEX HEAD BOLT HHB-MBJ090FCJ M8 X 1.25 X 35 mm HEX HEAD BOLT... - Page 17 TF810 PRO Operator’s Manual SNC-MCA095FCJ M16 X 2 X 40 mm CARRIAGE HEAD BOLT BHS-MBJ073FCM M8 X 1.25 X 18 mm BUTTON HEAD SCREW BHS-MBM175FCM M10 X 1.5 X 120 mm BUTTON HEAD SCREW HHS-MBM057069AJ M10 X 1.5 X 20 mm HEX HEAD SHOULDER SCREW SCALES Ruler scales are provided below to double-check bolt and screw lengths if necessary.
-
Page 18: Nuts
TF810 PRO Operator’s Manual NUTS HLN-MBJCH HLN-MBMCH M8 X 1.25 LOCK NUT M10 X 1.5 LOCK NUT HLN-MCACH ACN-MBMAJ M16 X 2 LOCK NUT M10 X 1.5 ACORN NUT 0007030-M-EN: Rev D Page 27-Jun-2023... -
Page 19: Washers
TF810 PRO Operator’s Manual WASHERS FTW-MBJ000AJ FTW-MBR000NA M8 FLAT WASHER M12 NYLON FLAT WASHER FTW-MCA000AJ FDW-MBJ079000AJ M16 FLAT WASHER M8 FENDER WASHER, 30 mm OD FDW-MBM079000AJ SLW-MBMAJ M10 FENDER WASHER, 30 mm OD M10 SPLIT LOCK WASHER 0007030-M-EN: Rev D... -
Page 20: Tools Required
TF810 PRO Operator’s Manual TOOLS REQUIRED Tool Specification Wrench/Socket 13 mm (2X) Wrench/Socket 16 mm (2X) Wrench/Socket 17 mm Wrench/Socket 24 mm or Adjustable Wrench Wrench 27 mm or Adjustable Wrench Hex Key Set of Metric Hex Keys [2-10 mm] Hacksaw* Any metal-cutting saw (Sawzall, etc.) -
Page 21: Assembly
TF810 PRO Operator’s Manual ASSEMBLY 1. UNPACKING A. UNBOXING THE CRATE Unpack the contents of the crate by first cutting the nylon strapping and then remove the cardboard top and sides. Remove the four (4) M8 hex bolts and nuts located at each bottom corner of the crate and then lift it off the skid. -
Page 22: Lower Hitch Arms
40.64 1-5/8 TF810 PRO Operator’s Manual B. LOWER HITCH ARMS 20.32 13/16 Using the hardware listed below, reorient and then assemble the lower hitch arms. M16 X 60 mm M16 Lock Nut Hex Bolt M16 Flat Washer WARNING! Remove and then reinstall one lower hitch arm at a time. - Page 23 TF810 PRO Operator’s Manual Remove upper bolt and washer Switch to the other side and remove the upper M16 X 45 mm hex bolt and flat washer from that side of the base. Slide the lower hitch arm out. Slide arm out and flip 180°...
-
Page 24: Connecting Rod
TF810 PRO Operator’s Manual C. CONNECTING ROD Using the components listed below, assemble the connecting rod and lower hitch pins to the lower hitch arms. Connecting Linch Pin Lower Hitch Pin Position the connecting rod between the two (2) lower hitch arms and then thread one (1) lower hitch pin into each end, securing it to the arms. -
Page 25: Upper Hinge Plates
TF810 PRO Operator’s Manual D. UPPER HINGE PLATES Using the hardware and components listed below, assemble the upper hitch plates to the belt guard. M16 X 40 mm Upper Hinge Carriage Bolt Plate M16 Flat Upper Hinge Washer M16 Lock Nut... -
Page 26: Infeed Chute
40.64 TF810 PRO Operator’s Manual 1-5/8 2. INFEED CHUTE 20.32 A. TOP PANEL 13/16 The wood chipper infeed chute consists of four (4) metal panels that are bolted together. The first step is bolting the top panel to the lower flywheel housing that forms the hinge. Using the hardware listed in the table below, assemble the hinge connection. -
Page 27: Side Panels And Bottom Panel
TF810 PRO Operator’s Manual B. SIDE PANELS AND BOTTOM PANEL With the top panel bolted to the hinge, assemble each side panel to the sides of the top panel using the M8 X 18 mm button head screws, M8 lock nuts, and M8 fender washers. Use a hex key for the screws and a socket/wrench for the lock nuts. -
Page 28: Round Edge Bar
20.32 TF810 PRO Operator’s Manual 13/16 C. ROUND EDGE BAR Assemble the round edge bar to the infeed chute using the hardware listed below. M8 X 18 mm M8 X 30 mm Button Head Fender Washer Screw Round Edge 20.32... - Page 29 TF810 PRO Operator’s Manual With the edge bar in place, assemble the panels to the edge bar. Use a hex key for the button head screws and a socket/wrench for the lock nuts. Install the remaining thirteen (13) M8 X 18 mm button head screws, M8 lock nuts, and M8 X 30 mm fender washers as shown below to secure the panels and edge bar in place.
-
Page 30: Control Arm
TF810 PRO Operator’s Manual D. CONTROL ARM The large red infeed control arm is attached to the infeed chute using the hardware below. M10 X 120 mm Button Head M10 Acorn Nut 20.32 Screw 13/16 M10 X 30 mm Control Arm... - Page 31 TF810 PRO Operator’s Manual Use one (1) M10 X 120 mm button head screw, one (1) M10 X 30 mm fender washer, one (1) M10 lock nut, and one (1) M10 acorn nut to secure each end of the control arm to the infeed chute side panels.
-
Page 32: Control Arm Linkage
TF810 PRO Operator’s Manual E. CONTROL ARM LINKAGE With the control arm fastened to the infeed chute, the linkage assembly can now be connected between it and the hydraulic directional control valve. Control Arm M10 X 35 mm Linkage Hex Bolt Assembly 20.32... - Page 33 TF810 PRO Operator’s Manual On the opposite end of the linkage, secure the linkage to the the hydraulic directional control valve actuator using the clevis pin and hairpin cotter pin. Once the linkage has been assembled, ensure both M10 jam nuts are tight.
-
Page 34: Discharge Chute
1-5/8 TF810 PRO Operator’s Manual 20.32 13/16 3. DISCHARGE CHUTE The discharge chute comes partially assembled. With the components and hardware listed 42.67 42.67 below, assemble the discharge chute to the upper flywheel housing. 1-11/16 1-11/16 20.32 13/16 M8 X 25 mm M8 X 30 mm 20.32... - Page 35 TF810 PRO Operator’s Manual Set the discharge chute into the recess in the top of the nozzle. Secure the chute to the nozzle using the two (2) retainers with six (6) M8 X 35 mm hex bolts, twelve (12) M8 flat washers, and six (6) M8 lock...
-
Page 36: Chainsaw Holder
TF810 PRO Operator’s Manual 4. CHAINSAW HOLDER Mount the chainsaw holder assembly to the side of the chipper base using the hardware and components listed in the table below. M10 X 55 mm M10 Split Lock 20.32 Hex Bolt Washer 13/16 40.64... -
Page 37: Trimming The Pto Shaft
TF810 PRO Operator’s Manual TRIMMING THE PTO SHAFT The wood chipper is shipped with a PTO shaft that can be fitted to most Category 1 tractors. The PTO shaft may need to be trimmed depending on your tractor and configuration. Follow the steps below to ensure the PTO shaft is correctly fitted to your tractor. - Page 38 TF810 PRO Operator’s Manual 3. Verify the distance between the locking pins on the PTO shaft while in the compressed state (Dim B) as shown in the image below. It should measure 29-7/16 in [747 mm]. 4. If Dim A is at least 1 in [25 mm] longer than Dim B, the PTO shaft does not require trimming.
-
Page 39: Operation
TF810 PRO Operator’s Manual OPERATION 1. PRE-START UP CHECKLIST Fill the hydraulic tank with hydraulic oil per the table below: Capacity Model Hydraulic Oil Gallons (gal) Litres (L) WC46 WC68 18.9 ISO 32, ISO 46, AW 32, AW 46 WC88 18.9... -
Page 40: Start Up
TF810 PRO Operator’s Manual 2. START UP The following steps in the sub-section below (a. through i.) are a summarization of the steps necessary to safely and properly operate the wood chipper. Please follow the references to other sections that provide further detail into the step being performed. -
Page 41: Infeed Roller Control
TF810 PRO Operator’s Manual 3. INFEED ROLLER CONTROL The wood chipper infeed roller speed control valve is located to the right of the infeed chute. Rotating the arm as shown in the pictures below will increase or decrease the speed of the infeed roller. -
Page 42: Discharge Chute
TF810 PRO Operator’s Manual 4. DISCHARGE CHUTE To rotate the discharge chute, push down all the way on the spring-loaded locking pin and twist it 90° to temporarily lock it in the open position. The discharge chute is now free to rotate a full 360°. -
Page 43: Chipping
TF810 PRO Operator’s Manual 5. CHIPPING Keep your face and body away from the feed opening. Do not over reach. Keep proper balance and footing at all times. The wood chipper is designed to chip a variety of materials into a more readily decomposing or handled condition. -
Page 44: Maintenance
MAINTENANCE REPLACING BLADES Follow these steps when replacing blades. The TF810 PRO wood chipper uses eight (8) reversible hardened steel blades. Each blade measures 6-1/16 X 2-23/32 X 5/16 in [154 X 69 X 8 mm] in size. 1. If installed, disconnect the PTO shaft from the tractor for safety. - Page 45 TF810 PRO Operator’s Manual 4. Remove the three (3) M10 X 20 mm hex head bolts that fasten the blade to the flywheel using a socket. Take care not to drop the hardware into the lower flywheel housing. However, should this occur, a telescoping pen magnet can be used to retrieve them.
-
Page 46: Blade Sharpening
The wood chipper blades will dull, making chipping difficult and cause your tractor to labour. It is recommended to sharpen the blades every 25-50 hours of operation. The TF810 PRO wood chipper uses eight (8) hardened steel blades. The blades are reversible and can be sharpened on both sides. -
Page 47: Setting The Bed Plate Gap
TF810 PRO Operator’s Manual SETTING THE BED PLATE GAP The bed plate (also known as the anvil plate) is located on the left side of the flywheel housing (when facing the infeed chute). For ideal chipping performance, the gap between the bed plate and the blades should be set to 1/16-1/8”... - Page 48 TF810 PRO Operator’s Manual Blade Flywheel Bed Plate 1/16–1/8” 1.5–3.0 mm 4. Use a socket/wrench to loosen the three (3) M10 X 25 mm hex bolts securing the bed plate to the lower flywheel housing so the bed plate is free to slide in and out. This movement will increase or decrease the gap between the bed plate and the cutting edge of the blade.
-
Page 49: Adjusting Belt Tension
TF810 PRO Operator’s Manual ADJUSTING BELT TENSION HYDRAULIC PUMP BELT The hydraulic pump belt is the belt closest to the tractor. Check the condition and tension of the belt after every 30 hours of operation. It is self-tensioning via an extension spring. The amount of tension can be adjusted by following these steps: 1. -
Page 50: Paddle Flywheel Belt
TF810 PRO Operator’s Manual PADDLE FLYWHEEL BELT The paddle flywheel belt is the belt farthest from the tractor. Check the condition and tension of the belt after every 30 hours of operation. It is self-tensioning via an extension spring. The amount of tension can be adjusted by following these steps: 1. -
Page 51: Replacing Belts
TF810 PRO Operator’s Manual REPLACING BELTS Check the condition and tension of both belts after every 30 hours of operation. If the infeed roller is not rotating—or rotating slowly—the hydraulic pump belt could be slipping. A squealing noise may also be heard. In either case, these conditions can occur due to a worn belt or improper belt tension (see the previous section, Adjusting Belt Tension). - Page 52 TF810 PRO Operator’s Manual 3. Loosen the two (2) jam nuts on both of the belt tensioner eyebolts to completely release the tension on the extension springs. 1. Loosen A nuts first. 2. Loosen B nuts to release belt tension.
- Page 53 TF810 PRO Operator’s Manual 5. Loosen—but do not remove—the two (2) M8 set screws on the bearing collar as shown below. Loosen bearing set screws but do not remove them 6. Remove the four (4) M12 X 45 mm hex bolts and lock nuts used to mount the bearing and slide it off the flywheel shaft as shown below.
- Page 54 TF810 PRO Operator’s Manual 7. Unhook both belts from the lower pulleys and pull them up to the flywheel shaft as shown below-left. Remove the hydraulic pump belt (front) first. Pinch the bottom of the belt inward and squeeze it through the opening between the flywheel shaft and housing as shown below-right.
-
Page 55: Adjusting The Red Control Arm
TF810 PRO Operator’s Manual ADJUSTING THE RED CONTROL ARM If the movement of the red control arm feels too stiff or too loose, or if it falls into neutral or reverse unexpectedly, it can be adjusted via the directional control valve. -
Page 56: Greasing Bearings And Pto Shaft
TF810 PRO Operator’s Manual GREASING BEARINGS AND PTO SHAFT The wood chipper has ten (10) Zerk fitting grease points: two (2) flywheel shaft bearings, two (2) pump shaft bearings, one (1) infeed roller bearing, and five (5) on the PTO shaft. Check each grease point prior to use and add grease as needed. - Page 57 TF810 PRO Operator’s Manual Infeed Roller Bearing PTO Shaft U-Joint 1 PTO Shaft U-Joint 2 (#1: Yoke; #2: Yoke Cross; #3: Cover ) (#1: Yoke Cross; #2: Cover ) 0007030-M-EN: Rev D Page 27-Jun-2023...
-
Page 58: Storage
TF810 PRO Operator’s Manual STORAGE When the wood chipper is not in use, it can be stored to utilize a smaller footprint to save space. Follow these steps to put the wood chipper in its storage state: 1. Disconnect the control bar linkage from the directional control valve and reconnect it to the tab on the underside of the infeed chute bottom panel. -
Page 59: Troubleshooting
Excessive noise 1. Bearings not sufficiently 1. Grease bearings. Refer to page 54. coming from lubricated. 2. Replace bearings. Please contact Woodland Mills for flywheel bearings 2. Bearings are worn. bearing replacement instructions. Red control arm 1. Directional control valve not 1. -
Page 60: Replacement Parts Ordering
Record the part number (e.g. 0001071, HHB-MBM080FCJ, etc.) in the “Part No.” column. Contact Woodland Mills through the website or via phone/email. If possible, include the invoice or sales number from the purchased product so an associated account can be located. If the account has multiple addresses on file, please indicate to which address the replacement... -
Page 61: Exploded Assembly Views
TF810 PRO Operator’s Manual EXPLODED ASSEMBLY VIEWS COMPLETE ASSEMBLY 167 4X 185 4X 140 4X 167 4X 0007030-M-EN: Rev D Page 27-Jun-2023... -
Page 62: Base
TF810 PRO Operator’s Manual BASE 153 4X 174 4X 0007030-M-EN: Rev D Page 27-Jun-2023... -
Page 63: Lower Flywheel Housing [Front]
TF810 PRO Operator’s Manual LOWER FLYWHEEL HOUSING [FRONT] 0007030-M-EN: Rev D Page 27-Jun-2023... -
Page 64: Lower Flywheel Housing [Rear]
TF810 PRO Operator’s Manual LOWER FLYWHEEL HOUSING [REAR] 0007030-M-EN: Rev D Page 27-Jun-2023... -
Page 65: Flywheels
TF810 PRO Operator’s Manual FLYWHEELS 0007030-M-EN: Rev D Page 27-Jun-2023... -
Page 66: Infeed Chute
TF810 PRO Operator’s Manual INFEED CHUTE 0007030-M-EN: Rev D Page 27-Jun-2023... -
Page 67: Discharge Chute
TF810 PRO Operator’s Manual DISCHARGE CHUTE 162 6X 181 6X 142 4X 0007030-M-EN: Rev D Page 27-Jun-2023... -
Page 68: Hydraulic Hoses
TF810 PRO Operator’s Manual HYDRAULIC HOSES 0007030-M-EN: Rev D Page 27-Jun-2023... -
Page 69: Control Valves
TF810 PRO Operator’s Manual CONTROL VALVES 0007030-M-EN: Rev D Page 27-Jun-2023... -
Page 70: Pto Shaft
TF810 PRO Operator’s Manual PTO SHAFT 0007030-M-EN: Rev D Page 27-Jun-2023... -
Page 71: Parts List
TF810 PRO Operator’s Manual PARTS LIST Item Part No. Description 0007085 BASE 0001168 HYDRAULIC TANK, 20 L [5.3 gal] 0001164 HYDRAULIC TANK INTAKE LINE 0001752 HYDRAULIC INTAKE FILTER, 1/2 NPT 0004841 O-RING, 50 mm ID / 57 mm OD, 3.5 mm THK... - Page 72 TF810 PRO Operator’s Manual Item Part No. Description 0004382 FLYWHEEL 0003484 FLYWHEEL BLADE, 154 X 69 X 8 mm, TAPPED 0001734 SPACER, 40.6 ID X 46 OD X 1.5 mm LG 0003407 PADDLE FLYWHEEL 0002705 SPACER, 40.6 ID X 46 OD X 26.7 mm LG 0002193 V-BELT PULLEY, 40 mm SHAFT, 150 mm DIA, 60 DIA X 45.5 mm LG COLLAR...
- Page 73 HYDRAULIC HOSE ASSEMBLY, STR AND ELB FITTINGS, 800 mm LG 0003302 HYDRAULIC HOSE ASSEMBLY, STR AND ELB FITTINGS, 1850 mm LG 0008935 LABEL, TF810 PRO TWIN FLYWHEEL TECHNOLOGY 0008936 LABEL, TF810 PRO W/ WOODLAND MILLS LOGO 0008937 LABEL, PRO SERIES 0008938 LABEL, TWIN FLYWHEEL TECHNOLOGY 0008939...
- Page 74 TF810 PRO Operator’s Manual Item Part No. Description HHB-MBJ075FCJ HEX HEAD BOLT, CLS 8.8, M8 X 1.25, 20 mm LG, FULL HHB-MBJ080FCJ HEX HEAD BOLT, CLS 8.8, M8 X 1.25, 25 mm LG, FULL HHB-MBJ090FCJ HEX HEAD BOLT, CLS 8.8, M8 X 1.25, 35 mm LG, FULL HHB-MBJ095FCJ HEX HEAD BOLT, CLS 8.8, M8 X 1.25, 40 mm LG, FULL...
- Page 75 TF810 PRO Operator’s Manual Item Part No. Description FDW-MBM075000AJ FENDER WASHER, M10, 26 mm OD FDW-MBM079000AJ FENDER WASHER, M10, 30 mm OD FDW-MBR080000AJ FENDER WASHER, M12, 31 mm OD SLW-MBAAJ SPLIT LOCK WASHER, M5 SLW-MBEAJ SPLIT LOCK WASHER, M6 SLW-MBJAJ...
-
Page 76: Notes
TF810 PRO Operator’s Manual NOTES 0007030-M-EN: Rev D Page 27-Jun-2023... - Page 77 TF810 PRO Operator’s Manual 0007030-M-EN: Rev D Page 27-Jun-2023...
- Page 78 TF810 PRO Operator’s Manual 0007030-M-EN: Rev D Page 27-Jun-2023...
- Page 79 This page intentionally left blank.
Need help?
Do you have a question about the TF810 PRO and is the answer not in the manual?
Questions and answers