Eachine DVR03 - 4in1 FPV Camera Quadcopter Manual
Also See for DVR03:
- Product instruction manual (2 pages)
Advertisement
Table of Contents
Contents
Eachine DVR03 - 4in1 FPV Camera Quadcopter Manual
![]()
Overview

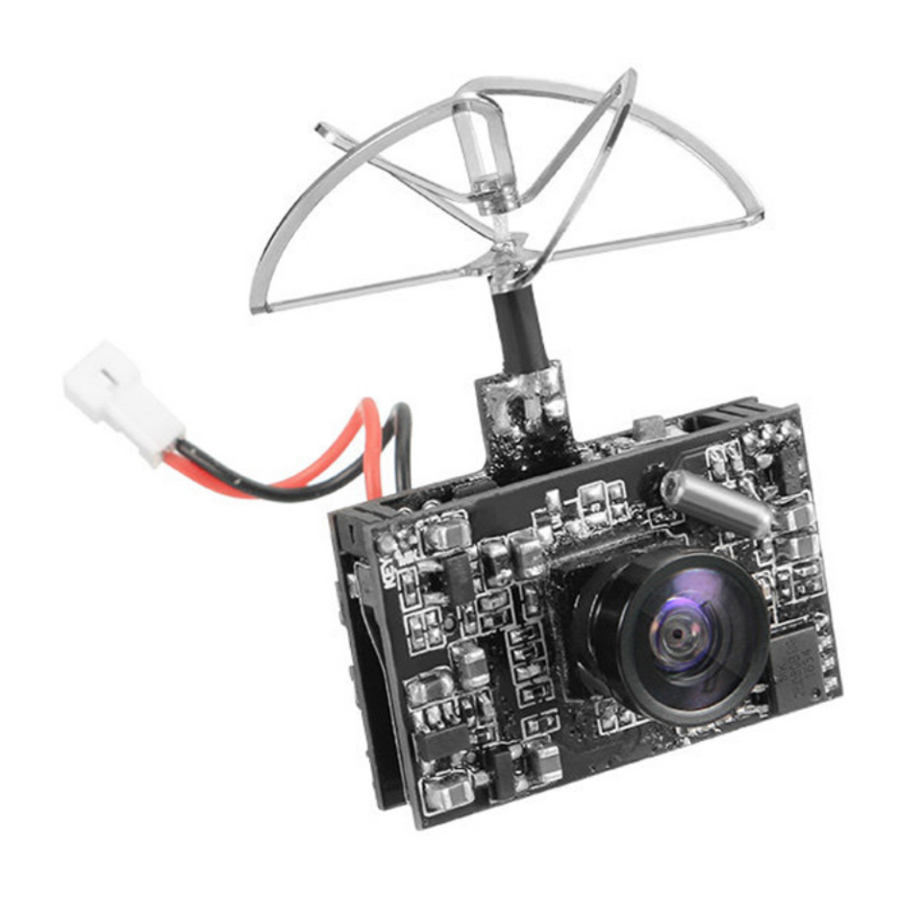
5.8GHz 72CH FPV Transmitter+520TVL FPV Camera + Four leaf antenna + DVR
Specification and Parameters
- Output power: 0/25mW/50mW/200mW adjustable (Set output power on 0, to avoid frequency interference)
- Input power: 3.2—5.5V
- Current consumption:
640mA-330mA(25mW)
730mA-41 OmA(50mW)
860mA-553mA(200mW) - Camera resolution: 520TVL
- Video system: NTSC/PAL
- Mini illumination: 1 lux
- Field of view: 120°FOV
![]()
- Sensor: 1/4" Color CMOS
- Video Format: AVI
- Recording Resolution: 1280 x 720P @ 30fps
- Photo Format: JPG
- AV Output: 640 x 480
- Micro SD Card: Max 32GB(
![warning]() CLASS10)
CLASS10) - Operating Temp: -10 60 degrees C
![]()
- Antenna dimensions: 22mm X 29mm diameter
- Antenna: 4 lobe right hand circular polarized
- Frequency: 5.8GHz 9 bands 72 channels, with Raceband: 5325-5945 MHZ
- Size: 30.3*18.04mm(L*W)
- Weight: 6.8g
 CLASS10)
Operation Instruction
The menu Settings
- When recording videos, press CS2 key to end video recording, long press CS2 to enter the Settings menu.
Long press CS2 again to exit menu and return to the main page. - When out of video recording, short press + long press CS2 keys to enter the menu function, press CSI and CS3 to choose up and down. Long press CS2 to exit menu and return to the main page.
Video recording
- Insert SD card, the recording function automatically activated, short press the CS2 key to end video recording, short press the CS2 key again for the next round of video recording.
Video playback
Long press CSI to enter the video play page, press CSI and CS3 to choose up and down, press CS2 button to play and pause, long press CSI to exit play video and return to the main page
Adjust CH FR and the power operation
- Powering on the vtx, blue LED display 0, indicating the vtx is powered on, but it is in off status without any transmission.
- Short-press the button to change channel (CH), digital display will change synchronously. Digital display changes cyclically from 1 to 8.
- Long-press the button for 2 seconds until digital display flicker. Then short-press the button to change the frequency band (FR), digital display will change synchronously. Digital display changes cyclically from A, b. E, F, r, U. o, L, H.
- Long-press the button for 5 second until digital display flicker. Then short-press the button to change the power, 25mW/50mW/200mW (one hyphen stands for 25mW, two hyphens stand for 50mW, and three hyphens stand for 200mW),
- 5 seconds after setting, CH, FR and power will flicker alternately.
Notice: The vtx has memory for settings. To change the settings, please repeat steps as above![]()
Frequency and channel frequency table
| Band | CHI | CH2 | CH3 | CHA | CH5 | CH6 | CH7 | CH8 |
| Band-A | 5865 | 5845 | 5825 | 5805 | 5785 | 5765 | 5745 | 5725 |
| Band-b | 5733 | 5752 | 5771 | 5790 | 5809 | 5828 | 5847 | 5866 |
| Band-E | 5705 | 5685 | 5665 | 5645 | 5885 | 5905 | 5925 | 5945 |
| Band-F | 5740 | 5760 | 5780 | 5800 | 5820 | 5840 | 5860 | 5880 |
| Band•r | 5658 | 5695 | 5732 | 5769 | 5806 | 5843 | 5880 | 5917 |
| Band-U | 5325 | 5348 | 5356 | 5384 | 5402 | 5420 | 5438 | 5456 |
| Band-o | 5474 | 5492 | 5510 | 5528 | 5546 | 5564 | 5582 | 5600 |
| Band-L | 5333 | 5373 | 5413 | 5453 | 5493 | 5533 | 5573 | 5613 |
| Band-H | 5653 | 5693 | 5733 | 5773 | 5813 | 5853 | 5893 | 5933 |

Documents / Resources
References

Download manual
Here you can download full pdf version of manual, it may contain additional safety instructions, warranty information, FCC rules, etc.
Advertisement

Need help?
Do you have a question about the DVR03 and is the answer not in the manual?
Questions and answers