Advertisement
PARTS LIST
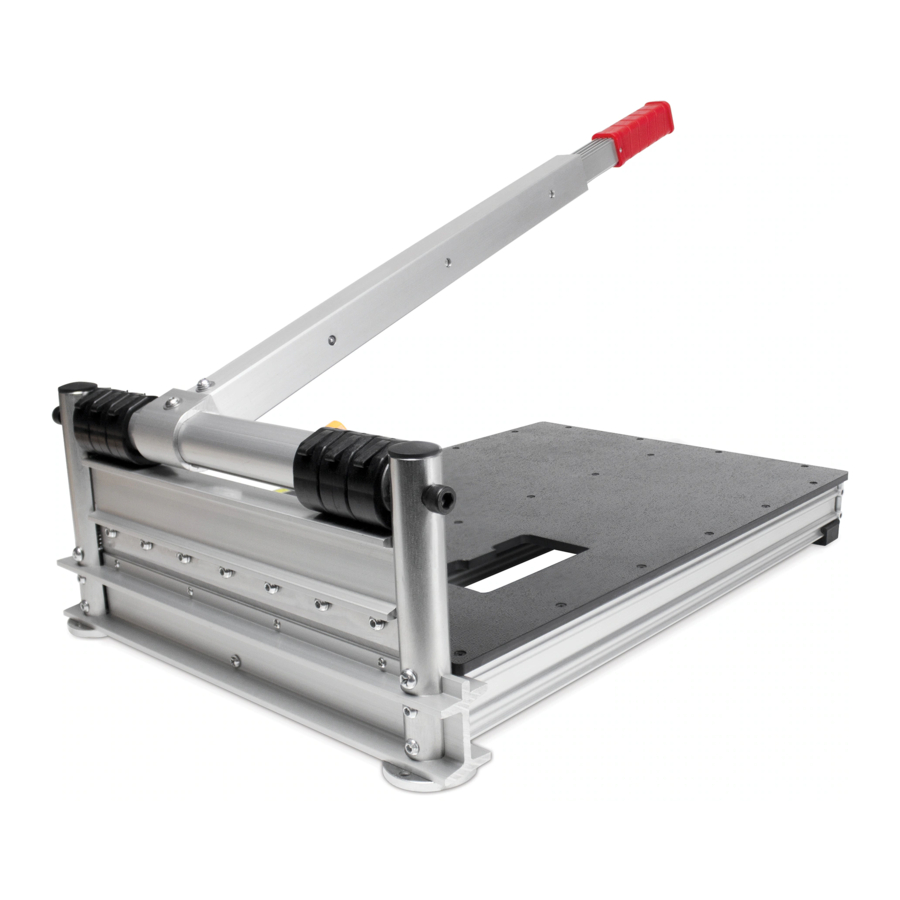
1 Table Base
1 Cutter Assembly
1 Handle
1 Angle Guide Attachment
1 Hardware Bag (2 Allen Wrenches and 4 Screws)

VERY SHARP BLADE
FAILURE TO FOLLOW THESE RULES MAY RESULT IN SERIOUS INJURY! USING THIS MACHINE WITH RESPECT AND CAUTION WILL CONSIDERABLY LESSEN THE POSSIBILITY OF PERSONAL INJURY.
SAFETY RULES FOR THE MULTI-FLOOR CUTTER
- READ AND UNDERSTAND THIS INSTRUCTION MANUAL BEFORE OPERATING THE MULTI-FLOOR CUTTER.
- If you are not thoroughly familiar with the operation of the Multi-Floor Cutter, obtain advice from a qualified instructor or call 866-435-8665
- Stay alert. Do not operate while under the influence of drugs, alcohol, or medication.
- Always wear safety approved eye protection with side shields (ANSI Z87.1)
- Keep work area and free of debris.
- Keep children and unauthorized persons away from the Multi-Floor Cutter and work area.
- Make sure tool is secure. Operate only on a firm substrate or solid stand.
- Use the right tool. Do not force the Multi-Floor Cutter or use it for a job for which it was not designed; use only on approved materials.
- Keep blade sharp. A dull blade will not perform properly.
- Always keep hands away from blade while operating or carrying.
- Do not alter or misuse this tool. The Multi-Floor Cutter is precision built; modifications not specified in this manual may result in a dangerous condition.
- Maintain the Multi-Floor Cutter with care. Keep blade sharp and clean. Follow instructions for lubricating and changing accessories.
- Use only recommended accessories. The use of improper accessories may cause hazards or injury.
- Never leave the Multi-Floor Cutter unattended. Secure the handle with the lock chain when not in use.
Drilling, sawing, sanding or machining wood products can expose you to wood dust, a substance known to the State of California to cause cancer. Avoid inhaling wood dust or use a dust mask or other safeguards for personal protection. For more information go to www.P65Warnings.ca.gov/wood-dust.
MAINTENANCE
CHANGING THE BLADE
- Use the Allen wrench to remove the 7 screws on back of Cutter Assembly base.
- Hold the blade at each end and carefully remove from the Holder. Do not put your fingers against the sharp edge of the blade at any time.
- Place a new blade in the holder with the flat side of the blade facing the table.
![]()

TRANSPORT
- Slide the Locking Pin left to lock blade and tighten. (Loosen and slide right to unlock)
- Use the hand hold opening in the table for easy transport.
![]()

ASSEMBLY INSTRUCTIONS

Tools needed for assembly (not included): Phillips screwdriver
Step 1: Remove the 6 screws located at the end of the Table Base frame
- 4 outer screws with small Allen wrench
- 2 center screws with Philips screwdriver
Step 2: Attach the Cutter Assembly to the Table Base
- Place the Table Base on its side.
- Align the Cutter Assembly to the Table Base with the screws of the blade facing away from the Table Base.
- Secure the Cutter Assembly to the Table Base with the 6 screws removed in Step 1.
Step 3: Use the 4 Hardware Screws to secure the plastic table to the Cutter Assembly.
Step 4: Attach the Handle to the Cutter Assembly
- Remove screw from the handle extension of the Cutter Assembly with Allen wrench.
- Place the handle over the handle extension.
- Tighten screw with Allen wrench.
Step 5: Attach the Angle Guide Attachment
- Remove the thumb screw from right side of the Table Base.
- Fit the Angle Guide Bar to the corner post.
- Screw the thumb screw back in place.
CUTTING
Maintain control of the handle. Do not allow handle to slam back after making a cut. Do not put your fingers against the sharp edge of the blade at any time.
CUTTING PREPARATION
- Press button at the end of the handle to extend handle to desired length.
- Adjust the Angle Guide Attachment to desired angle as needed.
STRAIGHT CUTTING
- Insert flooring between the cutting blade and the base.
- Align to the Angle Guide Attachment and hold the material. Do not put your fingers near the blade at any time.
- Push the handle down to complete the cut.


ANGLE CUTTING
- Adjust the angle attachment to desired angle.
- Insert material between the cutting blade and the base, against the Angle Guide Attachment. Do not put your fingers near the blade at any time.
- Push the handle down to complete the cut.


Documents / Resources
References

Download manual
Here you can download full pdf version of manual, it may contain additional safety instructions, warranty information, FCC rules, etc.
Advertisement


Need help?
Do you have a question about the 10-65 and is the answer not in the manual?
Questions and answers