
Related Manuals for Hisense 32A4EGTUK


Summary of Contents for Hisense 32A4EGTUK
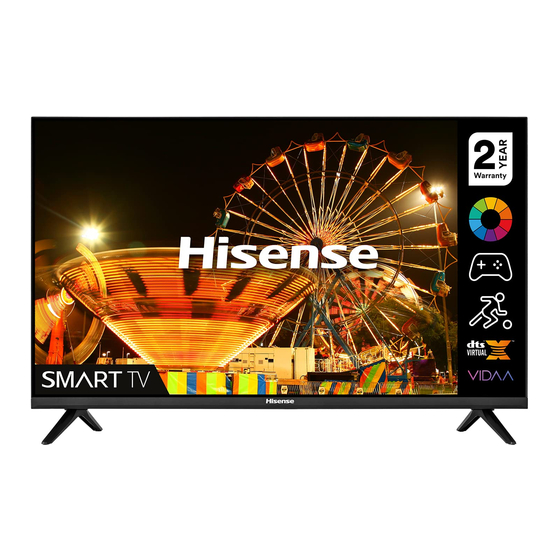
- Page 1 User Manual of Product 1: Hisense 32A4EGTUK (32 Inch) HD Smart TV, with Natural Colour Enhancer, DTS Virtual X, VIDAA U5 OS, Youtube, Netflix, Disney +, Freeview Play and WiFi (2022 NEW)
- Page 2 Read the manual carefully and ensure you have fully understood its contents before operating this device for the first time. English Deutsch Español Italiano Português Français Nederlands ES-A21240I-1 B...
- Page 3 Read the manual carefully and ensure you have fully understood its contents before operating this device for the first time. English...
- Page 4 Important Safety Instructions ▐ Important Notice Paragraphs beginning with the symbol indicate important instructions, tips or conditions for the following settings. For your own safety and the optimal performance of your TV, ensure to read the safety instructions before performing any installation. Compatibility with 3rd party products, software and services are not guaranteed.
- Page 5 Important Safety Instructions The intended use and ambient conditions for this TV This TV is intended for the rendering of video and audio signals, on a table-top or wall- mounted, in a home or office environment. It must not be used in rooms with a high level of humidity or dust concentration.
- Page 6 Important Safety Instructions „ Moving/Transportation „ Power plug and power cable Before moving this TV, disconnect all - Do not touch the power plug with wet cables and move in the vertical position hands. only. Grasp the device on the upper and - Do not place heavy objects on the lower edges of the frame.
- Page 7 Important Safety Instructions „ Air ventilation and high Prevent small items from getting into the interior of the device through the ventilation temperatures slots. Such objects may cause short circuits, Install your TV only where there is proper which may cause fire. ventilation, and ensure that there is at least If something should get inside the unit, 10 cm free space on the sides and 20 cm...
- Page 8 Important Safety Instructions If you have a cardiac pacemaker, keep a „ Supervision distance of at least 22 cm from the TV. Radio - Do not let children play unsupervised waves may interfere with the operation of a close to the TV. It could tip over, be pacemaker.
- Page 9 Important Safety Instructions „ Cleaning and care swallowed. If swallowed by mistake, force the patient to vomit and visit the nearest hospital. CAUTION: Unplug the power cord prior to cleaning „ Modification the TV. Clean the TV, the screen, and the remote Do not attempt to modify this product control with a soft, moist, clean and in any way.
-
Page 10: Table Of Contents
[32A4BG / 32A4CG / 32A4DG / 32A4DGCH / 32A4EG / 32A4FG / 32A4GG / 32A4HG / 32A4EGCH / 32A4BGTUK / 32A4CGTUK / 32A4EGTUK / 32A4FGTUK / 40A4BG / 40A4CG / 40A4DG / 40A4DGCH / 40A4EG / 40A4FG / 40A4GG / 40A4HG / 40A4EGCH / 40A4BGTUK / 40A4CGTUK / 40A4EGTUK / 40A4FGTUK] is in compliance with Directive 2014/53/EU. -
Page 11: Installing The Stand Or Wall Mount Bracket
Installing the Stand or Wall mount bracket CAUTION Be sure to disconnect the AC power cord before installing a stand or wall mount brackets. The display on your TV is fragile. Make sure the TV screen is not scratched or damaged by hard objects or from pressure. - Page 12 Installing the Stand or Wall mount bracket Installing the wall mount bracket Before mounting the TV, remove the TV stand if you have already attached it, and make sure the wall mount bracket supports the weight of your TV. CAUTION When mounting the TV on a wall, follow instructions provided with the wall mount bracket.
-
Page 13: Tv Front
TV Front TV Front Standby / Source Remote sensor / Power indicator Item Description Receive remote signals from the remote control. Remote sensor Do not put anything near the sensor, as its function may be affected. Power indicator The light is red in standby mode. When the TV is in standby mode, press the button to turn the TV on. -
Page 14: Tv Rear
TV Rear TV Rear 32" Power cord 40" Power cord NOTES ANT2 Jack supports power supply for satellite antenna (13/18V, 420mA max.) Check the jacks for position and type before making any connections. Loose connections can result in image or colour problems. -
Page 15: Making Connections
Making Connections Wired setup LAN ( Connect your TV to your network by connecting the LAN port on the back of your TV to an external modem or router using a LAN (Ethernet/Cat 5) cable. See the illustration below. · It is recommended to use a modem or router that supports Dynamic Host Configuration Protocol (DHCP). - Page 16 Making Connections Outdoor Antenna Cable ANT OUT ANT 1 DVB-T/T2/C Antenna Cable (75Ω) (not included) VHF/UHF Antenna ANT 2 DVB-S/S2 (not included) 13/18V 420mA Satellite antenna Audio Amplifier/Speaker DIGITAL DIGITAL AUDIO OUT AUDIO OUT DIGITAL AUDIO cable (not included) Audio Amplifier/Speaker HDMI (ARC) HDMI...
- Page 17 Making Connections CAM CARD SMART CARD NOTES Before you insert/remove the CI+ module, ensure that the TV is switched off. Then insert the CI card into the CI+ module in accordance with the Service Provider's instructions. COMMON Do not repeatedly insert or remove the Common Access INTERFACE Module as this may damage the interface and cause a malfunction.
-
Page 18: Remote Control
Remote Control POWER: Switch the TV on or into standby mode INPUT: Select input sources Number button: Direct channel selection or numbers input GUIDE: Display the Electronic Programme Guide (DTV mode) CH.LIST: Display the Channel List on the screen Special function buttons Display the Quick setup menu Media content control function buttons / <... - Page 19 Remote Control POWER: Switch the TV on or into standby mode INPUT: Select input sources Number button: Direct channel selection or numbers input GUIDE: Display the Electronic Programme Guide (DTV mode) CH.LIST: Display the Channel List on the screen Special function buttons Display the Quick setup menu Media content control function buttons / <...
- Page 20 Remote Control Installing Batteries in the Remote Control 1. Slide the back cover to open the battery compartment of the remote control. 2. Insert two AAA size batteries. Make sure to match the (+) and ( - ) ends of the batteries with the (+) and ( - ) ends indicated in the battery compartment.
-
Page 21: Turning The Tv On For The First Time
Turning the TV on for the First Time Turning the TV on for the First Time 1. Connect the mains cable to the mains socket after you have completed all the connections. 2. The first time you turn the TV on, it will go straight into the Installation Guide. 3. -
Page 22: Specifications
Specifications Features, appearance and specifications are subject to change without notice. Item 32" 40” 28.2 × 16.9 × 3.4 inches 35.2 × 20.2 × 3.4 inches Without Stand (717× 428 × 86 mm) (893 × 513 × 86 mm) Dimension (W ×... -
Page 23: Other Information
Other Information Recycling/Licenses WEEE (Waste Electronic Electric Equipment) European Directive 2012/19/EU This symbol on the product or on its packaging indicates that this product must not be disposed of with your household waste. Instead, it is your responsibility to dispose of your waste equipment by handing it over to a designated collection point for the recycling of waste electrical and electronic equipment. - Page 24 [32A4BG / 32A4CG / 32A4DG / 32A4DGCH / 32A4EG / 32A4FG / 32A4GG / 32A4HG / 32A4EGCH / 32A4BGTUK / 32A4CGTUK / 32A4EGTUK / 32A4FGTUK / 40A4BG / 40A4CG / 40A4DG / 40A4DGCH / 40A4EG / 40A4FG / 40A4GG / 40A4HG / 40A4EGCH / 40A4BGTUK / 40A4CGTUK / 40A4EGTUK / 40A4FGTUK] is in compliance with Radio Equipment Regulations 2017.
Need help?
Do you have a question about the 32A4EGTUK and is the answer not in the manual?
Questions and answers