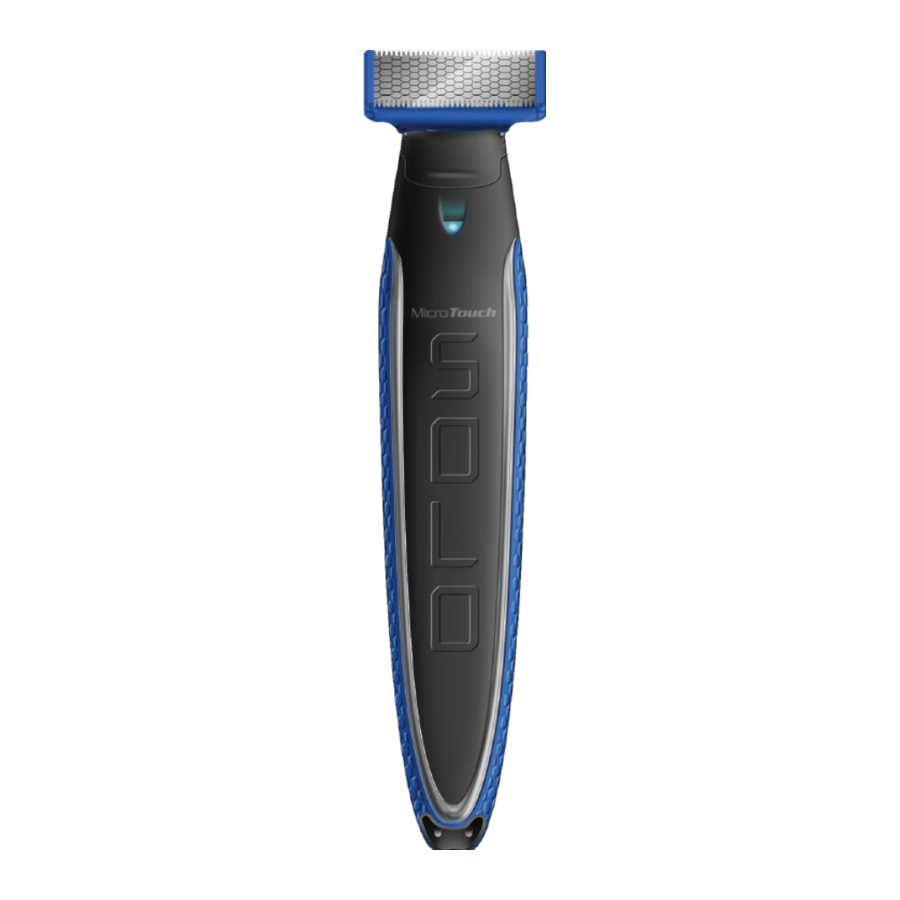
MicroTouch Solo - Trimmer Quick Start Guide
- Quick start manual (2 pages) ,
- Instructions for use manual (12 pages)
Advertisement
Features


DO NOT RINSE BLADE.
CAN CAUSE DAMAGE. USE CLEANING BRUSH.
Getting Started
NOTE: Prior to first use, test the blade on a small area on your arm or leg. If sensitivity or allergic reactions occur, discontinue use immediately.
NOTE: As with all trimmers/shavers, use caution around sensitive areas, such as ears, to prevent nicks or cuts.
CHARGING / RECHARGING
- Make sure the unit is fully charged before use.
- Plug the small end of the Charging Cable into the MicroTouch Solo and large plug into a USB Port. (Image 1) Initial charging or recharging requires approximately 4 hours.

- The Power Indicator LED will turn RED when charging. (Image 2) The light will turn off when fully charged.


NOTE: Do NOT operate unit while plugged in.
- The MicroTouch Solo has a cordless operating time of up to 45 minutes when fully charged.
NOTE: If unit begins to slow down, charge the battery.
How to Use
The MicroTouch Solo is perfect for facial hair including beards, goatees, mustaches, and sideburns. It is not intended for use on the scalp or genital areas.
- The MicroTouch Solo is designed for DRY USE ONLY. Do not use in shower or run blades under water.
- If blade cover is on, slide cover off prior to use (Image 3). Use power button to turn MicroTouch Solo ON and OFF (Image 4).


NOTE: When the power is ON the Power Indicator LED light will turn blue. It is recommended to keep the blade cover on when not in use.
GROOM
Great for grooming body and facial hair.
- Control exact shape and length with the 5mm, 3mm, or 1mm snap on guide (see below under "Trim").
- Shave up or down with the dual-sided German stainless steel blade to remove unwanted hair in seconds.
- Pivoting head contours prefectly to the body.
- LED lights hard to see areas.
TRIM
Choose a 5mm, 3mm, or 1mm guide to trim your beard to the exact length you want or keep stubble exactly as you want it (Image 5).

- Make sure unit is off. Select one of the guides provided and place it on the blade, ensuring both sides snap into place (Image 6). Teeth can face both directions, depending on area being shaved and most comfortable way to hold the unit.

- Do not move the unit too quickly. A smooth, gentle motion is best.
- Always trim in the direction of the teeth of the guide, making certain that the flat part of the guide is in full contact with the skin.
- For optimal results, try various trimming positions (upwards, downwards, or across) and move the shaving head against the grain.
- For best results, use when the skin and hair are fully dry.

NOTE: See back cover for Trimming Guide Removal Instructions.
SHAPE
The lighted pivoting head contours to your face and is designed to give you complete control when shaping your beard (Image 7).

- DO NOT USE water and/or shaving cream. This can cause the blade to stop working.
- Press lightly while making long strokes. Your skin may take a while to adjust to the blade.
NOTE: It is normal for shaving head to become warm during use.
EDGE
Select the guide you prefer to give sideburns, mustaches, beards, and goatees that barbershop perfect look. For more precise trimming, use the unit without the guide. • Use either edge of the blade for sharp lines.
- Hold the MicroTouch Solo unit with the blade to the skin, with only one edge actually touching the skin (Image 8).

- Be sure to use smooth and gentle strokes.

Care and Maintenance
CLEANING
The MicroTouch Solo blade is fragile – please handle with care.
- If hairs have accumulated on the guide or blade, simply blow them off, or gently sweep with included brush.
- Do not rinse blade. Can cause damage.
TO REMOVE TRIMMING GUIDE

Place thumb on top of Trimming Guide (Image 8) and push down to flip guide off Blade Head (Image 9). Lift Trimming Guide off head (Image 10).
BLADE REPLACEMENT
For optimal results, replace the blade every 3-4 months, or when it no longer provides the desired results. Go to www.SoloReplacementHeads.com for special replacement head offer.
- Remove any attachments.
- With cover on, gently push the blade release up and hold the blade to prevent falling (Image 11).
![]()
- Hold the new blade by its sides and press onto handle. There will be a "click" when the blade is secure.
- Remove cover prior to use.

NOTE: Be sure the stem found under the blade head is centered prior to securing blade to unit. After replacement, if blade does not move once turned on, remove the head, turn unit on briefly and reinstall head.
 | |
|
|
Documents / Resources
References
Download manual
Here you can download full pdf version of manual, it may contain additional safety instructions, warranty information, FCC rules, etc.
Advertisement


Need help?
Do you have a question about the Solo and is the answer not in the manual?
Questions and answers