Table of Contents
Advertisement
Advertisement
Table of Contents

Related Manuals for Samsung MM-L2


Summary of Contents for Samsung MM-L2
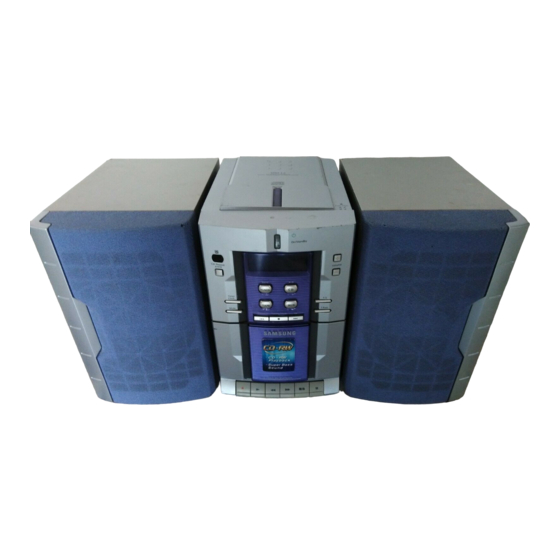
- Page 1 MICRO COMPONENT SYSTEM CD-R/RW PLAYBACK MM-L2 Instruction Manual...
-
Page 2: Wiring The Mains Power Supply Plug (Uk Only)
Safety Warnings CLASS 1 LASER PRODUCT KLASSE 1 LASER PRODUKT LUOKAN 1 LASER LAITE KLASS 1 LASER APPARAT PRODUCTO LASER CLASE 1 CAUTION RISK OF ELECTRIC SHOCK. DO NOT OPEN CAUTION: TO REDUCE THE RISK OF ELECTRIC SHOCK, DO NOT REMOVE REAR COVER, NO USER SERVICEABLE PARTS INSIDE, REFER SER- VICING TO QUALIFIED SERVICE PERSONNEL. -
Page 3: Table Of Contents
Contents NSTALLING ICRO Safety Warnings ... 2 Front Panel View ... 4 Rear Panel View ... 4 Remote Control ... 5 Connecting the Loudspeakers ... 6 Inserting the Batteries in the Remote Control ... 6 Connecting Your System to the Power Supply ... 6 Connecting the AM(MW)/LW Aerial ... -
Page 4: Front Panel View
Front Panel View On/Standby button CD Repeat (A B) button TUNER/Band TAPE button Timer/Clock button Mute button Skip Down/Up buttons Fast-Rewind button Playbak button Record button Rear Panel View Push Open On/Standby CD Rep eat Vol um e Band TUNER Timer TAPE Clock... -
Page 5: Remote Control
Remote Control On/Standby button Super Bass button Equalizer Mode selection button Sleep button Program/Set button CD Repeat button CD Repeat A B button Stop button CD Track or radio station search button On/Standby Timer Timer Clock on/off EQ Preset S.Bass Mute Function Program... -
Page 6: Connecting The Loudspeakers
Connecting the Loudspeakers The loudspeaker connector terminals are located on the rear of both the system and the loudspeakers (red and black tabs in both cases). There are four terminals: Two for the left speaker (marked L on the system) Two for the right speaker (marked R on the system) To achieve the correct sound quality, connect the: Red cable to the + terminal... -
Page 7: Connecting The Am(Mw)/Lw Aerial
Connecting the AM(MW)/LW Aerial The AM(MW)/LW aerial (for long and middle waves) can be: Placed on a stable surface Fixed to the wall (you must first remove the base) The AM aerial connector terminals are located on the rear of the system and are marked AM ANT. -
Page 8: Setting The Clock
Setting the Clock Your system is equipped with a clock which allows you to turn your system on and off automatically. You should set the clock: When you purchase the Micro component system After a power failure After unplugging the unit For each step, you have a few seconds to set the required options. -
Page 9: Precautions When Using Compact Discs
Precautions When Using Compact Discs To guarantee hours of enjoyable listening with your compact discs: Always hold them by the edges to avoid leaving fingerprints on the shiny surface Always replace them in their cases after listening to them Do not fix paper or adhesive tape to the discs and do not write on the label Clean the player with a special cleaning disc Shuffle Play Function... -
Page 10: Programming The Order Of Playback
Programming the Order of Playback You can decide for yourself: The order in which you listen to the tracks The tracks to which you do not wish to listen This feature can be combined with the Repeat function. If necessary, stop the player by pressing STOP ( ). Press Program/Set. -
Page 11: Selecting A Stored Radio Station
Selecting a Stored Radio Station You can listen to a stored radio station as follows: Switch the system on by pressing On/Standby. Press TUNER to select the radio function. Select the required frequency band by pressing Band. Select the radio station as follows. To listen to... -
Page 12: Recording A Radio Programme
Recording a Radio Programme You can record a radio programme of your choice and listen to it at a later date. Insert a blank cassette in the cassette deck. Press TUNER to select the radio function. Select the radio station that you wish to record. To start recording, press the RECORD ( Result: Recording starts immediately. -
Page 13: Timer Function
Timer Function The timer enables you to switch the system on or off at specific times. Example: You wish to wake up to music every morning. If you no longer want the system to be switched on or off automatically, you must cancel the timer. Before setting the timer, check that the current time is correct. -
Page 14: Sleep Timer
Sleep Timer You can set the system to switch off automatically. Example: You wish to fall a sleep to music. Press Sleep. Result: The following indications are displayed: Press Sleep one or more times to indicate how long the system should continue playing before it switches off: 90 MIN 60 MIN 15 MIN... -
Page 15: Microphone Function (Option)
Microphone Function (option) The microphone enables the user to mix in his or her vocals to sing-along with the music. Preparation Plug the microphone with a 3.5mm mic jack into microphone terminal. Connecting Headphones You can connect a set of headphones to your micro component system so that you can listen to music or radio programmes without disturbing other people in the room. -
Page 16: Technical Specifications
Technical Specifications SAMSUNG strives to improve its products at all times. Both the design specifications and these user instructions are thus subject to change without notice. TUNER Signal/noise ratio Usable sensitivity Total harmonic distortion AM (MW) Signal/noise ratio Usable sensitivity... - Page 17 MEMO...
- Page 18 THIS APPLIANCE IS MANUFACTURED BY: ELECTRONICS AH68-00954B...
Need help?
Do you have a question about the MM-L2 and is the answer not in the manual?
Questions and answers