Light & Motion SOLA - Underwater Lighting Manual
- Owner's manual (2 pages) ,
- Owner's manual (2 pages)
Advertisement
OPERATION

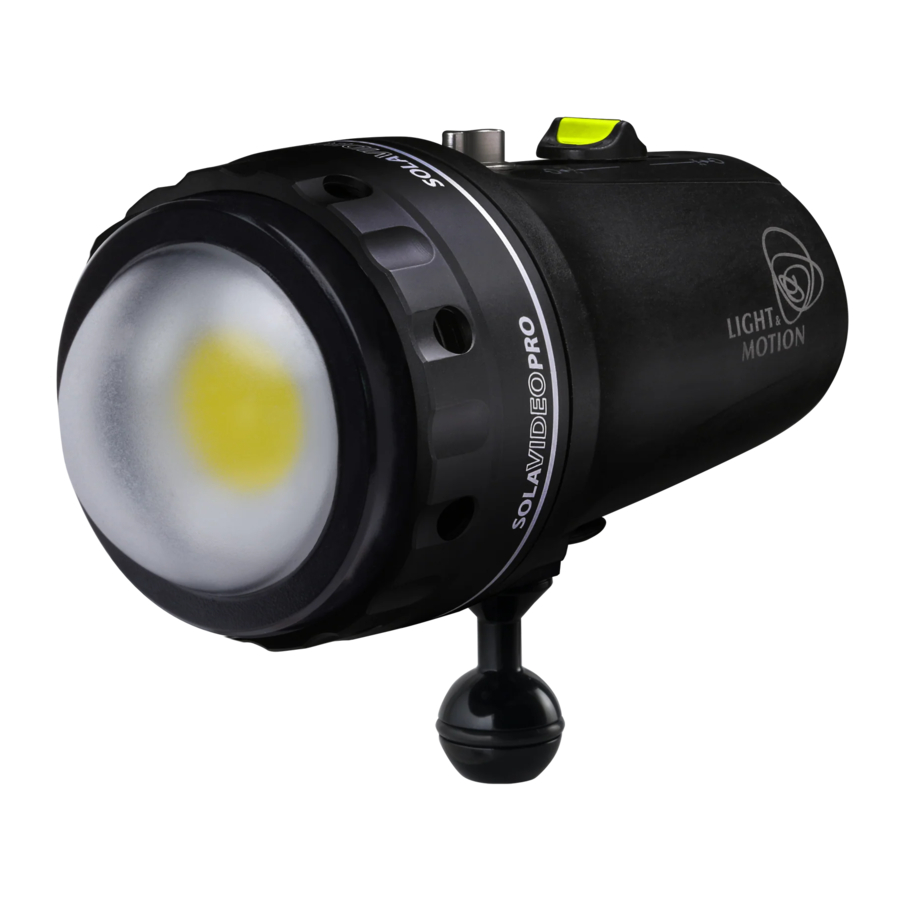
- Power ON/ 0FF Knob
- Toggle Slide Switch
- Switch Forward Increase output
- Switch Back Decrease output
- Off: Hold either direction 2 seconds.
- SOS Mode:
With light off, hold switch in "back (4)" position for 4 seconds to engage SOS mode. To exit SOS mode, hold switch in either direction for 2 seconds to turn off, or press the switch forward and release it to turn light on in normal mode.
OLED DISPLAY
![]() Overheating Icon
Overheating Icon
Wait to charge until symbol disappears
![]() Thermal Sensor is not Detect
Thermal Sensor is not Detect
Return unit to Light and Motion for servicing.
![]() LED is not detected
LED is not detected

DOME PORT ASSEMBLY DIRECTIONS

- Visually locate the locking detent on LED Head Module. (Detail A)
- Angle the Dome Port to slide the Dome Port Arm underneath the locking detent. (Detail A)
- Turn the Dome Port clock-wise into the locked location before using your light. (Detail B)
CONNECTING THE LED HEAD MODULE
Disconnecting the LED Head Module from the Body Module:
Unscrew the bezel from the body module and remove the LED head module. Install connector cap on the LED head module to protect the o-ring from debris. Install connector cap to body connector to prevent damage to electrical contacts. Thread bezel back onto the body assembly. The LED head module and Body assemblies can be packed separately for travel. To re-install the LED head module, do the above procedure in reverse order.
The Dome Port sealing edge must be kept clean and protected from any damage. Make sure O-ring is lubricated – re-grease with standard silicone lubricant if necessary.
* Contact Light and Motion for additional O-ring replacement or information.
* If Dome Port is removed, do not compromise the sealing surface. Do not place Dome Port on rough surface.
SOLA EXPLODED VIEW

- Bezel
- LED Head Module
- Power Knob
- Slide Switch
- Charge Pins
- Display
- Mount Plate
- D-Ring
- 1"Photoball
SLIDE SWITCH
The Slide Switch activates the light, and controls brightness. It can also be locked into place to by centering the slider and rotating the switch 90 degrees in either direction.

POWER KNOB
The Power Knob electrically disconnects the Li-Ion battery. To connect the battery, turn the knob ON. The light will be ready for use but the LED will remain off.

CHARGING THE SOLA
- Align guide pin to connect charger.
- Make sure to fully charge it before use.
To charge: Turn the Power Knob to "ON". Connect the charger to the charge pins on the back and plug the AC adaptor into an outlet. The display will come on to confirm the light is charging.

CARE AND MAINTENANCE
- Rinse your Sola thoroughly in fresh water after every dive. This will prevent corrosion and salt buildup.
- If the LED head module or front port has been removed, inspect the o-ring and sealing surfaces for dirt and defects and if necessary add a light film of O-ring grease before re-assembling.
- Store the SOLA in a cool, dry place with its batteries at least 1/2 charged and the slide switch in the locked position and the power knob OFF. Charge batteries every 60 days when not in use.
- Do not store the Sola with its batteries discharged as this can cause permanent damage to the batteries.
- Avoid display image 'burn-in' by disconnecting the charger and turning the unit off after charging is complete; leaving the unit plugged into charging power for extended periods of time may result in cosmetic visible display change.
TIPS AND TRICKS
- Conserve your battery by not burning your SOLA at full brightness. For example half the brightness yields twice the runtime.
- Light & Motion has provided a D-ring for attaching a lanyard to the bottom of the SOLA; it is recommended to tether the SOLA using the D-ring to your housing as a security precaution.
- When using the ¾" Locline arms, it is effective to grasp the light at the ¾" Locline base of the light to move it. This minimizes any risk of accidentally popping the light off of the arm.
Light & Motion 711 Neeson Road, Marina, CA 93933 USA
lightandmotion.com

Documents / Resources
References
Download manual
Here you can download full pdf version of manual, it may contain additional safety instructions, warranty information, FCC rules, etc.
Advertisement


Need help?
Do you have a question about the SOLA and is the answer not in the manual?
Questions and answers