Advertisement
ASSEMBLY
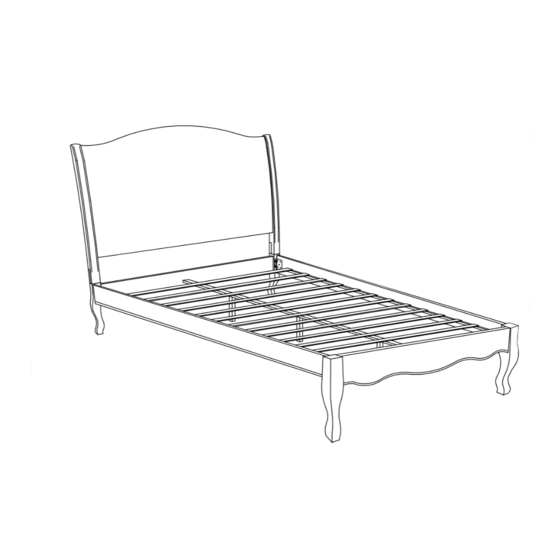
135CM BED
INSTRUCTIONS
Approximate Assembly Time
People Required to Assemble
Tools Required
1hr
Before you start...
Please carefully unpack and lay out all of the component parts to ensure nothing
is missing and to check each component for any obvious damage.
Should you identify any concerns at this stage please contact the retailer from
whom this product was purchased. Please quote your order number, details of
your issue, the product code, and the batch number from the cartons which will
help to resolve your issue as quickly as possible.
Product Code - CAM301
Version Number - V1.0
Advertisement
Table of Contents

Related Manuals for Julian Bowen CAM301


Summary of Contents for Julian Bowen CAM301
- Page 1 Please quote your order number, details of your issue, the product code, and the batch number from the cartons which will help to resolve your issue as quickly as possible. Product Code - CAM301 Version Number - V1.0...
- Page 3 Please check all hardware matches the list below. Should you notice any are missing please contact your retailer. JCBB M8 x 25mm JCBC M6 x 60mm JCBC M6 x 25mm JCBC M6 x 15mm Spring Washer M8 Allen Key M5 Hex Nut M6 Flat Washer M8 CSK M4 x 32mm...
- Page 4 PARTS Please ensure you carefully check all the pieces, should you have any concerns please contact the retailer before assembly commences. Please have your order number, details of the issue, the product code, and the batch number from the cartons as this will help us to resolve your issue much faster.
- Page 5 ASSEMBLY ADVICE Please take the time to carefully read through these instructions before you commence. Keep these instructions for future reference. We advise that the product is assembled in the room it is intended for. We advise that you keep the hardware in a bowl during assembly to avoid losing anything.
- Page 6 1 / 2 1 / 2 1 / 2...
- Page 8 Attach the slat by pushing the side rail together so that the slat is flush against the side rail, before inserting the screw. GENERAL CARE & MAINTENANCE We advise that when cleaning the product that a damp cloth is used. Avoid the use of all household cleaners and abrasive.
Need help?
Do you have a question about the CAM301 and is the answer not in the manual?
Questions and answers