
Related Manuals for Hamilton Beach CrispiFry HB4001D


Summary of Contents for Hamilton Beach CrispiFry HB4001D
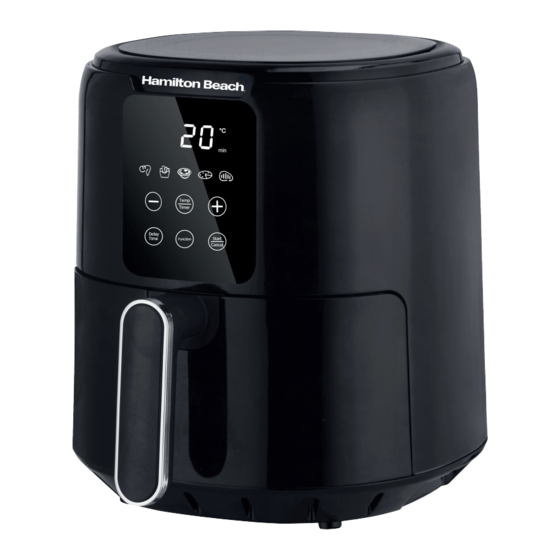
- Page 1 CrispiFry 4.2L Digital Air Fryer Instruction Manual HB4001D - FOR INDOOR HOUSEHOLD USE ONLY - Please read this manual carefully before you use the appliance and save it for future reference.
-
Page 2: Table Of Contents
TABLE OF CONTENTS STRUCTURE OF YOUR AIR FRYER - SPECIFICATION & FEATURES IMPORTANT SAFETY INFORMATION - KEY SAFETY POINTS - GENERAL SAFETY - CAUTION - PLUG AND CORD - WHILST AIR FRYING - BEFORE FIRST USE - PREPARING FOR USE INTRODUCTION - FUNCTIONAL DIAGRAMS - GENERAL DESCRIPTION... -
Page 3: Structure Of Your Air Fryer
STRUCTURE OF YOUR AIR FRYER Air Inlet LED Screen Air Outlet Drawer Cool Touch Handle SPECIFICATION & FEATURES: Voltage 220-240V AC 50/60Hz 1300 Watts (max) Wattage 4.2 Litre Basket Capacity 80—200℃ Adjustable Temperature 0-60MIN Timer... -
Page 4: Important Safety Information
IMPORTANT SAFETY INFORMATION Please read these safety NOTES carefully BEFORE using your Hamilton Beach appliance. These warnings have been provided in the interest of safety. Basic safety precautions should always be followed including the following: KEY SAFETY POINTS CAUTION: During operation: •... -
Page 5: Whilst Air Frying
WHILST AIR FRYING • Please ensure that the appliance is used on a stable, level, and heat resistant surface. • DO NOT place the appliance on or near combustible materials such as a tablecloth or curtain. • DO NOT place the appliance against a wall or against other appliances. Leave at least 10cm free space on the back and sides and 10cm free space above the appliance. -
Page 6: Using The Appliance
USING THE APPLIANCE This air fryer can prepare a large variety of foods. HOT AIR FRYING 1. Connect the mains plug into an earthed wall socket. 2. Carefully pull the basket out of the air fryer 3. Put the ingredients in the basket. 4. -
Page 7: Control Panel Instructions
CONTROL PANEL INSTRUCTIONS Temperature & Timer Power/Start/ Delay Function Cancel Time PRESET FUNCTION INSTRUCTIONS This table below will help you to select the basic settings for your food. Note: Keep in mind that these settings are indications. As ingredients differ in origin, size, shape as well as brand, we cannot guarantee the best setting for your ingredients. -
Page 8: Operation Instructions
OPERATION INSTRUCTIONS 1: Plug the appliance into a mains socket. The control display on the front of the air fryer wil now be illuminated. The display will default to the settings required for the first item on the preset functions menu. 2: To Select a Function: Press the “Function”... -
Page 9: Settings
SETTINGS This table below will help you to select the basic settings for preparing a variety of foods. Note: Keep in mind that these settings are indications. As ingredients differ in origin, size, shape as well as brand, we cannot guarantee the best setting for your ingredients. Use Oven Ready Use Oven Ready Use Oven Ready... -
Page 10: Cleaning The Drawer And Grill Plate
CLEANING THE DRAWER AND GRILL PLATE WARNING: Do not immerse the appliance in water or any other liquid. Clean the main unit, drawer and grill plate after every use. DO NOT allow food residues to dry on. Food residue could start to burn and possibly cause faults. 1. -
Page 11: Troubleshooting
TROUBLESHOOTING Problem Possible cause Solution The air fryer The appliance is not Put the mains plug in an earthed wall socket. does not work plugged in. Set the timer to the required preparation time and press You have not set the timer. start. -
Page 12: Guarantee & Service
GUARANTEE AND SERVICE 1 YEAR WARRANTY This product is covered by a 12-month warranty, please read the guarantee and service carefully and keep for future use. Please Note: To maintain the validity of the warranty, it is imperative to register it within the initial 30 days of purchase. -
Page 13: Disposal Of Your Appliance
DISPOSING OF THE APPLIANCE Appliances bearing the symbol shown here may not be disposed of in domestic rubbish. You are required to dispose of old electrical and electronic appliances like this separately. Please visit www.recycle-more.co.uk or www.recyclenow.co.uk for access to information about the recycling of electrical items. -
Page 14: Customer Service
CUSTOMER SERVICE If you have any questions or concerns about your new product, please contact our helpful Customer Support Team: 01274 752624 customerservice@hamiltonbeach.co.uk www.hamiltonbeach.co.uk Please have your Model No. available. This can be found on the front cover of this instruction manual and on the appliance’s rating label. - Page 15 Trusted quality for over 100 years. Discover the innovative and dependable products that have made Hamilton Beach a trusted name since 1910. We make your cooking experience easier. #Cookwithconfidence Join our community! Follow us for news, recipe ideas, offers and tips...
Need help?
Do you have a question about the CrispiFry HB4001D and is the answer not in the manual?
Questions and answers